
Installing the X.509 Certificate for Cypress Server
Installing your X.509 certificate enables the Secure Socket Layer (SSL) in Cypress to ensure that all communications between the Cypress client and the Cypress server are encrypted.
This topic contains instructions for these procedures necessary for the proper operation of Cypress server encryption:
- Installing your certificate for Cypress
- Importing your certificate
- Configuring Cypress Administration for your certificate
These are prerequisites for installing the certificate:
- The root certificate of the X.509 certificate needs to be pre-installed on all Cypress client machines.
- You must have the private key for the certificate. ASG recommends using the .pfx or .p12 file for certificate installation.
To install your X.509 certificate for the Cypress server
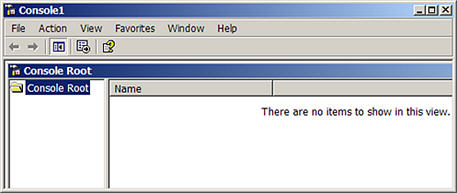
- Select Start } Run and type mmc in the Open input field, then click OK.
The Console1 window displays.
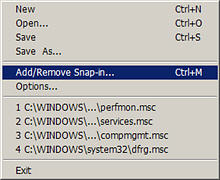
- Select Add/Remove Snap-in to display the Add/Remove Snap-in dialog:
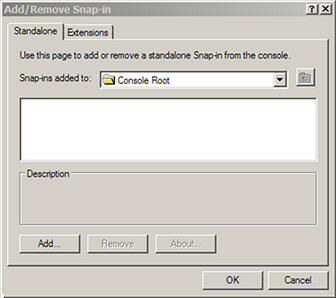
- Select the Standalone tab, if not already selected, then click the Add button to display the Add Standalone Snap-in dialog:
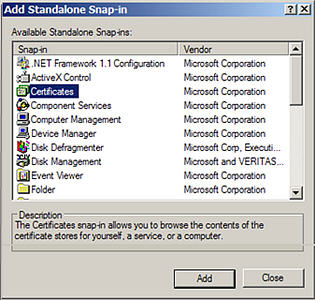
- Highlight Certificates, then click the Add button to display the Certificates snap-in dialog:
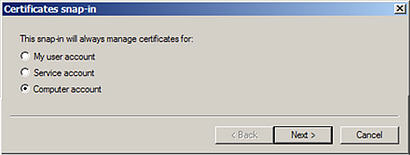
- Click the Computer account option button, then click the Next button to display the Select Computer dialog:
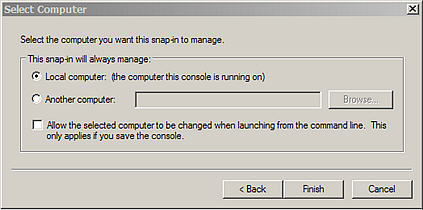
- Click the Local computer option button, then click the Finish button.
The certificate for your local computer now displays on the Add/Remove Snap-in dialog:
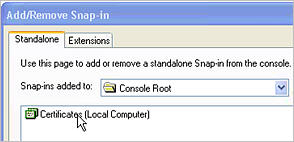
- Click OK.
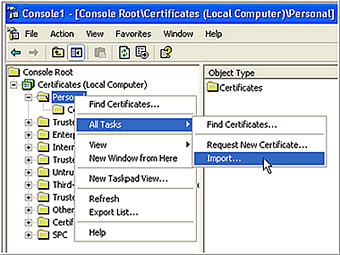
| 1. | Open the Console1 window where you added the certificate snap-in. |
| 2. | Expand the Certificates (Local Computer) directory to display Root directory. |
| 3. | Right-click Personal, then select All Tasks }Import. |
The Welcome to the Certificate Import Wizard dialog displays:
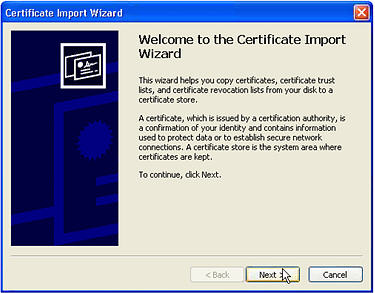
| 4. | Click Next to display the File to Import dialog: |
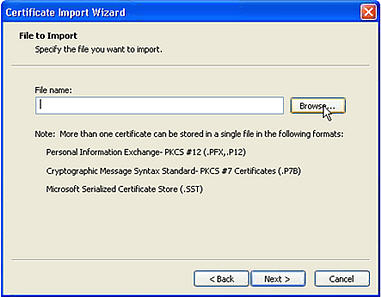
| 5. | Click the Browse button to locate the certificate file name. |
Or
Type the name of the certificate to import in the File name input field.
| 6. | Click Next to display the Password dialog: |
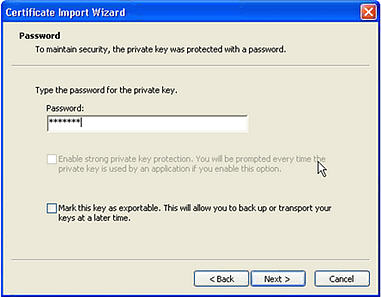
| 7. | Type the password for the private key in the Password input field, and click Next to display the Certificate Store dialog: |
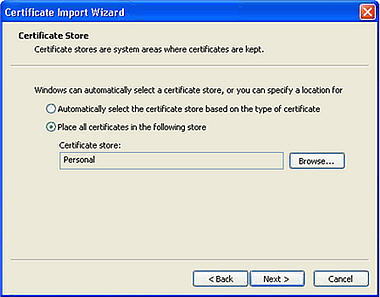
| 8. | Click the Place all certificates in the following store option button. |
| 9. | Click the Browse button to select the directory for your certificate store, then click Next to display the Completing the Certificate Import Wizard dialog: |
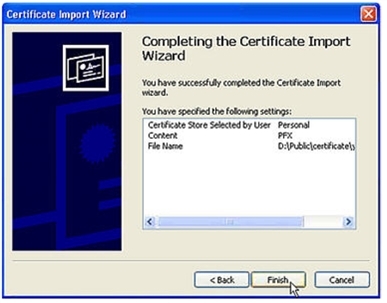
| 10. | Click Finish. A message displays to confirm the import was successful. |
To configure Cypress Administration with your certificate
| 1. | Launch Administration Tools from the Cypress main window. |
| 2. | Select the Parameter tab. |
| 3. | Select the SSL tab. |
| 4. | Select the Enable SSL check box. |
| 5. | Select the Minimal Encryption Strength from the drop-down menu. |
| 6. | In the Certificate area, click the arrow in the Display Name field to display the available certificate(s) on the drop-down menu. |
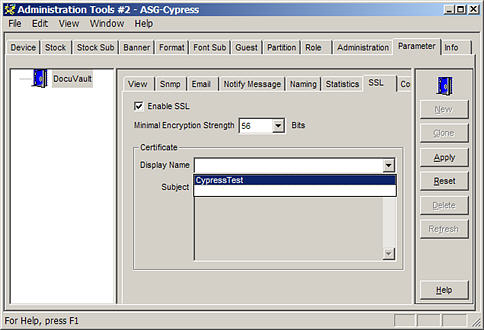
| 7. | Select the name of the certificate, and click the Apply button. |
Cypress is now configured to work properly with your certificate.