Managing Cypress Users
This topic provides information on managing your users.
Overview
Cypress users can include individual users as well as groups of users and can be any of these entities:
- A specific user (e.g., Judah Benton)
- An abstract user (e.g., Cypress Administrator)
- A group of users (e.g., Dept. 1110 Managers)
The capability of defining different levels of users enables you to choose how you want to manage your users. For example, you can use role definitions to assign specific users to a role that has clearly defined permissions within Cypress. For more information, see Cypress Roles.
You also can ensure that your remote users have the same access capabilities as your local users. For example, you can create a group that contains the remote employees who need access to Cypress. For more information, see Giving Users Access to Cypress.
Cypress Roles
You can use Cypress roles as a way to create groups of users that you select when defining security requirements for objects (e.g., stocks or printers) within a DocuVault. Instead of adding individual users to each object’s Access Control list (within each object’s Security tab), you can add groups of users to the object. This simplifies and speeds security management. The Cypress role feature also enables you to create security groups without requiring Windows administrator privileges or support from the site network security organization.
Although Windows domain security descriptors may be used to control access to Cypress objects, devices, definitions, etc., you are encouraged to utilize the Cypress role feature. Among its many benefits, a role simplifies security as it enables you to control permissions for a Windows domain security user or group related to one or more Cypress objects. In contrast, Windows domain security stores permissions with the object itself, requiring permissions to be managed and maintained object by object. See Defining a Cypress Role for the steps required to create a role.
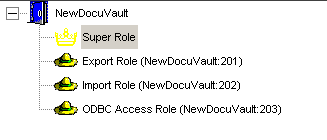
In addition to role groups that you create, you also can add members to these built-in roles:
- Super Role automatically provides unrestricted access to any object within a DocuVault. Super Role members can even create objects, whether or not they are listed in the Administration Tools module’s administration security. For more information on Super Role, see Overwriting Role Security Permissions.
- Import Role members can use the import_xml utility to import resource data into Cypress from XML files.
- Export Role members can use the export_xml utility to export Cypress resource data to XML files.
- ODBC Access Role members with execute permission can connect to the DocuVault using the Cypress ODBC Driver.
Although you can set access permissions when you create a role, you also can specify them when you associate the role with a Cypress object (e.g., a device, subreport definition, etc.). Cypress will use the new permissions instead of any permissions you might have specified when you created the role and will apply them to all users and groups defined in the role.
Adding a User to Super Role
Immediately after installing Cypress, you should add at least one user to Super Role from the user interface on the Cypress Server. As you continue to use Cypress, you might want to add users to and remove them from the Super Role as employees are hired, leave your company, or change jobs.
To add a user to Super Role
|
1.
|
Open the Administration Tools module, and click the Role tab. |
|
2.
|
Select the Super Role node in the Navigation tree view on the left side of the screen, as shown in this example: |
|
3.
|
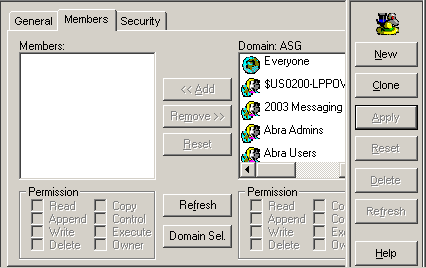
Select the Members tab on the Role tab. |
|
4.
|
Select a user in the Domain list. |
|
5.
|
In the Permission area below the Domain list, select the Owner check box. |
|
6.
|
Click the Add button to move the user to the Members list. |
|
7.
|
Repeat steps 4 through 6 for each user you wish to add to Super Role. |
|
8.
|
Click Apply to save your changes. |
Defining a Cypress Role
This topic provides the steps required to create a Cypress role.
To create a role
|
1.
|
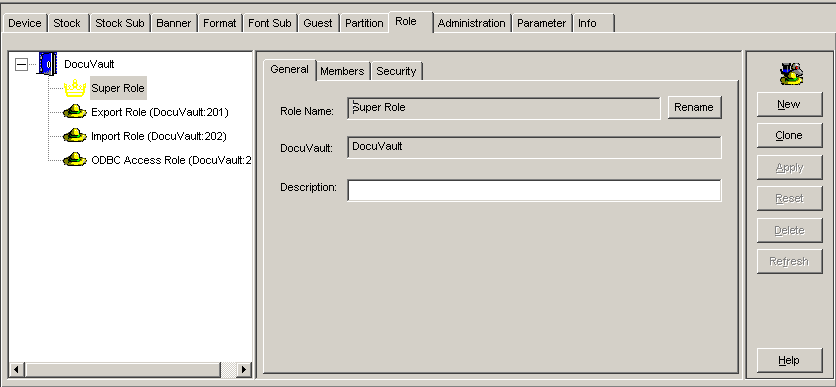
From the Administration Tools module, select the Role tab. The Role tab contains General, Members, and Security tabs, which hold configuration information for all role definitions. |
Role definitions are listed in the Role list in alphabetical order according to role type. There are two levels of roles. The Super Role automatically provides unrestricted access to any object within a DocuVault. Standard-access role groups do not automatically have this level of access, and permissions must be defined for each object.
Super Role users with
Owner permissions (set on the Member’s tab) can create objects, even if they are not given administration permissions on the Administration Tools module’s Administration tab.
|
2.
|
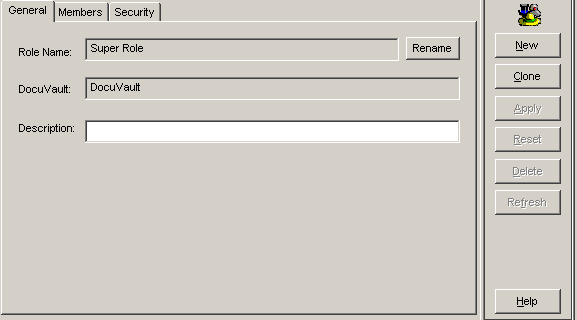
Select the General tab if it is not already selected. It contains descriptive parameters for creating role definitions. |
|
3.
|
Click the New button to create a new Role definition. |
|
4.
|
Enter the name of the Role definition in the Role Name input field. There are no restrictions on Role names as long as they comply with Windows domain security naming conventions. |
|
5.
|
Optional, but recommended. Enter a description of the Role in the Description input field. |
|
6.
|
Click the Apply button to add the Role definition to the DocuVault. The name of the Role you just created will appear in the role list. |
After creating a role, see Assigning Members to a New or Built-in Cypress Role for the steps required to add members to the role.
Assigning Members to a New or Built-in Cypress Role
This topic describes how to add members to a new or built-in roles.
|
1.
|
From the Administration Tools module, select the Role tab. |

|
2.
|
Select the Role from the role list to which you want to add members. |
|
3.
|
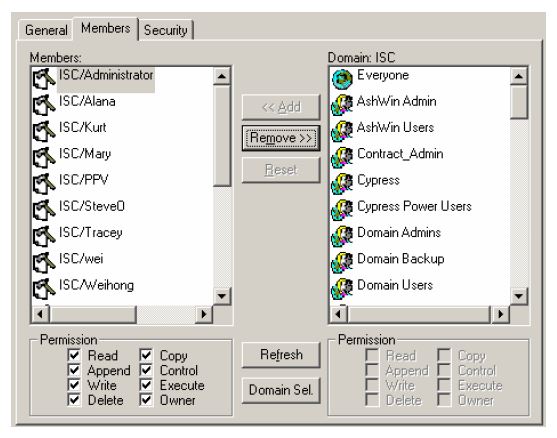
Select the Members tab, which enables you to add and remove members from a Role definition. |
|
4.
|
Select the domain users to be added to the Role’s Members list. Domain users are defined in Windows domain security and are listed in alphabetical order in the Domain list, first by user group then by individual user. |
|
5.
|
Select the appropriate check boxes in the Permission area, located below the Domain list. These selections will apply to the selected domain users once added to the Members list. (You can also edit the permissions for each of the users after you have added them to the Members list using the check boxes in the Permission area below the Members list.) |
|
6.
|
Click the Add button to move the selected domain users to the Members list. Just as in the Domain list, they are listed in alphabetical order, first by user group then by individual user. |
|
7.
|
Click the Apply button. |
Overwriting Role Security Permissions
Although you can assign security permissions to users when you add them to a role, you might want to assign the members of a role different permissions for certain objects. It is possible to overwrite previously assigned permissions when you assign a role to an object.
To overwrite security permissions for a role
|
1.
|
Open the Administration Tools module, then select the appropriate Security tab for the object you are creating or editing. |
|
2.
|
Select the role for which you want to overwrite the security permissions. |
|
•
|
If the role has already been set for the object, it appears in the Access Control list. |
|
•
|
If the role is not yet associated with the object, it appears in the Domain list. |
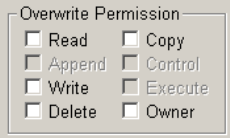
When you select the desired role, the Permissions section (with individual permission check boxes) is retitled Overwrite Permission.
|
3.
|
Select the Overwrite Permission check boxes as desired. |
The permissions you set will be applied to all users defined in the role.
Giving Users Access to Cypress
Once the Cypress application is installed and active, it may be necessary to grant users access to the application itself, depending on where the user is located. You can grant access to any of these users:
|
•
|
A user in the same domain as the Cypress Server |
|
•
|
A user in the same domain as the Cypress Server, but who does not logon to a Windows network |
|
•
|
A user who is not a member of a Windows network |
Refer to Managing Cypress Security for more information on security permissions within Cypress.
Users in the Same Domain as the Cypress Server
To grant access to users in the same domain as the Cypress Server
|
1.
|
Set up Cypress security using the users and groups already defined in Windows domain security. |
Cypress can then use the Windows domain security logon identifier to control access to Cypress features and functions, even though some users might be defined in different domains.
|
2.
|
Instruct users to access Cypress by clicking the Find DocuVault or the Browse DocuVaults toolbar buttons in the Cypress main window and entering the IP address or the host name of the server on which you have installed Cypress. |
Users in the Same Domain as the Cypress Server Who Do Not Logon to a Windows Network
Remotely connected users who want to access Cypress over the Internet are frequently either in the same domain as the Cypress Server or in domains that have a trusted relationship with the Cypress Server, but do not logon to a Windows network as part of their daily routine.
If a user attempts to access Cypress without first logging on to a Windows network, there is no Windows domain security login identifier for Cypress to verify. Cypress prompts the user to enter the appropriate domain name, user name, and password so it can verify the user’s identity and grant access.
To grant access to users in the same domain as the Cypress Server but who do not logon to a Windows network
|
1.
|
For remote users not already defined in Windows domain security, create a group such as internet_users and a Windows domain security user name for each user who requires remote access to Cypress. |
|
2.
|
Provide the users with their domain name, user names, and passwords. |
|
3.
|
Instruct users to access Cypress by clicking the Find DocuVault or Browse DocuVaults toolbar button in the Cypress main window and entering the IP address or the host name of the server on which you have installed Cypress. |
Users Who Are Not Members of a Windows Network
To grant access to users who are not members of a Windows network
|
1.
|
Define Cypress users and groups in the Windows domain. You need define only users who need access to Cypress. You do not need to mirror your existing security. |
|
2.
|
Set up Cypress security using the users and groups already defined in Windows domain security. |
Cypress can use the Windows domain security logon identifier to control access to Cypress features and functions, even though some users might be defined in different domains.
|
3.
|
Instruct users to access Cypress by clicking the Find DocuVault or Browse DocuVaults toolbar button in the Cypress main window and entering the IP address or the host name of the server on which you have installed Cypress. |
You do not need to configure your PCs with two logons. Even though security information is defined in Windows domain security, users only logon to Cypress, not a Windows network.
Users Who Submit Jobs from Non-Windows Domain Security Platforms Via LPD In
You can use guest security for users who submit jobs from non-Windows domain security platforms via LPD In. Depending on the degree to which permissions will vary between users, you can create guest security definitions in different ways. You can create definitions that apply to specific users on specific hosts, definitions that apply to all users on specific hosts, and/or one definition that applies to all users on all hosts. Cypress validates access based on this hierarchy.
To set up guest security
|
1.
|
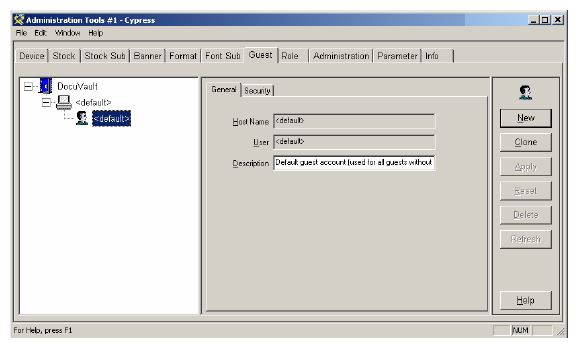
From the Administration Tools module, select the Guest tab. It contains General and Security tabs that hold all the configuration information for guest definitions. |
Guest definitions are listed in the tree view in alphabetical order by the user-defined (or default) guest name.
|
2.
|
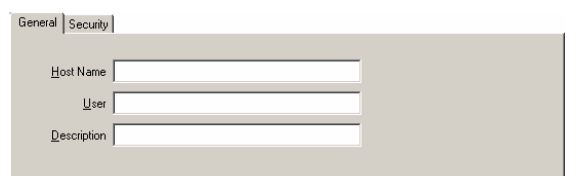
Select the General tab if it is not already selected. |
|
3.
|
Click the New button to create a new guest definition. |
Enter the name of the guest in the Host Name input field. There are no restrictions on guest names as long as the names comply with Windows domain naming conventions. The host name should be the name of the platform from which jobs can be submitted (e.g., “System 390” or “Sun”).
The default host name is <default>, which indicates that the guest definition applies to any undefined users.
|
4.
|
Enter the user in the User input field. |
The default is <default>, which indicates that the guest definition applies to all users on the specified host.
|
5.
|
Optional. Enter a description of the guest in the Description input field. |
|
6.
|
Click the Add button to add the guest definition to the DocuVault. The name of the guest you just created will appear in the guest list. |
|
8.
|
Click Apply to save your changes. |
