
The Cypress User Interface
This topic provides an introduction to the Cypress user interface and steps for configuring the interface for your site.
Overview
Cypress’s main user interface provides single-click access to key Cypress modules, tools for connecting to and disconnecting from Cypress DocuVaults, and a menu bar that enables you to pool DocuVaults and set certain system options.
The Cypress user interface starts with the main window, which provides access to all Cypress modules, for example:
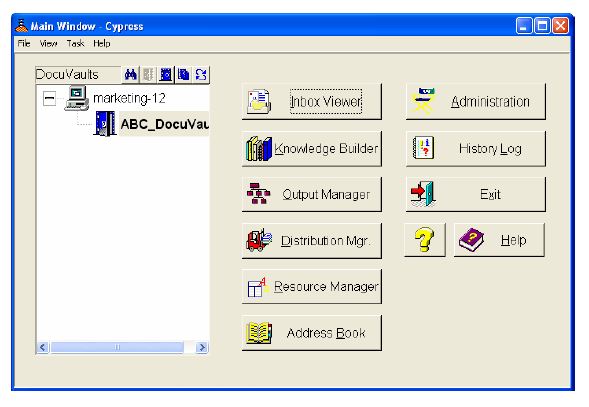
These are the primary Cypress modules:
| • | Inbox Viewer |
| • | Knowledge Builder |
| • | Enterprise Output Manager |
| • | Report Distribution Manager |
These are the secondary Cypress modules:
| • | Resource Manager |
| • | Address Book |
| • | Administration Tools |
| • | History Log |
| • | Online Help System |
The tree view at the left of the main window provides access to all Cypress DocuVaults. A DocuVault is the central repository for all information related to an output environment.
Inbox Viewer
The Inbox Viewer module enables users to view and manipulate documents and reports delivered to their Inbox. An Inbox is a logical, personal output destination to which documents and reports can be delivered.
Users can access their Inbox wherever they log on to Cypress over the network. They can view, print, or send to a DocuSpace all documents and reports displayed within the Inbox Viewer.
This example shows the Inbox Viewer displaying an invoice summary that was received in Student 1’s Default inbox:

Knowledge Builder
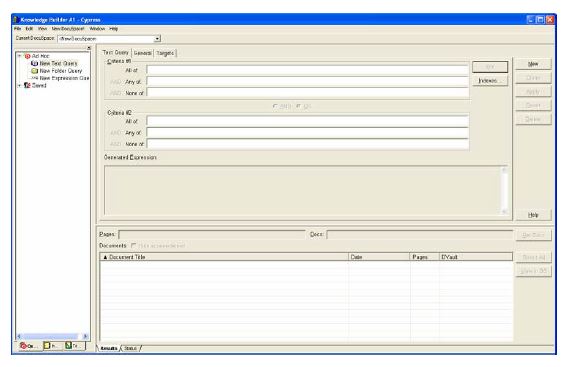
The Knowledge Builder module enables users to search and retrieve documents archived in a Cypress DocuVault. Users can search DocuVaults using system indexes, custom indexes, or the full-text index, which stores every word within a document.
Cypress provides system indexes that it applies to all documents stored in the DocuVault (including documents captured before you have configured Knowledge Builder). These indexes are provided as a starting point. In most cases, you will want to add custom indexes for your users and/or activate full-text indexing. Once search results are returned, documents can be viewed or the search can be further refined.
This example shows the Knowledge Builder with New Text Query selected:
Enterprise Output Manager
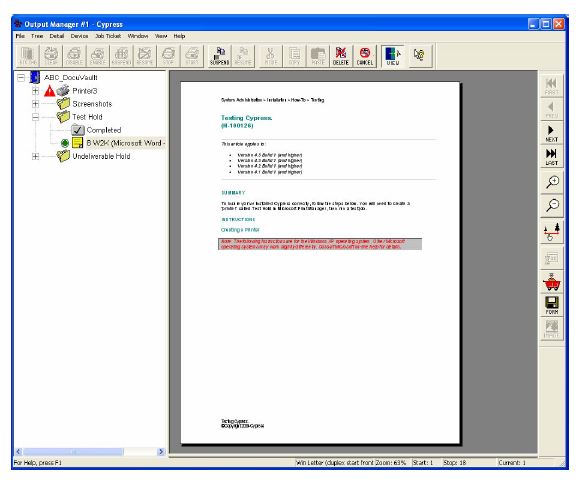
The Enterprise Output Manager module enables you to monitor and control your output environment from a single workstation. It contains five primary areas:
| • | Toolbar |
| • | Tree display |
| • | Job Ticket |
| • | Property Inspector |
| • | Viewer |
The toolbar contains buttons that allow you to perform specific functions on devices (Stock Change, Clear, Disable, Enable, Suspend, and Resume) and jobs (Suspend, Resume, Repeat, Move, Copy, Paste, Delete, Cancel, View, and What’s This?).
The tree display provides a view of your output environment and displays all devices and the jobs queued to each device for all connected DocuVaults.
The Job Ticket displays basic information about jobs in the top half of the Output Manager window.
The Property Inspector displays detailed information in the lower half of the Output Manager window about the device or job that is selected in the tree display. It enables you to edit certain job fields (e.g., Copies Requested).
The Enterprise Output Manager module provides the Viewer to enable you to view the contents of any job in the tree display. You can also manually index any viewed document or page from the Viewer.
You can select a job for viewing before or after clicking the View toolbar button. When you click View, the Job Ticket and Property Inspector disappear and the View window displays in their place. View acts as a toggle. Click it again to restore the Job Ticket and Property Inspector. This example shows the Output Manager with the Job Ticket and Property Inspector visible:

The View window has its own toolbar. By default, this toolbar displays at the right side of the application window. The View toolbar includes buttons that enable you to page through the displayed job (e.g., First, Prev, Next, and Last). It also includes three buttons for scaling the contents of the displayed job and four additional buttons for capturing and storing data. This example shows the Enterprise Output Manager with the View activated:
Report Distribution Manager
The Report Distribution Manager module (RDM) enables the creation and delivery of reports and subreports throughout your Cypress-controlled environment, for example:
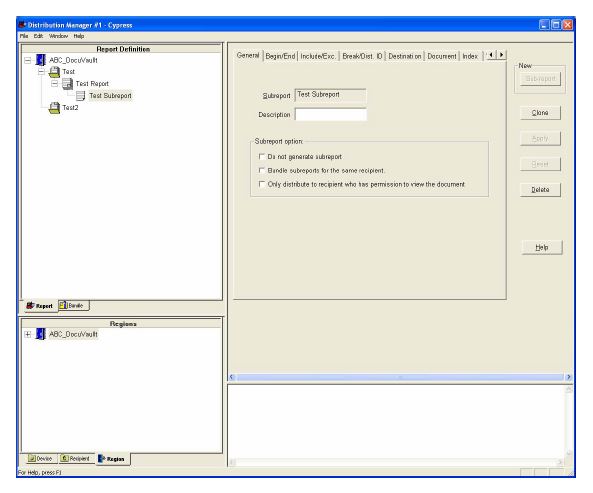
When you create report definitions, you can use RDM to instruct Cypress on how to split and index data contained in output data files. You can also specify how Cypress should deliver the new documents to the appropriate devices and recipients.
Resource Manager
The Resource Manager module allows you to list, view, clone, and delete resources (e.g., forms and images), for example:
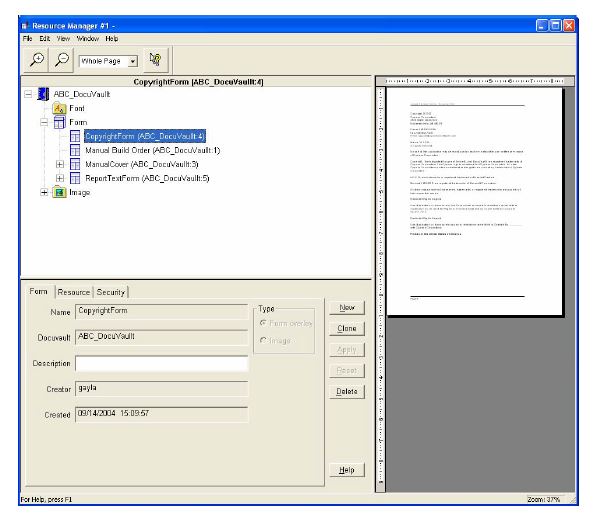
You can also use the Resource Manager to define databoxes, a Cypress feature that enables you to print variable data on dynamically generated banner pages or at any location on a form regardless of data location in the print file.
The Property Inspector provides detailed information about whatever resource is selected in the tree display.
Address Book
The Address Book module enables you to distribute reports based on end-user information and preferences. This module provides great flexibility in addressing and routing reports, and allows end users to receive their reports quickly and at their preferred output devices.
This is an example of the Address Book module:
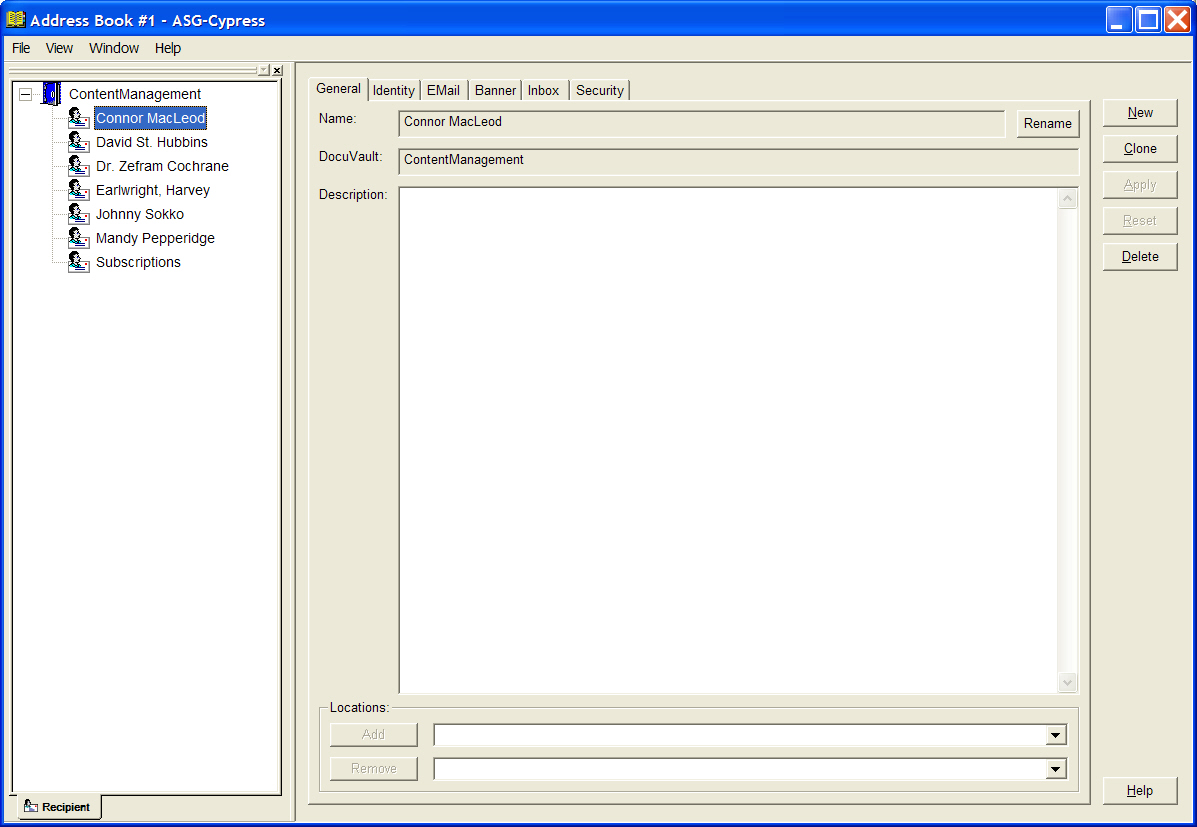
The Address Book interface is very similar to popular contact management software. You can create a list of end users, or recipients, and enter specific information about each one. For example, you can enter the recipient’s name, address, company name, job title, phone number, and preferred output device.
You can then configure document delivery based on any piece of information within the Address Book. For example, you can print reports to Dennis Masters or East Region Employees. Cypress uses the Address Book to look up the locations where documents and reports are to be delivered.
Administration Tools
The Administration Tools module is the interface you can use to configure and manage your Cypress-controlled environment. From this application, you can define Cypress objects, including devices, stocks, banners, formats, guests, roles, and DocuVault security as well as indexing and archiving requirements and other parameters.
This example shows the Administration Tools window with a printing device’s general properties displayed:
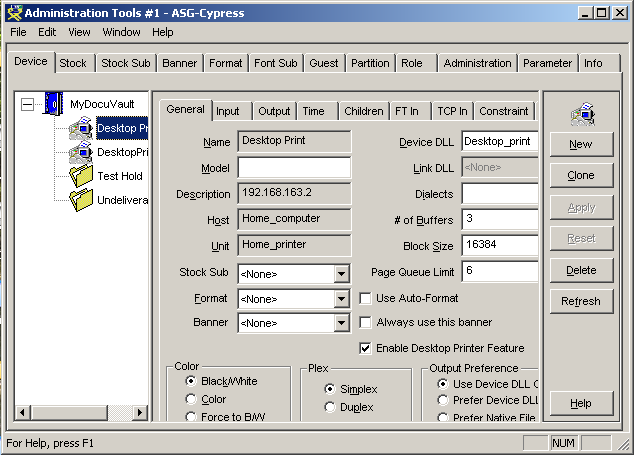
Each Cypress object has its own set of templates, or property tabs, where you enter information to create or modify the object definition. For example, when you are creating a device definition, the property tabs include General, Input, Output, Time, Children, FT In, TCP In, Constraint, Fax, and Security.
The buttons on the button panel to the right of the property tabs apply to any object definition that you are creating or modifying:
| • | The New button provides a blank template you can use to create a new object. |
| • | The Clone button creates a copy of whatever object definition you select from the object list. |
| • | The Add button adds a new object definition to the DocuVault and is only accessible when creating a new object. |
| • | The Apply button saves your modifications to an existing object definition and is accessible only when modifying an existing object’s settings. |
| • | The Reset button resets all values in an object definition to their last-saved state. |
| • | The Delete button deletes whatever object definition you select from the object list. |
| • | The Refresh button refreshes document information. |
History Log
The History Log window stores a chronological listing of events that occur in your Cypress-controlled environment, for example:
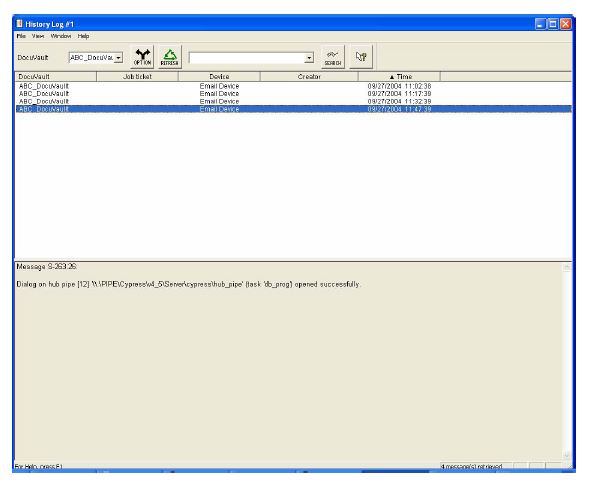
Cypress generates messages for each event, recording both user actions and DocuVault actions. You can use this log for troubleshooting or job verification. When you open the History Log, messages generated by Cypress within the last hour will automatically display.
Online Help System
The Online Help System is available from all Cypress applications. You can access it by clicking the Help button.
The window displays topics associated with using Cypress. For example:
The Online Help is separated into these parts:
| • | The left side of the Online Help contains this information: |
| – | The Contents tab displays topics at the highest level. You can double-click a topic to view its contents. Topics may contain other subtopics. |
| – | The Index tab contains a multi-level list of topics and keywords. These entries help you to quickly find specific information in the help system. |
| – | The Search tab allows you to search throughout the help system for specific words or phrases. |
| • | The right side of the Online Help displays the topics and tasks. |
When you select a topic, information about that topic is displayed. For example:
Configuring User Interface Options
The Cypress user interface offers a dialog with several configuration options, including settings for font loading, image quality, units of measure, document indexing, and e-mailing.
To configure your Cypress user interface
| 1. | Open the main Cypress application and click View } Options to open the Options dialog. |
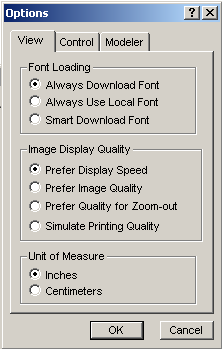
| 2. | Select one of these Font Loading options: |
|
Option |
Description |
|
Always downloads all fonts referenced in the document. This option ensures document fidelity, but can result in slower viewing speed. |
|
|
Only fonts installed at the client will be used to display the document. If the name of a locally-installed font exactly matches the font specified in the document, it will be used. If no match is found, a font will be substituted. While this option increases viewing speed over slower connections, it can result in decreased fidelity. |
|
|
Cypress examines the fonts installed locally at the client, then downloads any missing fonts. If the name of a locally-installed font exactly matches the font specified in the document, it will be used. If no match is found, the missing font will be downloaded from the Cypress Server. This option typically increases viewing speed, without loss of document fidelity. |
| 3. | Select one of these Image Display Quality options: |
|
Option |
Description |
|
Cypress loads the image more quickly with some minor loss of image fidelity. |
|
|
Cypress loads the image with one-hundred-percent fidelity, but with some loss of speed. |
|
|
Cypress loads the image with one-hundred percent fidelity when zoomed out, but with some loss of speed. |
|
|
Cypress draws the image with 300 dpi in memory first and then resamples and paints the image to the screen so that even the finest lines are visible, but at the greatest loss of speed. |
| 4. | Select one of these Units of Measure options: |
|
Option |
Description |
|
By default, units of measure will be displayed in inches. This is the default setting. |
|
|
By default, units of measure will be displayed in centimeters. |
| 5. | Select the Control tab: |
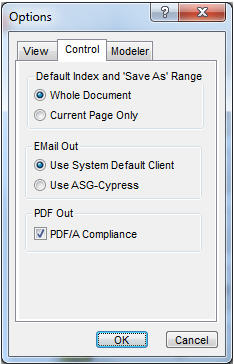
| 6. | Select one of these Default Index and ‘Save As’ Range settings: |
|
Option |
Description |
|
Whole Document |
Sets the default value for indexing or a Save As operation to the whole document. |
|
Current Page Only |
Sets the default value for indexing or a Save As operation to the current page. |
| 7. | Select an EMail Out setting: |
|
Option |
Description |
|
Use System Default Client |
Cypress will use the system e-mail client to compose e-mail messages. |
|
Use Cypress |
Cypress will use its own e-mail client to compose e-mail messages. |
| 8. | (Optional.) Clear the PDF/A Compliance option to revert to the previous method for generating a PDF. |
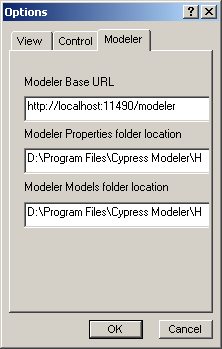
| 9. | For Cypress Data Mining only. Optional. Select the Modeler tab. |
You can use the Modeler tab to manually set the URL and folder locations for the Modeler.
|
Field |
Description |
|
Allows you to specify the Base URL for the Modeler. |
|
|
Modeler Properties folder location |
Allows you to specify the location for the Modeler Properties folder. |
|
Modeler Models folder location |
Allows you to specify the location for the Modeler Models folder. |
| 10. | Click OK to save your changes or Cancel to cancel the modifications. |