
Installing and Using the Data Mining Module
This topic provides information about the data mining module and how to use it.
Introduction
The Cypress data mining module is a DocuVault-based application that enables you to manipulate report files submitted to RDM in a variety of ways and export them as customized subreports in popular application formats. Using this feature, you can change the structure and presentation of report file data to better meet each user’s or department’s needs, summarize report data by creating totals or subtotals, and perform other types of data manipulations. The resulting subreports that you create can then be delivered as Excel- or text-formatted files to any appropriate enterprise or Web destination.
The Cypress data mining module comes with a single seat of these two data mining options: Cypress Data Mining and DataWatch’s Monarch Pro for Cypress (herein called Monarch Data Mining). Each option gives you a single-user data mining application that provides support for the administrator responsible for creating model files that define report file manipulations and power users who require extended, hands-on data mining capabilities.
You can enable either of these options in one license file. You must, however, enable one of them to use the data mining functionality. The selected seat must be installed and operated from the Cypress Server.
Data Mining Data Flow
The data mining module processes report files to generate different views of the report file’s contents. You define the way(s) in which the data is manipulated within RDM subreport definitions and data mining module model files. The flow of data from the point at which a job is submitted to an RDM processor to the end user is illustrated in this figure:
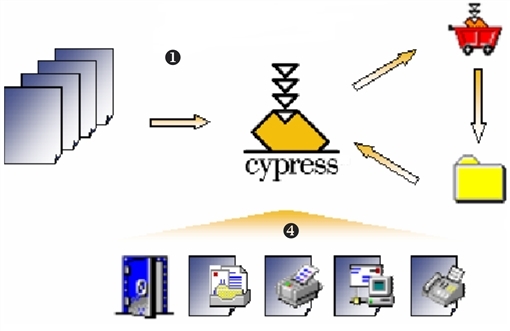
These are the steps in the data mining flow:
| 1. | The report file is submitted to a Cypress RDM processor. |
| 2. | The report file is mined based on the configuration of the subreport definition and the model file. |
| 3. | The newly created subreports are written as Excel or text files to the specified local directory. |
| 4. | The resulting subreports are automatically retrieved from the local directory, then may be archived in the DocuVault and routed to appropriate Inbox, printer, fax, email, etc. |
Manipulating Report Files
Subreports that you create using the data mining module are archived as live source files (with either the *.xls or *.txt extension) by default and are not captured in the Cypress format. You can use the Document tab to configure the archiving parameters (i.e., retention settings).
Even though subreports created using the data mining module are generated as live source files, you can still index and associate any information from the original report file with the subreport. The steps to create and define indexing requirements do not change. When a subreport stored as a source file is retrieved via query in Knowledge Builder or Cypress.Web, however, the subreport is returned as a hit, but not at the page level as source files are indexed at the file level. For more information, see the ASG-Cypress DocuSpace and Inbox Viewer User’s topic.
You can archive subreports in the Cypress format by directing the export file to an FT In directory. Any document placed in an FT In directory will be processed and captured by Cypress.
Subreports generated as text files can be printed by setting the export file path to an FT In directory and then configuring the appropriate device to watch the FT In directory. See the ASG-Cypress Document Capture Administrator’s topic for information on configuring devices to use FT In.
If you want to capture the subreport as a Cypress document, do not select Capture Exported File into DocuVault on the subreport’s Data Mining tab. Instead, include the FT In directory in the Export File detail’s path, and select Internal DocuVault Format on the device’s FT In tab.
Using the Model File describes the model file and gives examples of its functions. ASG recommends that you create your model files so that a single model file can be used to support multiple report files.
Like any other report distribution application, you must first familiarize yourself with the report file being processed. Essentially, you need to understand the exact information requirements of your users, then create model files that manipulate the report data to present information as required.
Once your model files are created, you can construct report definitions (see Creating a Report Definition) and subreport definitions (see Creating Subreport Definitions). Your only additional task is to properly configure the Data Mining tab within the subreport definition (see Using the Data Mining Tab).
The operation of the data mining module is very easy to understand and is based on two Cypress elements:
| • | The model file (.mod or .xmod) |
| • | The subreport’s Data Mining tab |
Using the Model File
The model file is essentially either a text description or a template that specifies how report file data is to be extracted and manipulated. Specifically, it contains functions that control the filtering—or extraction, sorting, and summarizing of the data.
Example of Filtering the Content of a Report File
You can specify that a model file filters a report file to extract only certain rows or columns of information. For example, your report file might contain columns of data for 100 departments, 25 sales regions, and 300 branches, etc. Using the filtering function, you can specify that only the pertinent columns for a particular department, region, or branch should be extracted, which would enable you to limit the distribution of sensitive information, and improve user productivity by providing users with only the information they need.
Example of Sorting the Content of a Report File
You can specify that a model file sorts the content of a report file to order the information to meet a specific user’s requirements. For example, you might have a human resources report file that contains salary information for all employees but is sorted by employee number within each department. The user for whom you are specifying the model file might need to see the report data sorted by annual salary in descending order, grade by department, or employee name by department, etc.
Example of Summarizing the Content of a Report File
You can specify that a model file summarizes information within a report file. For example, your monthly invoice print file might contain hundreds of individual customer invoices that include part number, quantity ordered, subtotal, and total. You might, however, want to calculate the total number of units sold for a particular part number, or total revenue generated for a particular part number.
When you are creating model files, ASG encourages you to create multiple filter, sort, and summary functions within the model file that then can be called directly from the subreport definition. This will allow you to support multiple subreport definitions with a single model file. For details on model file construction, consult the Monarch Pro for Cypress User Guide. For further information on creating a subreport definition, see Creating Subreport Definitions.
Using the Data Mining Tab
If your site has licensed the Cypress data mining module, the Data Mining tab is displayed on the Distribution Manager window with the standard subreport definition tabs. Use it to identify and configure the model file that is to be applied to the report file, and to specify how the resulting subreport is to be saved.
The Data Mining tab enables you to:
| • | Identify the model file to be applied |
| • | Call the appropriate functions in the model file |
| • | Identify the directory and file name of the resulting subreport |
| • | Declare whether or not to capture (archive) the file |
| • | Declare whether or not to delete the file from disk (if you have chosen to capture the file |
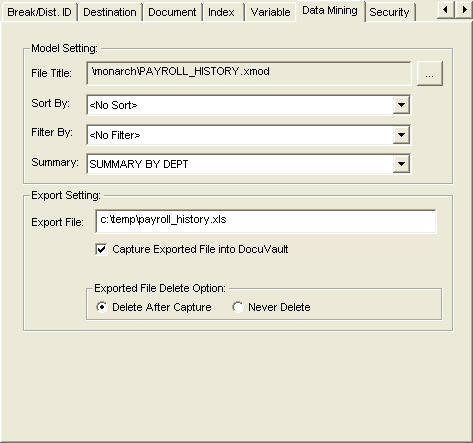
Model Setting
The Data Mining Tab’s Model Setting area enables you to identify the model file to apply to the report, and to invoke specific functions (e.g., sort, filter, and browse) that are available within the identified model file.
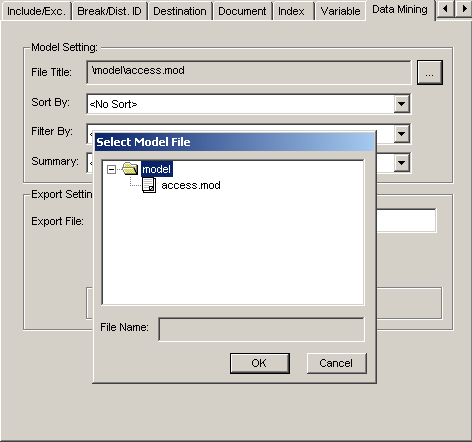
To identify and configure a model file
| 1. | Specify the name of the model file that is to be applied in the File Title field. You can select previously created model files by clicking the … button. The Select Model File is displayed. |
| 2. | Specify the name of the sort function within the model file to be applied to the data in the Sort By field. |
| 3. | Specify the name of the filter function within the model file to be applied to the data in the Filter By field. |
| 4. | Specify the name of the summary function within the model file to be applied to the data in the Summary field. |
Export Setting
The Export Setting area enables you to specify the format and archiving requirements associated with the subreport.
To specify the format and archiving requirements
| 1. | In the Export File field, specify the full path and file name of the file to be created on the local machine (remote machines cannot be specified). |
The file extension provided in the path determines the type of file that is created: either a text file (*.txt) or an Excel spreadsheet (*.xls).
| • | If no file extension is provided, Cypress creates a text file (*.txt) by default. |
| • | If a file with an identical name already exists in the specified directory, it is overwritten with the new file. Keep this in mind when determining your output file naming convention. |
Or
If you want to capture the subreport as a Cypress document, clear the Capture Exported File into DocuVault check box to keep the source file in the specified directory.
| 3. | If you selected the Capture Exported File into DocuVault check box in step 2. , select the appropriate Exported File Delete option: |
| • | Delete After Capture, which deletes the newly created subreport file from the local disk as specified in the Export File detail |
| • | Never Delete, which leaves the file on disk |
Exporting Report Files as Subreports
If you want to export report files as subreports, you must install Cypress Data Mining or Monarch Data Mining. You cannot enable both.
| • | To install Cypress Data Mining, go to Installing Cypress Data Mining. |
| • | To install Monarch Data Mining, go to Installing Monarch Data Mining. |
Installing Cypress Data Mining
You must install Cypress Modeler on the client system from which you plan to invoke data mining.
To install Cypress Data Mining
| 1. | Start the setup.exe program in the \Modeler folder on the Cypress distribution CD. The Welcome to the InstallShield Wizard for Cypress Modeler is displayed. |
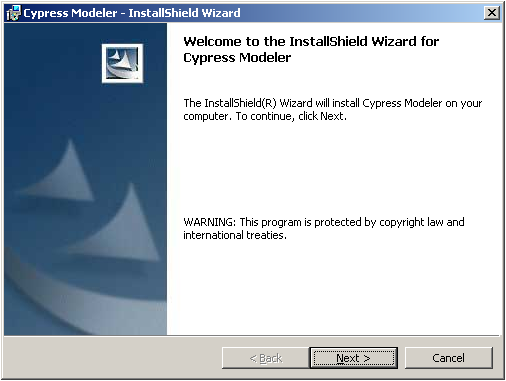
| 2. | Click Next. The License Agreement dialog is displayed. |
| 3. | Accept or decline the License Agreement. Before you can install Cypress, you must accept all terms and conditions as described in the License Agreement. |
| • | Click the I accept the terms in the license agreement radio button to continue your installation. |
| • | Click the I do not accept the terms in the license agreement radio button to stop the installation. |
| 4. | Click Next. The Destination Folder dialog is displayed. |
Perform one of these tasks:
| • | Click Next to install into the default folder (e.g., C:\Program Files\Cypress). |
| • | Click Change to browse to select another folder. The Change Current Destination Folder dialog displays. |
After selecting a folder, click Next. The Destination Folder dialog redisplays with the specified folder. Click Next.
The Setup Type dialog is displayed.
| 5. | Select a setup type: |
| • | Complete. Installs all program features. |
| • | Custom. Installs the selected features. |
| 6. | Click Next. The Ready to Install the Program dialog displays. |
| 7. | Click Install to begin your installation. The Installing Cypress Modeler dialog displays during the installation process. |
After the installation is complete, the InstallShield Wizard Completed dialog displays.
| 8. | Click Finish to complete your installation. |
Setting Up Cypress Data Mining with RDM
After you install Cypress Data Mining, any models you create are saved in the models directory (e.g., C:\Program Files\Cypress Modeler\HOME\models). If you will be using data mining in RDM, complete these steps:
- Create a model subdirectory in your Cypress Server directory (e.g., C:\Program Files\Cypress\model).
- Copy your model files from your models directory to the model subdirectory that you created.
Post-installation Setup for Cypress Data Mining
After completing your installation, you must start the Apache Tomcat server before using Cypress Data Mining. You also can change the configuration settings for the Cypress Modeler.
Starting the Tomcat Server
This section provides the steps required to start the Tomcat server.
To start the Tomcat server
| 1. | Select Cypress Modeler from the Start menu. |
| 2. | Select Server Status from the submenu. The Apache Tomcat CypressTomcat Properties dialog is displayed. |
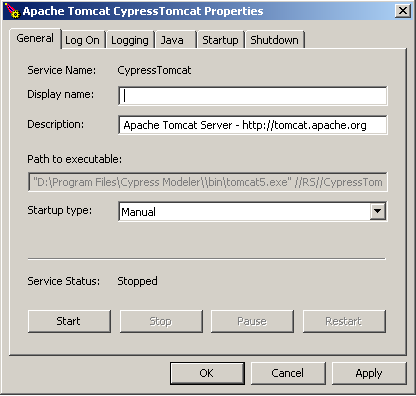
| 3. | Click Start to start the server. |
| 4. | Click OK to close the dialog. |
Configuring the Cypress Modeler
When you install Cypress Data Mining, the installer sets these parameters by default:
| • | Modeler Base URL |
| • | Modeler Properties folder location |
| • | Modeler Models folder location |
If you want to change the value of these parameters, you must first change them in the modeler.properties file. For more information, see To change the modeler.properties file.
After changing any of these parameters, you must also change them on the Modeler tab in the Options dialog, which you can access from the Cypress main window by selecting Options from the View menu. For more information, see To configure the Modeler tab.
To change the modeler.properties file
| 1. | Locate the modeler.properties file. For example: C:\Documents and Settings\All Users\.asg\modeler.properties. |
| 2. | Open the file. |
| 3. | Edit the appropriate values: |
|
Parameter |
Description |
|
modeler.home |
Location in which the modeler should store all temporary data. |
|
models.home |
Root folder for the model location. You can open or save the models to the specified location. |
| 4. | After making the changes, save the file. |
| 1. | From the View menu in the Cypress main window, select Options. The Options dialog is displayed. |
| 2. | Select the Modeler tab. |
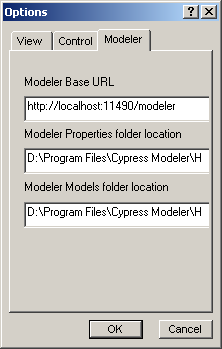
| 3. | Optional. Edit the values of these parameters: |
|
Field |
Description |
|
Displays the Base URL for the Modeler. Modifying the Base URL requires configuration changes to the CypressTomcat file. ASG recommends that you not change the Base URL. See your system administrator for further assistance.
|
|
|
Modeler Properties folder location |
Allows you to specify the location for the Modeler Properties folder. |
|
Modeler Models folder location |
Allows you to specify the location for the Modeler Models folder. |
| 4. | Click OK to save your changes. |
Installing Monarch Data Mining
You must install both Monarch Pro for Cypress and the Monarch Exporter on the Cypress Server. Additionally, Monarch Pro must be installed on the client system from which Monarch Data Mining will be launched.
Installing Monarch Pro for Cypress
To install Monarch Pro for Cypress
| 1. | Start the setup.exe program in the \Client_install folder on the Cypress distribution CD. The Welcome to the Monarch Pro for Cypress Installation dialog is displayed. |
| 2. | Click Next. The Customer Information dialog is displayed. |
| 3. | Enter the appropriate information in the User Name and Company Name input fields. |
| 4. | Enter the installation key from the CD jacket in the Serial Number input field. Look for the installation key. If you cannot find the installation key, contact ASG Customer Support. |
| 5. | Click Next. The Choose Destination Location dialog is displayed. |
Perform one of these tasks:
| • | Click Next to install into the default folder (e.g., C:\Program Files\Monarch Pro for Cypress). |
| • | Click Browse to select another folder. The Change Current Destination Folder dialog displays. |
After selecting a folder, click Next. The Destination Folder dialog redisplays with the specified folder. Click Next.
The Setup Type dialog is displayed.

| 6. | Select the installation setup type: |
| • | Compact. Installs only the components that Monarch Pro requires to run properly. Optional files (e.g., Monarch Pro lessons) will not be installed. |
| • | Custom. Allows you to tailor the installation to components that you have licensed and platforms installed at your site. |
| • | Secure Audit Trail. Installs all Monarch Pro components except for the utility required to allow your users to purge audit trails. |
| • | Typical. Installs all Monarch Pro components. |
If you select Compact, Secure Audit Trail, or Typical, click Next to continue to the Select Program Folder dialog (step 9. ).
If you select Custom, click Next to continue to the Select Components dialog (step 7. ).
| 7. | When the Select Components dialog displays, select the component you wish to install. Clear the components you do not want to install. |
| 8. | Click Next. The Select Program Folder dialog is displayed. |
When you are satisfied with the name of the program folder, click Next to begin the installation.
| 10. | When the InstallShield Wizard Complete dialog displays, click Finish to complete the installation. |

Installing the Monarch Exporter
To install the Monarch Exporter
| 1. | Start the setup.exe program in the \Exporter_install folder on the CD. The Welcome to the InstallShield Wizard for Cypress Components dialog is displayed. |
| 2. | Click Next. The Choose Destination Location dialog is displayed. |
Perform one of these tasks:
| • | Click Next to install into the default folder (e.g., C:\Program Files\Monarch Pro for Cypress). |
| • | Click Browse to select another folder. The Change Current Destination Folder dialog displays. |
When you are satisfied with the destination location, click Next to begin the installation.
| 3. | When the InstallShield Wizard Complete dialog displays, click Finish to complete the installation. |
Setting Up Monarch Data Mining with RDM
After you install Monarch Data Mining, any models you create are saved in the models directory (e.g., C:\Documents and Settings\All Users\Documents\Monarch Pro for ASG-Cypress\models). If you will be using data mining in RDM, complete these steps:
- Create a monarch subdirectory in your Cypress Server directory (e.g., C:\Program Files\Cypress\monarch).
- Copy your model files from your models directory to the monarch subdirectory that you created.
Using the Data Mining Module
The Document Modeler (herein called the Modeler) is a fully integrated, Web-based tool for creating and editing models. Model files define where and how to extract data from within report text.
The Modeler has features that allow you to easily extract and analyze data in existing archived reports and other business documents. These features include:
| • | Multiple-column extractions, which allows you extract data contained in columns across a page. |
| • | Trap functionality (i.e., floating and postal), which allows you to extract specific information from a report. |
| • | Lookup fields, which provide the capability to read a value from a report and translate it into a new value using a user-defined table. |
| • | Formula fields, which allow you to create a formula-based calculated field-by-field expression that you can use in filter, sort and summary definitions and copy, print and export it along with other fields. |
The Document Modeler Online Help provides specific information for these and other tasks.
To display the Document Modeler help
| > | Select Show help on the Document Modeler screen to display specific information for the task you are attempting to perform. |

Invoking the Modeler
To invoke the Modeler
| 1. | In Output Manager, select the appropriate document. |
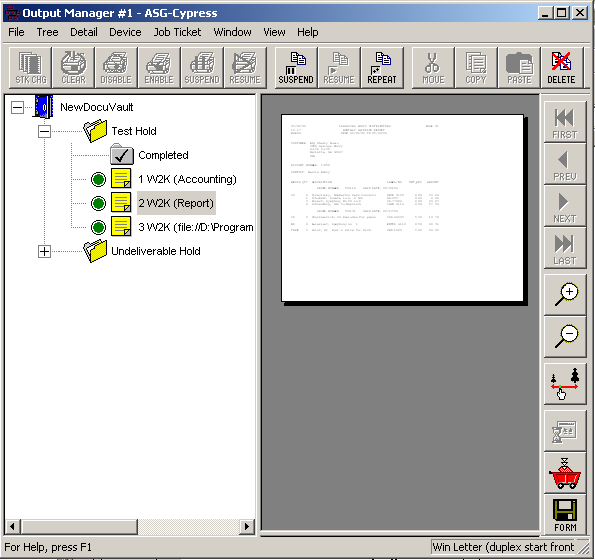
| 2. | Click the Export for data mining button  on the toolbar. on the toolbar. |
The selected document displays in the Document Modeler as a report file.
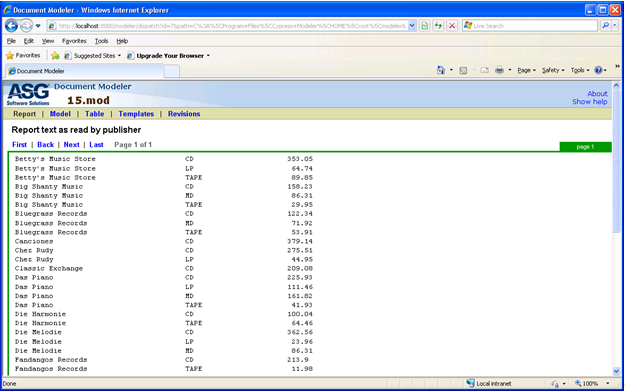
The Document Modeler screen includes these viewing options: Report View, Model View, Table View, Template View, and Revisions View.
Report View
The Report view allows you to define how the model extracts information from the report.

Model View
The Model view offers a detailed view of the current model.
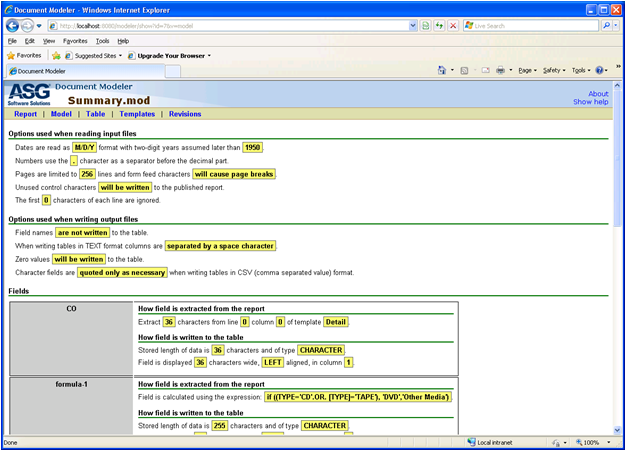
From the Model view, you can:
| • | View the model definitions in the form of an overview. |
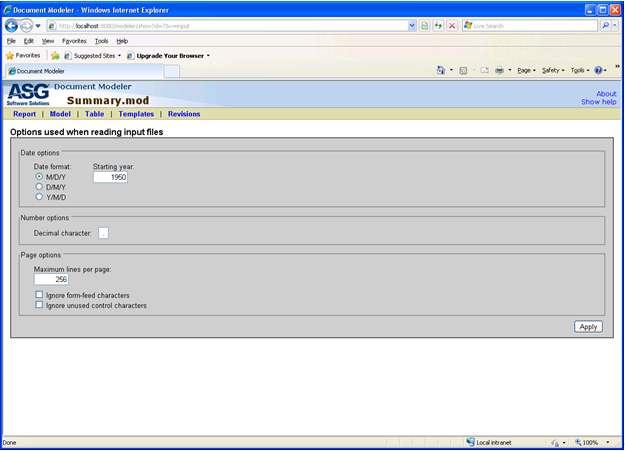
| • | Change the options that apply to reading the input report. |
| • | Change the options that apply to writing the output files. |
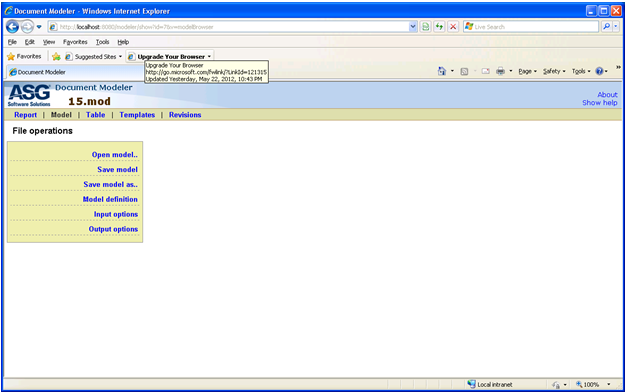
To access the Model view options
| > | Select the Model tab on the Document Modeler Page. The File operations menu is displayed. |
This screen shows the menu options:
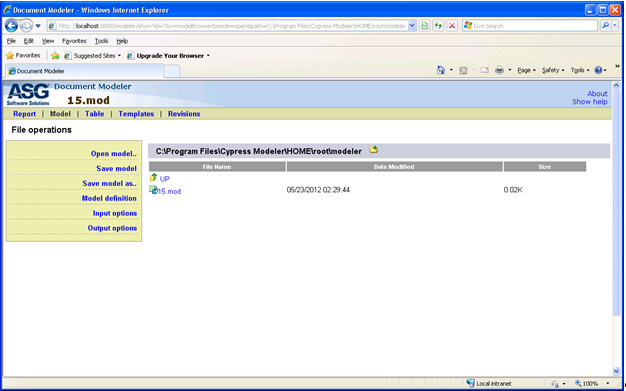
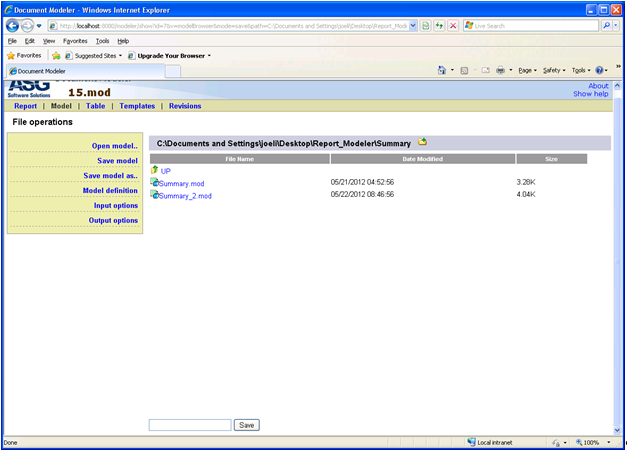
These two screens show how you can use the  feature to move to a different directory level:
This screen shows the input file options, which can be modified:
This screen shows the output file options, which can be modified:
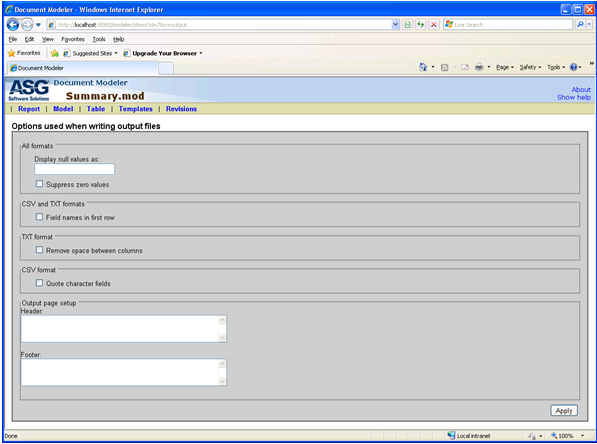
Table View
The Table view shows the data extracted from the report by the current model.
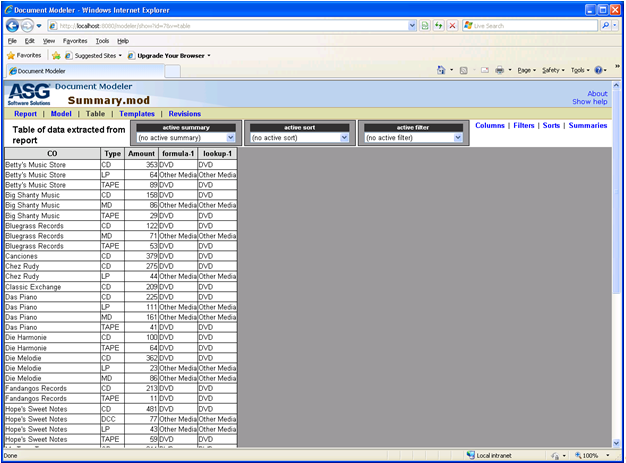
From the Table view, you can:
| • | View the table of data extracted from the report. You can apply any defined filters or sorts. |
| • | Change the order and summary of columns and fields included in the table. |
| • | Define filters to limit the rows returned. |
| • | Define sorts to change the order of rows in the table. |
| • | Define a summary to display subtotal and total summary information. |
Revisions View
The Revisions view shows the current and all old versions of the model.
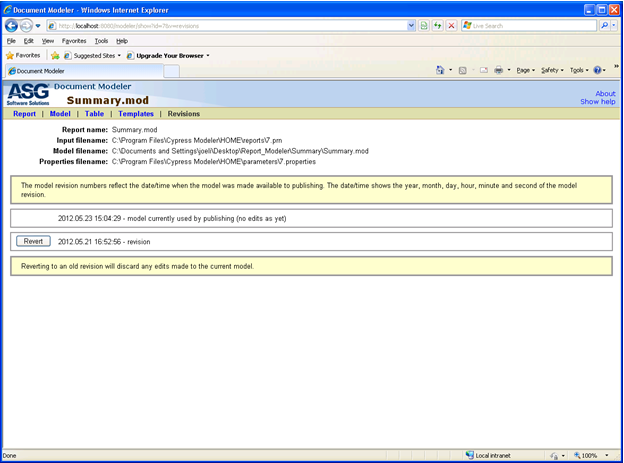
From the Revisions view, you can:
| • | Activate the current edited model show that it will be used for publishing reports. |
| • | Revert to an older version of the model so that the older model will be used for publishing. |