Installing becubic
If you intend to upgrade your existing becubic projects, you can install becubic either in a directory in which an earlier version was installed or in a separate directory.
Do not, however, rename the directory that contains the earlier version. Renaming the directory will make it impossible for the installer to detect the earlier version. If you have the preconfigured JBoss server installed on the machine on which you want to upgrade becubic, you must stop and remove it (i.e., through the console or the corresponding Windows service). The preconfigured application server is replaced with Tomcat 7.
Prerequisite
becubic and its underlying software (i.e., Eclipse, Ant, and Apache Tomcat) require the Java Runtime Environment (JRE). You must have a JRE installed before installing becubic.
- See Hardware and Software Configurations for information about the version compatibility.
- If you have different versions of JRE/JDK compatible with becubic installed, the most recent version is selected by the setup program.
- If you use a JRE (not a JDK), you may encounter the warning message Unable to locate tools.jar. in different log files. You can ignore this warning since it has no effect on using becubic.
Local Administrator Rights
The becubic setup does not require the Local Administrator rights. However, it also installs CAE, which requires these Microsoft Redistributable programs:
- Microsoft Visual C++ 2010 Redistributable
- Microsoft Visual C++ 2013 Redistributable
- Microsoft SQL Server Native Client 2008 (32-bit or 64-bit depending on the operating system)
- Microsoft SQL Server Native Client 2012 (32-bit or 64-bit depending on the operating system)
These programs are automatically installed by the setup program on the condition that the login account has the Local Administrator rights.
To be able to install becubic and CAE without Local Administrator rights, you must install all these components prior to proceeding to becubic installation.
product_cd\Disk1\modules\cae\redist.
Installation Procedure
Perform the following steps to install becubic in your machine.
To install becubic
- Run the installer from the ZIP file downloaded from the ISP or insert the becubic product distribution CD. If you are using the installation files downloaded from the ISP, double-click the setup.bat file. Or, if you are using the CD, the setup program runs automatically.
- Select the language, either English or French, from the drop-down list at the bottom of the window. This choice concerns these items:
- The language used in the setup program pages.
- The GUI version for the localized modules.
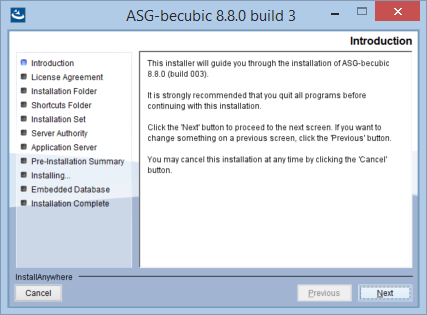
- Click OK. The Introduction page displays:
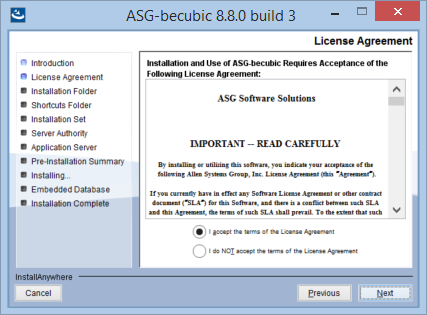
- Click Next. The License Agreement page displays:
- Read and accept the terms of the License Agreement.
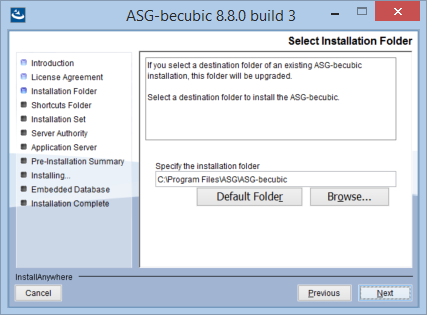
- Click Next. The Select Installation Folder page displays:
- Specify the installation root directory. To browse for a folder, click Choose. This opens the Browse For Folder dialog where you can choose a folder or create a new one. In this example, C:\ASG\becubic is the installation root directory:
- Clicking the Restore Default Folder button enables you to reset the value to the default installation directory.
- You can choose an Eclipse installation folder to add becubic features to your current development environment. See Hardware and Software Configurations for the compatible version of Eclipse.
- Click Next.
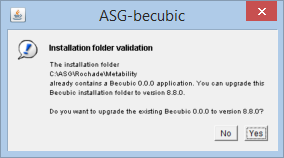
- If the setup program detects becubic Version 7.0.0 or later in the directory, it prompts you to either confirm that you want it upgraded to 8.8 or choose another installation root directory for becubic 8.8:
- If the setup program detects a becubic version that cannot be upgraded because it is earlier than 7.0.0, it prompts you to choose another installation root directory for becubic 8.8.
- If the setup program detects a compatible version of Eclipse, it prompts you to either confirm that you want to add becubic features to it or choose another installation root directory for becubic 8.8:
- If you click Yes, the ASG-becubic Installation Folder page opens. Specify where you have installed the becubic programs. In this case, go to step 14.
- When the Choose Installation Folder page becomes active again, click Next. The Choose Shortcut Folder page displays:
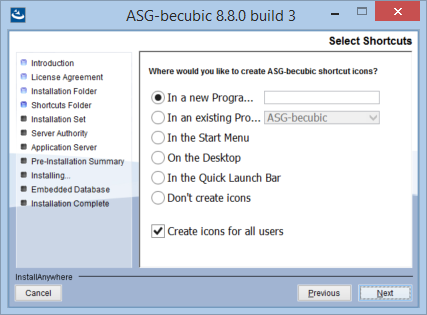
- Select one of the options to specify where to create a becubic shortcut, and then click Next to be able to choose an installation set:
- Choose one of these options:
- If you chose the Custom option in step 11, click Next to go to step 13.
- Select (or clear) installation sets from the Choose Installation Set page:
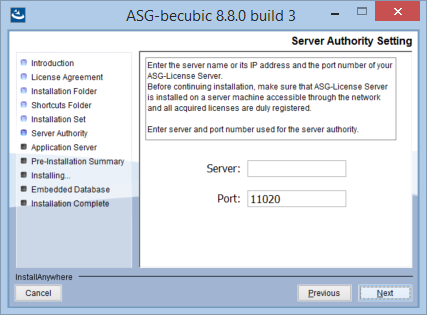
- Click Next. The Server Authority Setting page displays:
- Enter the address and the port number of License Server, which provides you with license information.
- Click Next.
- If you chose Typical in step 11 or deselected the Apache Tomcat application servers in step 13, skip to step 19.
- If you chose Full in step 11 or selected the Apache Tomcat application servers in step 13, continue to step 17.
- Specify the appropriate information at the Apache Tomcat Application Server Setting page:
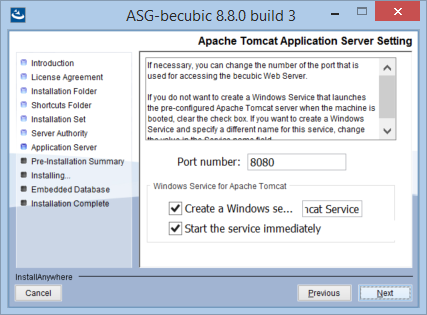 The port number 8080 is a standard default one that might be used by another application if your application server is not dedicated to becubic. ASG recommends that you specify a non-standard port number for becubic Web server.
- Enter the port number of the Apache Tomcat server. The port number is part of the URL that is used to connect to becubic Web Client (see the ASG-becubic Web Client User’s Guide for details about the Web Client logon).
- Select or clear the Create a Windows service name check box to specify whether the Tomcat server is to be launched as a Windows service or in the console mode (i.e., by means of a BAT command).
- Optional. Select the Start the service immediately check box if you want the Windows service to start as soon as becubic installation is complete.
- Click Next.
- The Pre-installation Summary page displays for you to verify your installation parameters:
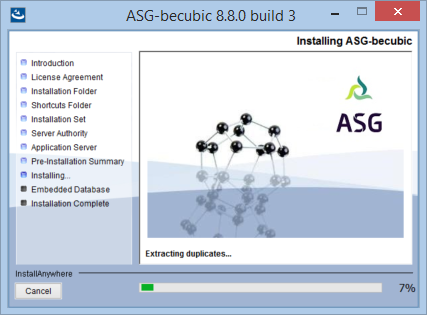
- Click Install. The setup program installs becubic on your computer:
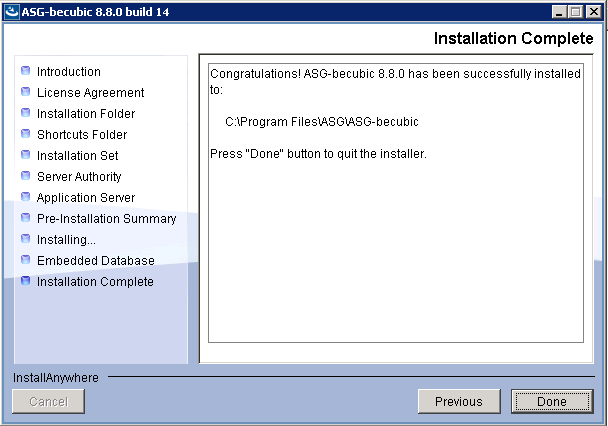
- Click Done when the Installation Complete (or Upgrade Complete) window displays and indicates that the installation process ended successfully:
- ASG-becubic
- Common Analysis Engine (only if selected)
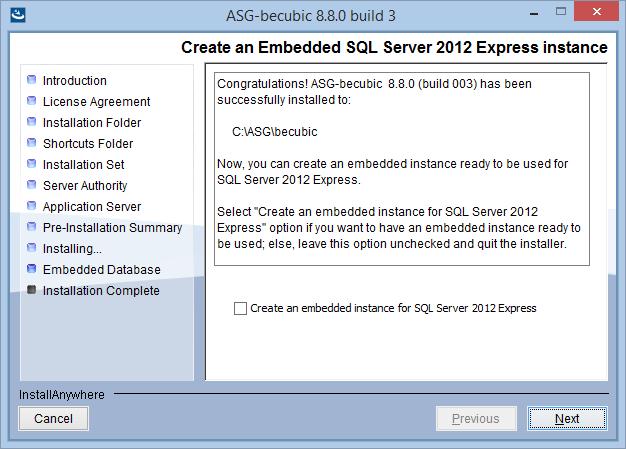
- Optional. If you want to create an embedded local instance for Microsoft SQL Server Express 2012, perform these steps:
- Microsoft SQL Server 2012 Express is suitable only for a limited testing project.
- The use of Embedded SQL Server Express is not supported on a Windows Server 2012 R2 machine.
- The version of bundled SQL Server Express is 2012 R2. If an existing earlier version is detected, the setup program attempts to upgrade your current installation.
- Select the corresponding check box and click Next. The SQL Server Express 2012 Installation page opens:
- Change the parameter values if required, and specify a password for the SA user.
- Click Next. The Project and Repositories Definition page opens:
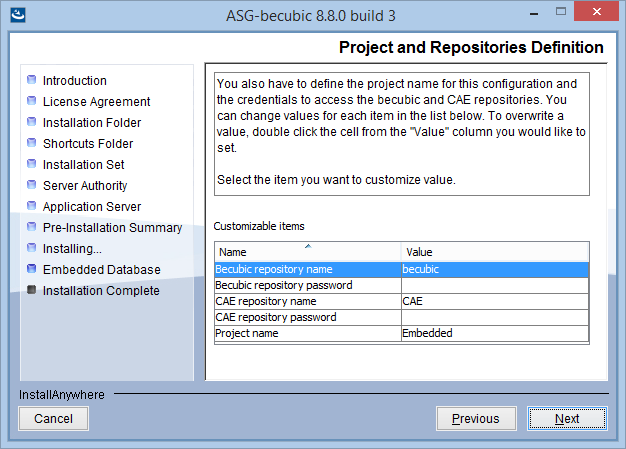
Enter passwords for the becubic repository and CAE entry point. Optionally, you can change the project name.
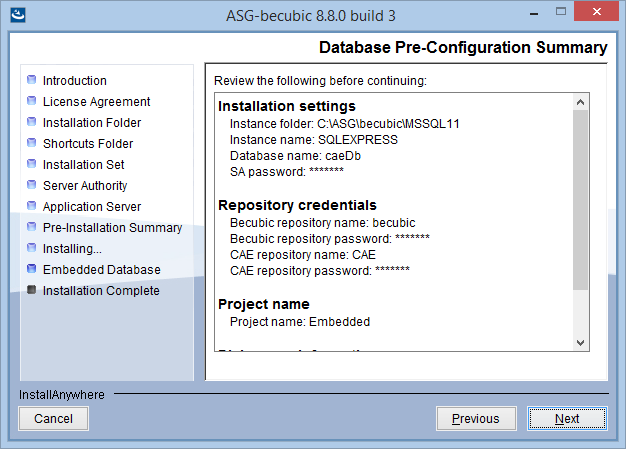
- Click Next. The Database Pre-Configuration Summary page opens showing the installation parameters and project settings.
- Verify the parameters and click Next to launch the installation. The database engine installation, database instance creation, and becubic project creation are done consecutively. This may take several minutes.
- On successful installation, a message displays to inform the completion:
- Click Done to exit the setup program.
A dialog shows the progress of the preparation:

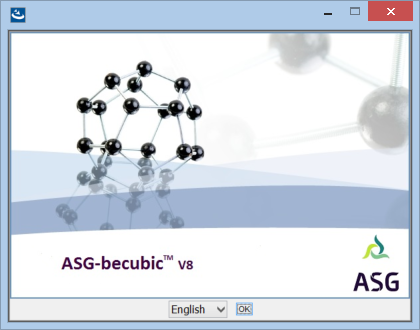
The splash/language selection page displays:
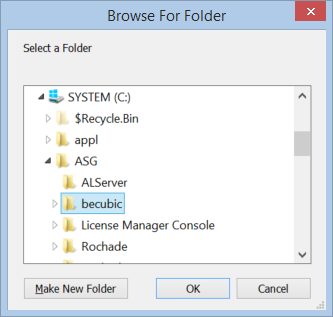
Select a folder and click OK to return to the Select Installation Folder window.
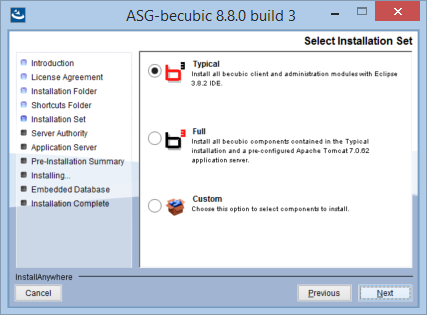
| Option | Description |
|
Typical |
Installs all software without installing the application server software. Choose this option if you are installing becubic on a Rich Client station. |
|
Full |
Installs all software and sets up a preconfigured application server (Apache Tomcat) that will be used as becubic Application/Web Server. Choose this option to install the application server machine with Tomcat with all client and administration modules on the server. If you do not want to install client and administration modules on the application server machine, choose Custom.
|
|
Custom |
Enables you to select the components to be installed. See step 13 for details. |
Or
If you chose Full or Typical, click Next to go to step 14.
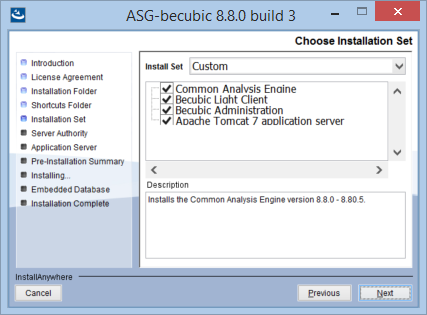
This table describes the installation sets:
| Installation Set | Description |
Common Analysis Engine | Installs the CAE analysis engine, providers, and the administration tools. |
Becubic Light Client | Installs only the standard Eclipse client. The becubic plug-ins can be installed on your Eclipse IDE Version 3.8 or later. The version of Eclipse bundled with becubic is 3.8.2, which is the certified and recommended version. |
Becubic Administration | Installs the Eclipse client with all the administration tools on Rich Client stations. This installation set is required for the becubic administrators. |
Apache Tomcat 7 application server | Installs a preconfigured Apache Tomcat 7 application server with all server-side applications to be deployed. |
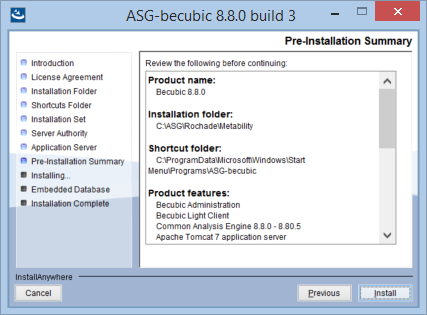
This table lists the items that are shown on the Pre-installation Summary page:
| Item | Description |
|
Product name |
Product name (becubic) and the version of the product that is about to be installed. |
|
Installation folder |
The installation folder you specified at step 7. |
|
ASG-becubic installation folder |
Displays only when installing on an existing Eclipse installation. The installation folder of the becubic programs. |
|
Shortcut folder |
The shortcut folder you specified at step 10. |
|
Product features |
Features and components to be installed (i.e., all or part of installation sets listed at step 13 and CAE version). |
|
License information |
License Server and the port number you specified at step 15. |
|
Target architecture |
The system architecture that the setup program has detected. |
|
Application server |
Information about the preconfigured application server. |
|
JAVA Virtual Machine |
Directory of the detected/selected JRE. |
|
Disk space information |
Required disk space to install the selected components/features and the amount of free space that the setup program detected on the selected drive. |