Configuring Subject Areas for User Accounts
Configuring subject areas for user accounts
- In the navigation tree for User Administration, select the user accounts and then User
 User Accounts
 Configure Subject Areas from the main menu.
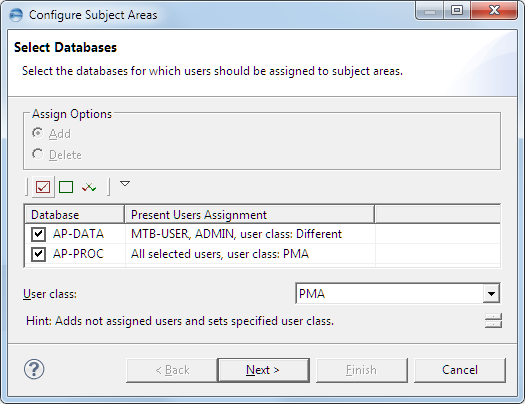
 - Select the databases that contain the subject areas for which you want to configure the user assignments.
- Set a user class for the users by selecting a database entry and then the appropriate user class from the User class for database drop-down list.
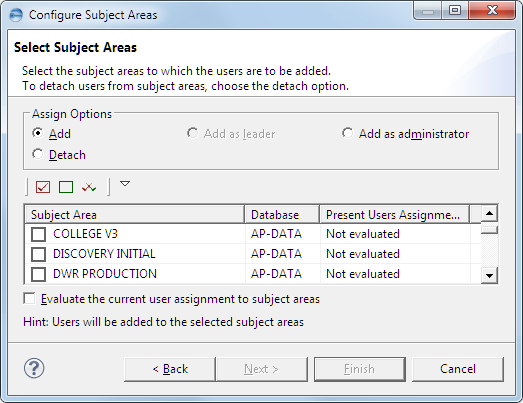
- Click Next. The Select Subject Areas dialog box is displayed. It lists the subject areas that were found in the selected databases.
- From the Assign Options group, select the action you want to perform. The following table lists the options available in the Assign Option group.
- Select Evaluate the current user assignment to subject areas to determine whether the selected users are already assigned to the listed subject areas. This is an optional step.
- Select the subject areas for which you want to configure the user assignments.
- Click Finish to confirm the changes.
Or
Right-click the accounts and then select Configure Subject Areas from the context menu.
The Select Databases dialog box is displayed.

The Present Users Assignment column shows if any of the selected users are currently assigned to the database and what user class has been set for them.

The page lists only the subject areas for which you are the leader because only the subject area leader is allowed to determine who is to have access to a subject area.
|
Option |
Description |
| Add | Assigns the users as members. |
| Add as leader | Assigns the user as leader. This option is enabled only if a single user account is selected in step 1. |
| Add as administrator | Assigns the users as administrators. |
| Detach | Removes the user assignments. |

The Present Users Assignment column shows whether any of the selected users are currently assigned to the pertinent subject area.
