Creating New Subject Areas
- In the navigation tree, select the database or a subject area node and then Subject Area
 New Subject Area from the main menu.
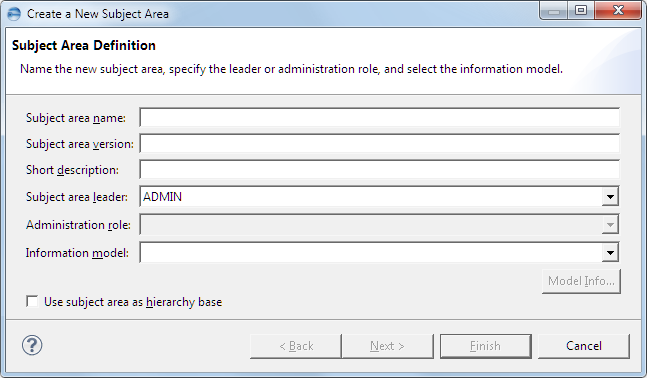
 - Enter a name, a version name, and a description for the new subject area.
- Change the subject area leader, if required.
- The Subject area leader drop-down list is preset to the current user.
- If the current user has a role that grants permission to create subject areas, the Administration role drop-down list is preset to that role.
- Select the information model on which you want to base the subject area.
- Click Model Info to display details about the selected information model. This is an optional step.
- If you want to use the subject area as a hierarchy base, select the Use subject area as hierarchy base check box.
- Click Next to open the Subject Area Configuration page.
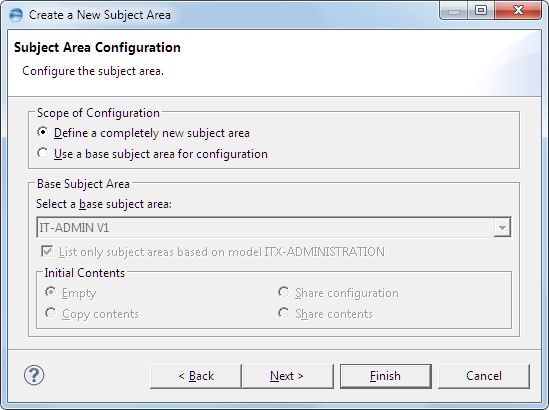
- Click Define a completely new subject area to create a new, empty subject area.
- From the Select a base subject area drop-down list, select an existing subject area on which you want to base the new subject area.
- Under Initial Contents, click the pertinent option to specify whether you want to start with an empty subject area, copy the base subject area’s contents, share the base subject area’s configuration, or share its contents.
- Click Next to proceed.
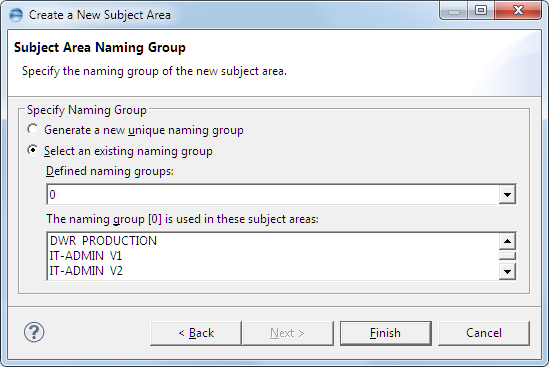
- Click Generate a new unique name group to create a new naming group for the subject area.
- Click Finish to create the new subject area.
Or
Right-click the node and then select New Subject Area from the context menu.
The Subject Area Definition dialog box is displayed.

You can enter an existing subject area name. In this case, you cannot use the new subject area as the basis for a hierarchy and its version name must be different from the version name of the existing subject area.
The new subject area will exist independently of the existing subject area. However, if you want to delete the existing subject area, you must first delete this subject area.

Or
Click Use a base subject area for configuration to base the new subject area on an existing one.
To list only subject areas that are based on the same model as your new subject area, select the List subject areas based on model <modelname> check box, where <modelname> is the name of the model specified in step 4.
For more information on subject area configurations, see the ASG-Rochade Concepts and Facilities.
The Subject Area Naming Group page is displayed.

On this page, you can specify a naming group for the new subject area’s items. By default, naming group 0 is preset (that is, all items will reside in naming group 0). For more information on naming groups, see the ASG-Rochade Concepts and Facilities.
Or
Click Select an existing group and then, from the Defined naming groups drop-down list, select the naming group that you want to use for the subject area.
