Customizing Table Columns
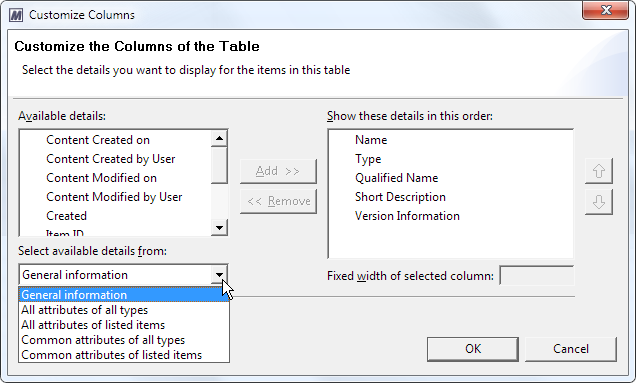
You can add columns by clicking the Customize Columns icon  in the local toolbar. This opens the Customize Columns dialog at the Customize the Columns of the Table page:

The Select available details from drop-down list enables you to choose between selecting entries for display from general item information or from different attribute lists.
This is the general information that you can display for all items:
| Element | Description |
|---|---|
|
Content Created by User |
User who created the item content. |
|
Content Created on |
Content creation date. |
|
Content Modified by User |
User who last modified the item content. |
|
Content Modified on |
Content Modification date. |
|
Created |
Creation date. |
|
Item ID |
Internal ID of the item. |
|
Modified |
Date of last modification. |
|
Modified by |
User who last modified the item. |
|
Name |
Default. The item name. |
|
Owned by |
User who created the item. |
|
Qualified Name |
The name of the item, including the names of the item’s parent namespaces. For example: Northwind.Customers (that is, the qualified name of an item Customers in the namespace of item Northwind). |
|
Short Description |
Content of the DEFINITION attribute. |
|
State |
Item state. |
|
Type |
Default. The item type. |
|
Version Created by User |
User who created the item version. |
|
Version Created on |
Item version creation date. |
|
Version Information |
The name of the subject area to which the item version belongs. |
|
Version Modified by User |
User who last modified the item version. |
|
Version Modified on |
Item version modification date. |
You can change the contents of the list by using these options:
- All attributes of all types: all attributes defined in the information model
- All attributes of listed items: all attributes of the items currently listed in the table
- Common attributes of all types: attributes common to all item types in the information model
- Common attributes of listed items: attributes common to the items currently listed in the table
To add columns to a table
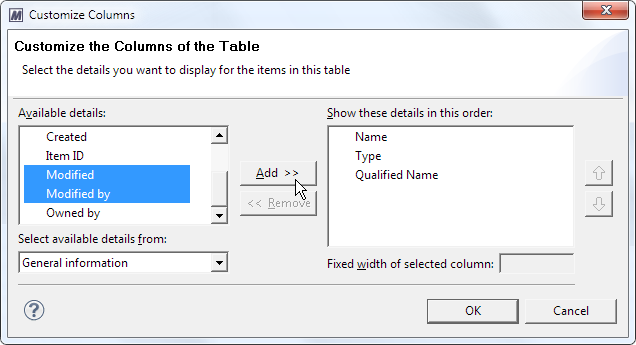
- From the Available details list, select the entries of the columns that you want to add to the table and then click Add:
- Select an entry from the Show these details in this order list and then specify a fixed width in pixels for the corresponding column in the Fixed width of selected column field. You will find that values of 100 or greater will lead to useful results. This is an optional step.
- Select one or more entries from the Show these details in this order list and then move the selected entries within the list by clicking the Move select objects upwards icon
 or the Move select objects downwards icon
  , respectively. This is an optional step.
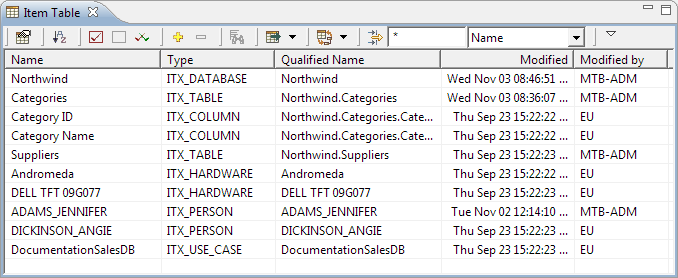
- Click OK to close the dialog and display the table with new columns added:

The selected entries are moved to the Show these details in this order list.

To remove a column from the table
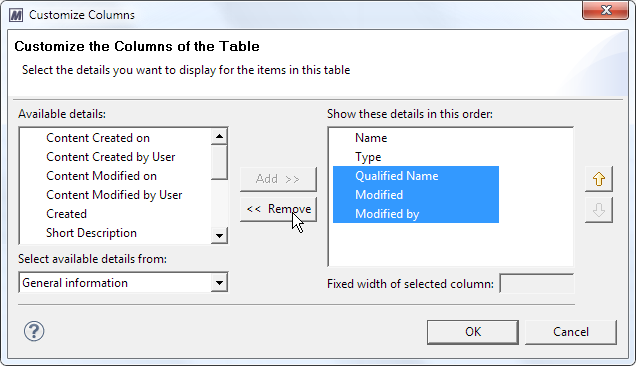
- From the Show these details in this order list, select the entries of the columns that you want to remove from the table and then click Remove:
- Click OK to close the dialog and display the table with the selected columns removed.

The selected entries are moved to the Available details list.
