
Indexing the EDI Metadata
This section describes how to configure the indexing utility for a specific subject area in the Rochade repository and how to run the utility under Microsoft Windows.
Configuring the Indexing Utility
To configure the indexing utility
- On the Rochade administration client, open the indexing_utility.zip\conf subdirectory of the search_app directory.
- In the applicationsSolr_rir.properties file, modify these settings:
- In the startupSolr.properties file, modify these settings:
- In the startupSolrInsert.properties file, modify these settings as appropriate for your environment:
- Open the indexing_utility.zip\WIN subdirectory of the search_app directory.
- In the setenv.bat, modify these settings as appropriate for your environment:
| Setting | Description |
|---|---|
|
user |
A user who has access to the metaApps subject area. |
|
password |
The user’s password (if required). |
|
applicationName |
The name of the metaApps subject area. |
|
applicationVersion |
The version of the metaApps subject area. |
|
control.databaseName |
The database that contains the Metability control subject area. |
|
control.applicationName |
The name of the Metability control subject area. |
|
control.applicationVersion |
The version of the Metability control subject area. |
|
control.applicationType |
The type of the Metability control subject area (such as, MC). |
For example:
user=GUEST
password=
applicationName=METAAPPS
applicationVersion=PRODUCTION
control.databaseName=AP-DATA
control.applicationName=METABILITY
control.applicationVersion=USER
control.applicationType=MC
| Setting | Description |
|---|---|
|
hostName |
The host name of the DI Server machine. |
|
portNumber |
The port number where the DI Server can be reached. |
|
databaseName |
The database that contains the metaApps subject area. |
For example:
hostName=rosrv.asg.com
portNumber=8888
databaseName=AP-DATA
| Setting | Description |
|---|---|
|
httpSolrServer |
The URL where the Solr server can be reached. |
For example:
httpSolrServer=http://localhost:8181/solr/
| Setting | Description |
|---|---|
|
SERVICE_NAME |
A space-separated list of the index services that you want to run. Each service creates an index of the items of a particular pathway (see Index Services and Corresponding Item Types). |
|
MAX_HITS |
The maximum number of items that you want to index. |
|
PROJECTION_LANG |
Multi-language environments only. A comma-separated list of language codes for the languages to be included in the index. |
|
|
For example: PROJECTION_LANG="en%%2Cde" You must encode the commas in the list as %%2C. |
For example:
set SERVICE_NAME=MGSolrInsert,SolrInsert_RBD,SolrInsert_RBI,
SolrInsert_RDB,SolrInsert_RDI,SolrInsert_RDQ,SolrInsert_RDS,
SolrInsert_REF,SolrInsert_RM,SolrInsert_RWM
set SERVICE_QUERY=MGView
set SERVICE_CATEGORY=BuildIndex
set MAX_HITS=2000
set PROJECTION_LANG="en%%2Cde"
set PHYSICAL_DEFINITIONS=startupSolr
set APPLICATION_DEFINITIONS=applicationsSolr_rir
set SOLR_DEFINITIONS=startupSolrInsertconfigFile=solr.xml
Index Services and Corresponding Item Types
| Index Service | Pathway | Item Types |
|---|---|---|
|
MGSolrInsert |
Business Glossary, Business Package, Personal Identification Information |
RBG/GLOSSARY, RBG/CONTEXT, RBG/BUSINESS-TERM, BPK__BUSINESS_ITEM, GDP_PERSONAL_INFORMATION, GDP_PI_STRUCTURE |
|
SolrInsert_RBD |
Big Data |
RBD_CLUSTER, RBD_CLUSTER-SERVICE, RBD_DIRECTORY, RBD_HOST, RBD_CONNECTION, RBD_CLUSTER-SERVICE-ROLE, RBD_CONFIG-PARAM |
|
SolrInsert_RBI |
Business Intelligence |
DWR_ANL_OLAP_PACKAGE, DWR_ANL_OLAP_SCHEMA, DWR_ANL_CUBE, DWR_ANL_DIMENSION, DWR_ANL_DIMENSION_MAP, DWR_ANL_HIERARCHY, DWR_ANL_MEMBER, DWR_ANL_REPORT, DWR_ANL_RPT_STRUCTURE, DWR_ANL_RPT_SCHEMA, DWR_ANL_RPT_FIELD, DWR_ANL_RPT_MAP, DWR_ANL_RPT_PACKAGE |
|
SolrInsert_RDB |
Relational Databases |
DWR_RDB_TABLE_OR_VIEW, DWR_RDB_DB_SYSTEM, DWR_RDB_DATABASE, DWR_RDB_SCHEMA |
|
SolrInsert_RDI |
Transformation |
DWR_TFM_SYSTEM, DWR_TFM_ACTIVITY, DWR_TFM_TASK, DWR_TFM_TRANSFORMATION, DWR_TFM_TRANSFORMATION_MAP, DWR_TFM_TRANSFORMATION_TYPE |
|
SolrInsert_RDQ |
Data Quality Management |
DQM_BUSINESS_POLICY, DQM_BUSINESS_RULE, DQM_CRITICAL_DATA_ELEMENT, DQM_CRITICAL_QUALITY_MEASURE, DQM_CRITICAL_QUALITY_MEASURE_RESULT |
|
SolrInsert_RDS |
Data Structure |
DWR_DAT_PACKAGE, DWR_DAT_FILE, DWR_DAT_DATA_TYPE, DWR_DAT_DOMAIN, DWR_DAT_FIELD, DWR_DAT_RECORD_TYPE |
|
SolrInsert_REF |
Reference Data |
MDM_DATA_CONTEXT, MDM_RDM_REFERENCE_COLLECTION, MDM_RDM_VALUE_COLLECTION, MDM_RMD_CONCEPTUAL_DOMAIN, MDM_RMD_DATA_CONCEPT, MDM_RMD_VALUE_DOMAIN |
|
SolrInsert_RM |
Models |
DWR_ERM_MODEL, DWR_ERM_SUBJECT_AREA, DWR_ERM_ENTITY, DWR_ERM_ATTRIBUTE, DWR_ERM_IDENTIFIER, DWR_ERM_RELATIONSHIP |
|
SolrInsert_STI |
Stitching |
STI_CONTAINER, STI_STRUCTURE_LINK, STI_FIELD_LINK |
For information on how to index the items of additional item types, see Indexing Additional Item Types and Attributes.
Running the Indexing Utility
To run the indexing utility
- Run the RochadeToSolr.cmd batch script in the indexing_utility.zip\WIN subdirectory of the search_app directory.
Once you have run the batch script, you can use the Solr Admin Web interface to check whether the Rochade data have been added to the index.
You can follow one of these approaches to make sure that search index stays up to date:
- Set up a Window task that updates the index in regular intervals (see To set up a task for keeping the indexes up-to-date).
- Set up the Index Search Update Web application, which updates the index
whenever an item is changed in Rochade (see Using the Index Search Update Web Application).
To set up a task for keeping the indexes up-to-date
- Open the indexing_utility.zip\WIN subdirectory of the search_app directory.
- Open the ScheduleIndex.cmd file for editing.
- Define the schedule (/sc) and the start time (/st) for the indexing task:
- Save your changes.
- Run the ScheduleIndex.cmd batch script.
schtasks /ru "SYSTEM" /create /tn SearchIndexing
/tr "%cd%\RochadeToSolr.cmd >> %cd%\indexing_log.log"
/sc daily /st 03:00:00
This adds a task to the Windows Task Scheduler that will automatically update the indexes at the specified interval.
Using the Index Search Update Web Application
The Index Search Update Web application uses Rochade’s event notification feature to receive change notifications for selected types of items and attributes. It then triggers an update of the indexed data in the corresponding Solr cores.
For more information about the event notification feature, see the ASG-Rochade Event Notification Tutorial in the ASG-Rochade Java API online documentation.
To set up the Index Search Update Web application
- Open the search_app directory.
- Deploy the rochade_index_search_update,war file to the application server that
runs EDI Browser. - On the application server, open the WEB-INF\classes subdirectory of the rochade_index_search_update document root.
- Open the connection.xml file for editing.
- In the roServers tag, specify the Rochade connection settings.
- In the applications tag, specify the subject areas that contain the indexed items
and the corresponding Solr cores (you must repeat the subject area specification for each Solr core). - In the items tag, specify the item types and attributes for which you want to receive notifications.
- In the searchServers tag, specify the Solr server connection settings:
- In the cores tag, specify the Solr cores that you want to update (including the Solr documents and fields).
- Save your changes.
- Restart the Index Search Update Web application.
For example:
<roServers>
<roServer name="Admin Connection" host="rosrv.asg.com"
port="8888" instDir="C:\Program Files\Rochade"
iniFile="C:\Program Files\Rochade\appl\rochade.ini"
iniSection="JAVAAPI" authType="classic" >
<databases>
<database name="AP-DATA">
<users>
<user name="ADMIN" password="rochade">
<applications>
...
</applications>
</user>
</users>
</database>
</databases>
</roServer>
</roServers>
These are the available parameters for specifying the DI Server connection:
| Tag / Parameter | Description | |
|---|---|---|
|
<roServer> |
|
|
|
|
name |
Specifies Rochade connection name. |
|
|
host |
Specifies the logical host name or IP address of the computer on which the DI Server runs. |
|
|
port |
Specifies the port number where the DI Server can be reached. |
|
|
authType |
Specifies the authentication mode. The default mode is classic. For information on how to use a different mode (for example, trusted connection), see Configuring Login and Authentication. |
|
<database> |
|
|
|
|
name |
Specifies the Rochade database that contains the indexed data. |
|
<user> |
|
|
|
|
name |
Specifies a Rochade user account with administrative access to the subject area that contains the indexed data. |
|
|
password |
Specifies the password for the account (you can leave this parameter empty when using a trusted connection). |
For example:
<applications>
<application name="METAAPPS" version="PRODUCTION" type="S"
maxWaitTime="60000" maxCountApplications="10"
maxCountKeepAlive="0" maxReserveTime="300000"
maxSuspendTime="600000">
<cores>
<core>BusinessTermView</core>
</cores>
<items>
...
</items>
</application>
<application name="METAAPPS" version="PRODUCTION" type="S"
maxWaitTime="60000" maxCountApplications="10"
maxCountKeepAlive="0" maxReserveTime="300000"
maxSuspendTime="600000">
<cores>
<core>DWRView</core>
</cores>
<items>
...
</items>
</application>
</applications>
These are the available parameters for specifying the subject areas and Solr cores:
| Tag / Parameter | Description | |
|---|---|---|
|
<application> |
|
|
|
|
name |
Specifies the name of the subject area. |
|
|
version |
Specifies the version of the subject area. |
|
|
type |
Specifies the type of the subject area. |
|
|
maxWaitTime |
Specifies the time (in seconds) by which a subject area |
|
|
maxCountApplications |
Specifies the maximum number of subject area objects allowed in the pool (must be between 1 and 100). |
|
|
maxCountKeepAlive |
Specifies the maximum number of subject areas to be |
|
|
maxReserveTime |
Specifies the maximum time (in milliseconds) for which an application can use a subject area object until it must release the object. If the limit is exceeded, the object is disposed. The value must be between 100 and 6000000 (100 milliseconds and 10 minutes). The default is 300000 (5 minutes). |
|
|
maxSuspendTime |
Specifies the maximum time (in milliseconds) for which |
|
<core> |
Specifies the name of the Solr core. |
|
For example:
<cores>
<core>BusinessTermView</core>
</cores>
<items>
<item type="RBG/GLOSSARY" options="CUSANP">
<attributes>
<attribute name="RBG/DESCRIPTION" options="CVO" />
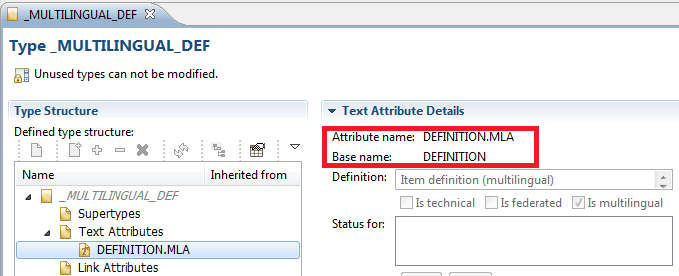
<attribute name="DEFINITION.MLA" options="CVO" />
</attributes>
</item>
<item type="RBG/CONTEXT" options="CUSANP">
<attributes>
<attribute name="RBG/DESCRIPTION" options="CVO" />
<attribute name="DEFINITION.MLA" options="CVO" />
</attributes>
</item>
<item type="RBG/BUSINESS-TERM" options="CUSANP">
<attributes>
<attribute name="RBG/DESCRIPTION" options="CVO" />
<attribute name="DEFINITION.MLA" options="CVO" />
</attributes>
</item>
<items>
These are the available parameters for specifying the item types and attributes:
| Tag / Parameter | Description | |||||||||||||||||||
|---|---|---|---|---|---|---|---|---|---|---|---|---|---|---|---|---|---|---|---|---|
|
<item> |
|
|||||||||||||||||||
|
|
type |
Specifies the name of the item type. |
||||||||||||||||||
|
|
options |
Specifies the notification options for the item type. These are the available options:
|
||||||||||||||||||
|
<attribute> |
|
|||||||||||||||||||
|
|
name |
Specifies the name of the attribute. |
||||||||||||||||||
|
|
options |
Specifies the notification options for the attribute. These are the available options:
|
||||||||||||||||||
<searchServers>
<searchServer name="Solr" schema="http" host="host" context="context"
port="port">
<cores>
...
</cores>
</searchServer>
</searchServers>
These are the available parameters for specifying the Solr server connection:
| Tag / Parameter | Description | |
|---|---|---|
|
<searchServer> |
|
|
|
|
name |
Specifies the Solr connection name. |
|
|
schema |
Specifies the schema for connecting to the Solr server. |
|
|
host |
Specifies the logical host name or IP address of the computer on which the Solr server runs. |
|
|
context |
Specifies the name of the document root if the Solr server runs as a Web application. |
|
|
port |
Specifies the port number where the Solr server can be reached. |
For example:
<cores>
<core name="BusinessTermView">
<attrMapping>
<field column="DEFINITION.MLA" name="DEFINITION" />
</attrMapping>
<docs>
<doc type="RBG/GLOSSARY">
<field value="1" name="level1" />
<field value="3" name="level2" />
<field value="search_mg" name="app_id" />
</doc>
<doc type="RBG/CONTEXT">
<field value="1" name="level1" />
<field value="4" name="level2" />
<field value="search_mg" name="app_id" />
</doc>
<doc type="RBG/BUSINESS-TERM">
<field value="1" name="level1" />
<field value="2" name="level2" />
<field value="search_mg" name="app_id" />
<field use="com.rochade.index.connection.config.ItemScopeService"
name="level3"/>
</doc>
</docs>
</core>
<core name="DWRView">
<attrMapping>
<field column="DWR_DESCRIPTION" name="DESCRIPTION" />
</attrMapping>
<docs>
<doc type="DWR_RDB_TABLE_OR_VIEW">
<field value="5" name="level1" />
<field value="11" name="level2" />
<field value="search_rdb" name="app_id" />
</doc>
<doc type="DWR_RDB_DB_SYSTEM">
<field value="5" name="level1" />
<field value="10" name="level2" />
<field value="search_rdb" name="app_id" />
</doc>
<doc type="DWR_RDB_DATABASE">
<field value="5" name="level1" />
<field value="9" name="level2" />
<field value="search_rdb" name="app_id" />
</doc>
<doc type="DWR_RDB_SCHEMA">
<field value="5" name="level1" />
<field value="8" name="level2" />
<field value="search_rdb" name="app_id" />
</doc>
</docs>
</core>
</cores>
These are the available parameters for specifying the Solr core details:
| Tag / Parameter | Description | ||
|---|---|---|---|
|
<core> |
|
||
|
|
name |
Specifies the name of the Solr core. |
|
|
<attrMapping> |
|
||
|
|
<field> |
Maps internal Rochade attribute names to Solr field names. This is required if the attribute name and its base name are different:
|
|
|
|
|
value |
Specifies the Rochade attribute name. |
|
|
|
name |
Specifies the Solr field name. |
|
<doc> |
|
||
|
|
type |
Specifies the item type to which the Solr document pertains. The Web application will ignore notifications about item types for which no corresponding Solr document has been defined. |
|
|
|
<field> |
|
|
|
|
|
value |
Specifies the default value for the Solr field. Mandatory for Integrated Search in RoBrowser field is: app_id – for storing the pathway application code to which this item belongs |
|
|
|
name |
Specifies the Solr field name. Optional fields are level1, level2, level3, etc. for faceting. |
|
|
|
column |
Specifies the name of a column in the browse query from the value is to be retrieved that will be stored into the specified Solr field. |
|
|
|
use |
Specifies a class that implements the IDetailsService interface to This is required if the Solr field should contain a value from a ResultSet that cannot be retrieved by specifying the column name. |
To verify that the Index Search Update Web application runs correctly
- Start your browser and point it to the Web application by entering this URL:
- Log into EDI Browser.
- Create a new item of a type for which you configured the index to be updated (if you create an item that is subject to approval, make sure to have it approved).
- Wait a couple of minutes, then run an index search for the new item.
http://host:port/rochade_index_search_update/config
where:
host is the logical name of the computer where the application server is running.
port is the number of the port where the application server can be reached.
This message displays if the Web application has been started successfully:

The item should be listed in the search result.
For information on how create items and how to run an index search, see the ASG-Enterprise Data Intelligence User’s Guide.
Indexing Additional Item Types and Attributes
This section describes how to add additional item types and attributes to the Solr index.
The process requires modifications in the Solr core. The relevant core depends on the service that you use for indexing. For more information, see Index Services and Corresponding Item Types.
The Solr cores for all services share a single configuration, which is stored under solr-8.6.1\server\solr\configsets\metaApp_configs\conf.
To add an additional item type to the index
- Navigate to the indexing_utility.zip\conf subdirectory of the search_app directory.
- If you want to add the type to an existing index service (see Index Services and Corresponding Item Types), open the service’s XML file (for example, SolrInsert_RDB.xml), and skip to step .
- Add the name of the new index service to the SERVICE_NAME setting in the setenv.bat file (you can find the file in the indexing_utility.zip\conf subdirectory of the search_app directory).
- Add a new category to the BuildIndex category in the index service’s XML file, and replace the settings in red with appropriate values:
- Save your changes.
- Restart the Solr server and run the indexing utility.
Or
If you want to add the type to a new service, create an empty XML file for the new service (for example, CustomService.xml), and add these lines to the file:
<RocService
stylesheet="com/rochade/wa/api/resource/stylesheets/abspathV2.xsl,
com.rochade.wa.api.ML.java,
com/rochade/wa/api/resource/stylesheets/rsV2.xsl"
whatdefault="id, name, scopeId, DEFINITION" what="{$what}">
<connection class="com.rochade.wa.api.roc.data.source.NonPooledDataSource" solrDefinitions="{$sD}" physicalDefinitions="{$pD}" applicationDefinitions="{$aD}" id="c2"/>
<categories>
<category id="BuildIndex">
<context id="c2" />
<category id="Cleanup">
<DeleteSolr coreName="<coreName>" />
</category>
...
</category>
</categories>
</RocService>
where <coreName> is the name for the Solr core in which the index is to be stored (for example, CustomView).
<categories>
<category id="BuildIndex">
...
<category id="Insert<itemTypeName>" name="Index Custom Type">
<context id="c2" />
<InsertSolr coreName="<coreName>">
<entity
query="MGView?category=ListItemsOfType&Type=<itemTypeName>&
_ProjectionLang={$_ProjectionLang}&maxHits={$maxHits}&
connectionType=com.rochade.wa.api.roc.data.source.NonPooledDataSource&
pD={$pD}&aD={$aD}&sD={$sD}&inheritance={$inheritance}">
<field column="type" name="type"/>
<field value="<groupFacetId>" name="level1"/>
<field value="<typeFacetId>" name="level2"/>
<field value="<appId>" name="app_id" />
<field column="id" name="id" />
<field column="scopeId" name="SCOPEID" />
<field column="name" name="NAME"/>
<field column="DEFINITION" name="DEFINITION"/>
</entity>
</InsertSolr>
</category>
</category>
</categories>
where:
<itemTypeName> is the name of the item type that you want to add to the index.
<coreName> is the name for the Solr core in which the index is to be stored.
<groupFacetId> is the facet ID for the group to which the item type belongs.
<typeFacetId> is the facet ID for the item type.
<appId> is the application or pathway ID to which the index service belongs.
| • | You must add corresponding entries for the facet IDs to the facetMapping.xml file (located either in the document root of the Web application or in the WEB-INF\classes subdirectory). |
| • | If the index service belongs to a new application or pathway, you must add a corresponding entry for the application/pathway ID to the applications_is.properties file (located in the WEB-INF\classes subdirectory of the Web application document root). |
To add a custom attribute to the index
- Navigate to the indexing_utility.zip\conf subdirectory of the search_app directory.
- Open the XML file for the index service to which you want to add the custom
attribute (for example, SolrInsert_RDB.xml). - Add the code in red to the category element for the item type to which the custom attribute belongs (for example, InsertDWR_RDB_TABLE_OR_VIEW):
- Repeat step for each custom attribute that you want to add to the index.
- Save your changes.
- Open the directory that contains the shared configuration for the Solr cores
(that is, \solr-8.6.1\server\solr\configsets\metaApp_configs\conf). - Repeat step 6 for each custom attribute that you added to the index.
- Save your changes.
- Restart the Solr server and run the indexing utility.
<category id="InsertDWR_RDB_TABLE_OR_VIEW" name="...">
<context id="c2" />
<InsertSolr coreName="DWRView">
<entity
query="MGView?category=ListItemsOfType&Type=DWR_RDB_TABLE_OR_VIEW&
_ProjectionLang={$_ProjectionLang}&maxHits={$maxHits}&
connectionType=com.rochade.wa.api.roc.data.source.NonPooledDataSource&
pD={$pD}&aD={$aD}&sD={$sD}&inheritance={$inheritance}">
<field column="type" name="type"/>
<field value="5" name="level1"/>
<field value="11" name="level2"/>
<field value="search_rdb" name="app_id" />
<field column="id" name="id" />
<field column="scopeId" name="SCOPEID" />
<field column="name" name="NAME"/>
<field column="DEFINITION" name="DEFINITION"/>
<field column="<attributeName>" name="<solrFieldName>"/>
</entity>
</InsertSolr>
</category>
where:
<attributeName> is the name of the attribute (for example, MY_DESCRIPTION).
<solrFieldName> is the Solr field in which you want to store the attribute. This field is an optional field. If this field is not set, then by dedault, the column attribute name is considered for this field.
For multi-language attributes, you must add corresponding field definitions to the managed-schema file. For example:
<field type="text_en" indexed="true" stored="true" multiValued="no" name="MY_DESCRIPTIONen"/>
<field type="text_de" indexed="true" stored="true" multiValued="no" name="MY_DESCRIPTIONde"/>
The field names must match the attribute’s field name in the index service XML file followed by the Rochade language code.
The managed-schema file contains predefined field types for most languages. For information on how to add a new field type, see https://cwiki.apache.org/confluence/display/solr/Language+Analysis#LanguageAnalysis-Language-SpecificFactories.
Indexing Additional Languages
By default, the index for multi-language Rochade environments contains entries for English and German. This section describes how to index additional languages.
To add an additional language definition to the index
- Find out the language code for the additional language in Rochade.
- Open the directory that contains the shared configuration for the Solr cores
(such as, \solr-8.6.1\server\solr\configsets\metaApp_configs\conf). - Open the managed-schema file for editing.
- Add the following entry to index new languages:
- Save your changes.
- Add the language code to the PROJECTION_LANG setting in the setenv.bat file.
- Restart the Solr server and run the indexing utility.
For details, see the ASG-Metability System Administrator’s Guide.
<dynamicField name="*_<langCode>_txt" type="text_rochade" multiValued="false" indexed="true" stored="true"/>
where:
<langCode> is the Rochade language code (for example, es).