
Create Database Datasource
This type of datasource allows the app to query data from a database.
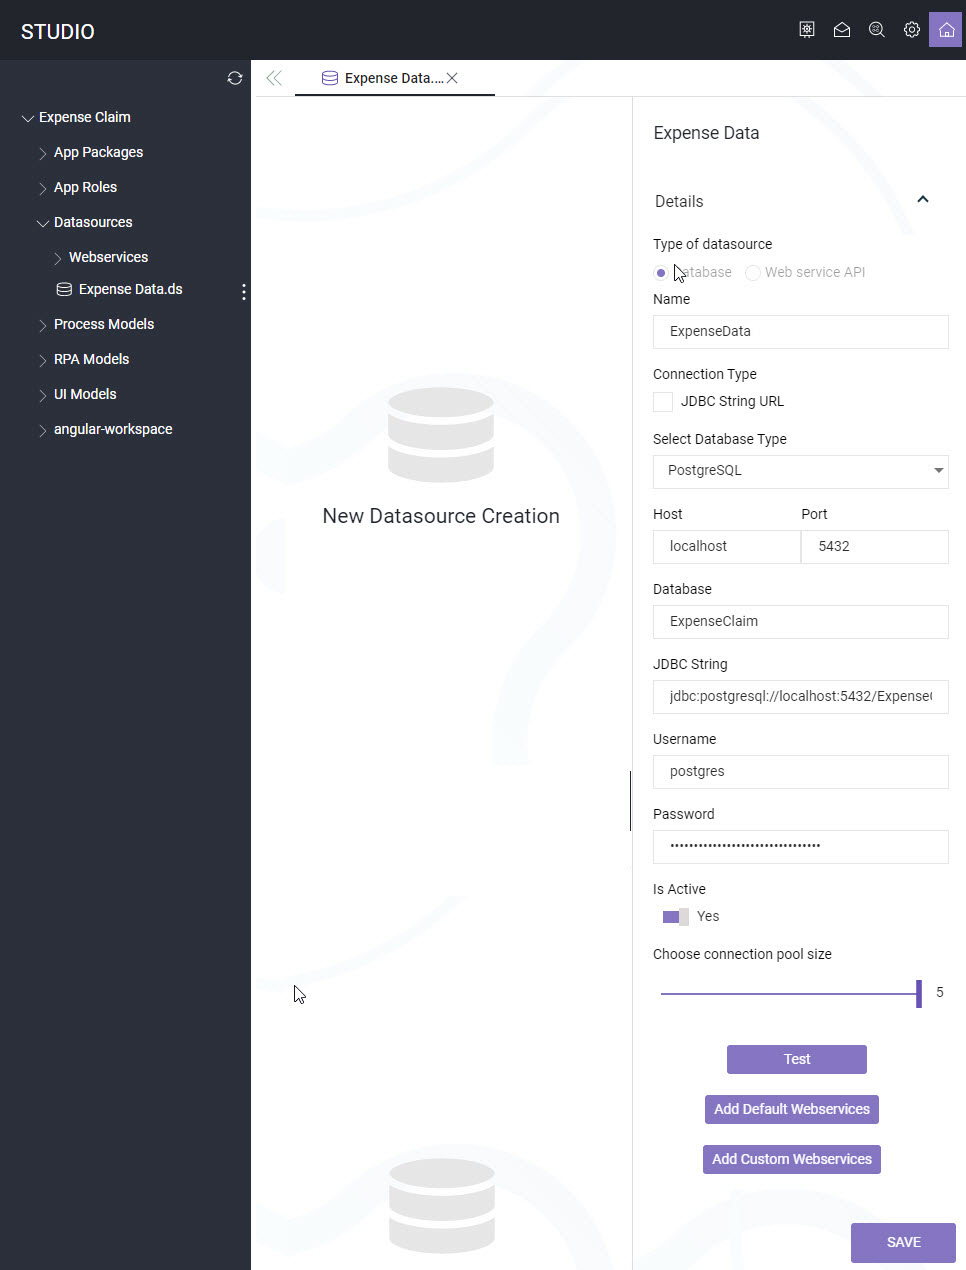
Perform the following steps:
- In ASG-Studio, go to the project in which you want to add Datasource.
- Navigate to the Datasources folder, click New and then click Datasources from the context menu.
- As Type of Data source select Database.
- Enter a name for the datasource in the Name field.
- Under Connection Type, choose either JDBC String (Java Database Connection String) to manually enter the connection string, or Database Type to fill in the database details and let the system form the JDBC string for you.
- Enter the Username and Password that give access to the database, and under Is Active, select whether these user credentials are currently active or not.
- Use the Choose connection pool size slider to choose the number of connection pools to create for the JDBC string. You can use a maximum of 5 connection pools for each JDBC string.
- Optionally, if you have set the user credentials as active, you can test the connection by clicking Test.
- Click Save.
The datasource name can contain only alphanumeric characters and space. The name can start only with a letter. The name cannot contain special characters. The maximum length of the name is limited to 30 characters.
The database datasource is created. You can now add webservice methods to the datasource.