Advanced Queries
The Advanced Query option is available in the context menus for subject areas and item types, for selected items, and in the Query menu when a subject area, an item type, or an item has the focus. The option provides a cascading menu with an Edit option and a list of previously defined advanced queries. You can run any one of them by clicking the pertinent entry in the list.
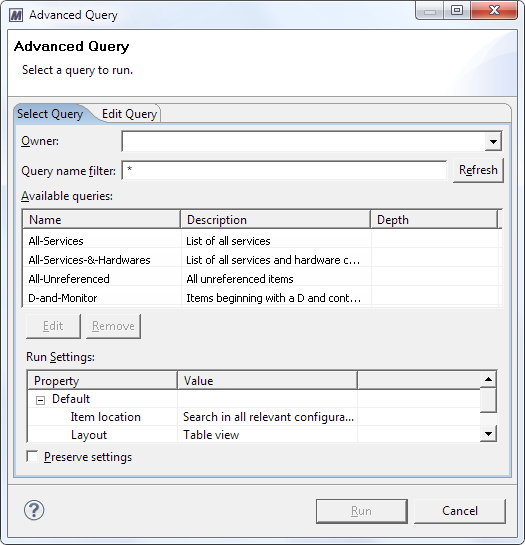
Running an existing Advanced query using the Advanced Query dialog
- Select Query
 Advanced Query
 Select.
 - Select a query from the list. If you want to filter the list so that only some of the available queries are shown, you can use these options:
- Select the empty entry in the Owner drop-down list to list all available queries, or any other entry to list only queries that were created by that particular user.
- To filter the list by query name, enter a character string in the Query name filter field. You can use wildcard characters.
- Edit: Brings the dialog’s Edit Query tab to the foreground, displaying the query definition. You can modify the definition and then store it in the database.
- Remove: Deletes the query. It is no longer available for execution.
- Specify runtime settings for the query.
- In the Run Settings list, you can specify values for these properties:
- In Item location, you can specify if items are searched in all relevant configurations or only the work configuration.
- In Scope of Search, you can specify if and how the items of the Item List tab are considered:
- The Layout for advanced queries is fixed (that is, Table view).
- In the Item List tab, you can specify items for which the query will be applied.
- After you have selected a query and all runtime settings, click Run.
The Advanced Query dialog opens with the Select Query tab in the foreground.
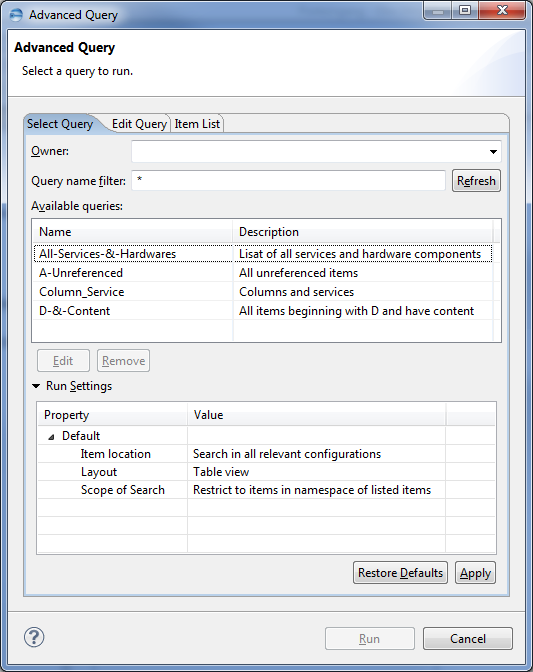
After you made changes in any of these two fields, click the Refresh button to see changes in the Available queries list.
These buttons are enabled when you select a query from the list:
Do not restrict to items of the list - considers all items, independent of the items listed in the Item List tab.
Restrict to items of the list - considers the items listed in the Item List tab (that is, items in the namespace of the listed items are not considered).
Restrict to items namespace of the of the listed items - considers the items listed in the Item List tab and items in the namespace of them.
If you have initiated an Advanced query for a selected item list, this tab contains the selected items:
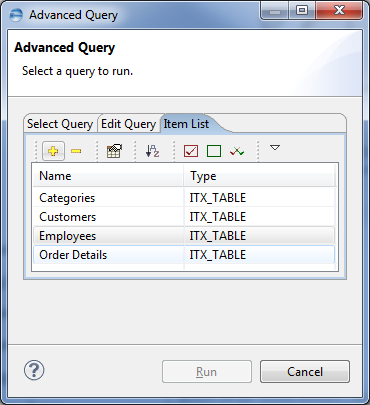
You can use the icons in the Item List tab to add or delete items to the item list.
In the Run Setting, if Do not restrict to items of the list is selected, the Advanced query does not consider items list in this tab.
Running an existing Advanced query directly
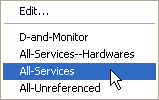
| > | Select Query Advanced Query from the main menu bar. In the cascading menu that opens, select the desired query. Advanced Query from the main menu bar. In the cascading menu that opens, select the desired query. |
- Select Query
 Advanced Query
 Edit from the main menu bar.
 - Specify whether you want to link the filter conditions with AND (all conditions must be true), with OR (any of the conditions can be true), or with XOR (exactly one of the conditions must be true).
- Click the Add Filter button. The Add Filter dialog is displayed.
- Repeat step 3 as many times as necessary.
- Click the Check Query Syntax button to check the query’s syntax. If the syntax is valid, the Query Name and Description edit fields are enabled.
- Enter a name for the query in the Name field, and optionally a short description in the Description field and then click the Save button to save the query.
The Advanced Query dialog opens with the Edit Query tab in the foreground, where you can define a new query.
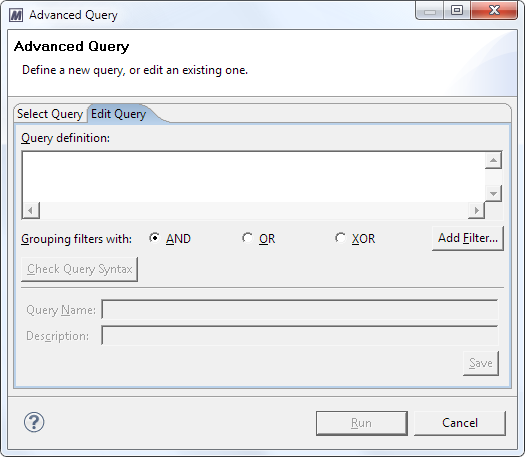
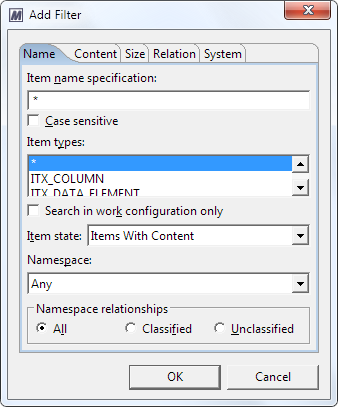
The dialog is similar to the conditions area of the Search for Items dialog (see Item Search Queries).
When you have finished defining a search condition, click OK to accept the defined condition, and to close the Add Filter dialog. The filter conditions are added to the Query definition field in text form.

You also can click Run to run the query. The query result opens in the Editor frame.
Editing an Advanced query
- Select Query
 Advanced Query
 Edit.
Edit. - Click the Select Query tab to bring it to the foreground.
- Select the query that you want to edit.
- Click the Edit button to bring the Edit Query tab to the foreground and display the definition of the selected query.
- Edit the query definition as described from step 2 to step 4 under Creating a new Advanced query.
- Click the Check Query Syntax button to check your changes. If the syntax is valid, the Query Name and Description edit fields are enabled.
- Click the Save button to save the query changes.
- Click Run to run the modified query.
The Advanced Query dialog opens with the Edit Query tab in the foreground.
Or
Click Cancel to close the Advanced Query dialog.
