Configuring LDAP Authentication
LDAP authentication enables DI Server to perform user identification and password checking by accessing authentication data located in an LDAP directory. This topic describes how to set up and activate LDAP authentication.
Opening the LDAP Configuration view
- Select Server > Configure LDAP Authentication from the main menu.
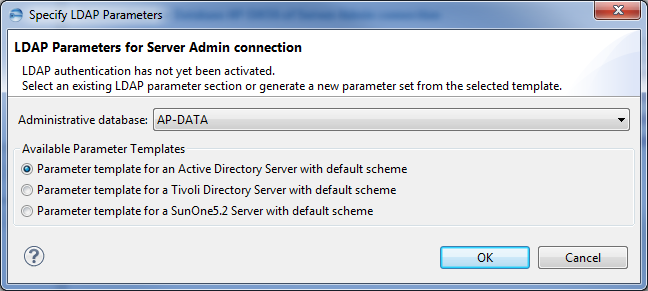
- From the Administrative database drop-down list, select the ADB or ADB candidate.
- In the Available Parameter Templates group, select the option that pertains to your LDAP directory server. The following table lists the options pertaining to the LDAP directory server.
Option Description Parameter template for an Active Directory Server with default scheme
Starts the LDAP configuration with default settings for authenticating users against an Active Directory Server.
Parameter template for a Tivoli Directory Server with default scheme
Starts the LDAP configuration with default settings for authenticating users against an IBM Tivoli Directory Server.
Parameter template for a SunOne5.2 Server with default scheme
Starts the LDAP configuration with default settings for authenticating users against a SunOne5.2 Server.
- Click OK.
Or
In the Administration tree, right-click the server connection for which you want to open the LDAP Configuration view and then select Configure LDAP Authentication from the context menu.
The Specify LDAP Parameters dialog box is displayed.
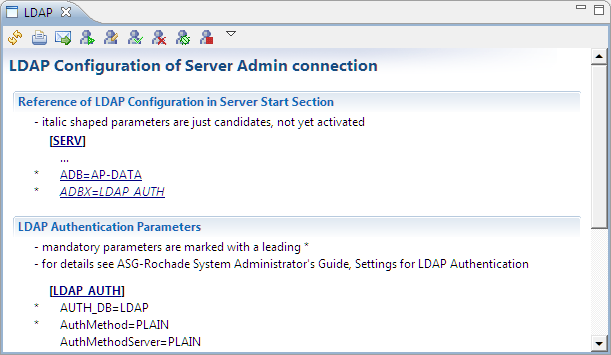
The LDAP Configuration of Server <connection name> view is displayed.
The following table lists the controls in the local toolbar.
| Icon | Command | Function |
|---|---|---|
|
|
Refresh the Current Page |
Reloads the page content. |
|
|
Print the Current Page |
Opens a dialog to print the page content. |
|
|
Send the Information as Mail |
Opens a new e-mail in your standard mail program to send the page content via mail. |
|
|
Set Up and Test LDAP Connection Parameter |
Opens a dialog for configuring the LDAP parameters. To know more, see Setting up the LDAP authentication. |
|
|
Edit LDAP Connection Parameter |
Opens a dialog for editing the LDAP parameters. To know more, see Editing the LDAP settings manually. |
|
|
Enable LDAP Authentication |
Enables LDAP authentication. |
|
|
Disable LDAP Authentication |
Disables LDAP authentication. |
|
|
Enable LDAP Debugging |
Enables the LDAP debugging functionality. |
|
|
Disable LDAP Debugging |
Disables the LDAP debugging functionality. |
Setting up the LDAP authentication
- Open the LDAP Configuration view.
- Click the Set up and Test LDAP connection parameter icon in the local toolbar.
- Enter the host name and port where your LDAP server can be reached.
- Click Check Network Parameter to test the connection to the LDAP server. It verifies if the LDAP server is reachable at the specified host and the port number.
- Specify what type of encryption method you want to use for the LDAP connection. The settings for the specified Encryption method are validated using the Server authentication check on Authentication page.
- Enter the path of the certificates for UNIX and z/OS.
- Click Next to continue. The Authentication page is displayed.
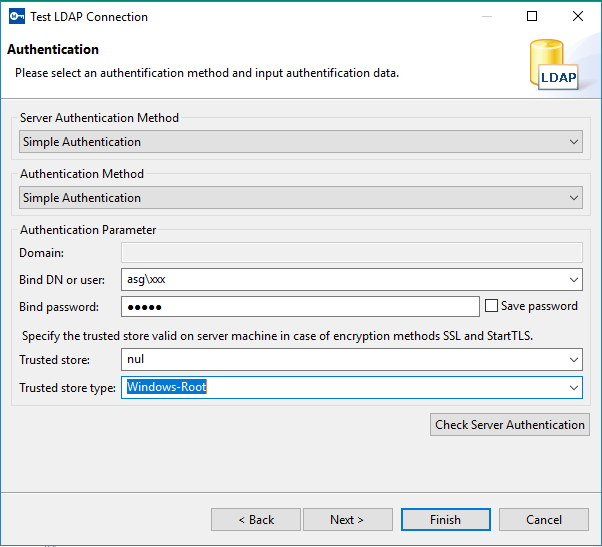
- In the Server Authentication Method drop-down list and Authentication Method drop-down list, select an appropriate Authentication method. Depending on the selected method, further parameters must be specified.
- Select External Authentication as Server Authentication Method or Authentication Method and perform the following:
- In the Domain field, enter the name of a valid domain name to support external server authentication for Windows.
- Select Simple Authentication as Server Authentication Method or Authentication Method and perform the following:
- In the Bind DN or user field, enter the name of a valid LDAP user account.
- In the Bind password field, enter the password for the user account.
- If you have selected an encryption method different from None on the Network Parameter dialog, then you must specify the parameters for the Trusted store.
- Enter the name of the Trusted store and the Trusted store type. The values of the Trusted store and the Trusted store type fields depend on the operating system that the server is running. The common value to Trusted store and Trusted store type fields are:
- Windows
- Trusted store: nul
- Trusted store type: Windows-Root
- s/OS(RACF settings)
- Trusted store: safkeyring://auth/*
- Trusted store type: JCERACFKS
- UNIX system
- The server authentication check is not supported for both the encryption methods.
- Click Check Server Authentication to verify the server authentication settings.
- Click Next to continue.
- Click Fetch User Base DNs. Depending on your settings, the Login for LDAP Search dialog is displayed.
-
In the Bind DN or user field, enter the name of a valid LDAP user account.
-
In the Bind password field, enter the password for the user account.
-
If you have selected an encryption method different from None on the Network Parameter dialog, then you must specify the parameters for the Trusted store. Enter the name of the Trusted store and the Trusted store type.
-
Click OK, a message is displayed that lists the fetched user base DNs.
- Close the message and then select the user base DN that you want to use from the User Base DNs drop-down list.
- Click Fetch Group Base DNs. A message is displayed that lists the fetched group base DNs.
- Close the message and then select the group base DN that you want to use from the Group Base DNs drop-down list.
- Click Finish.
- Click Save to save the LDAP configuration settings to the server initialization file.
- In the LDAP Browser tree, expand the External Users node to trigger an initial search in the LDAP directory.
- When you have finished testing the LDAP configuration, select Window > Close Perspective to close the LDAP perspective.
The Network Parameter dialog box is displayed.
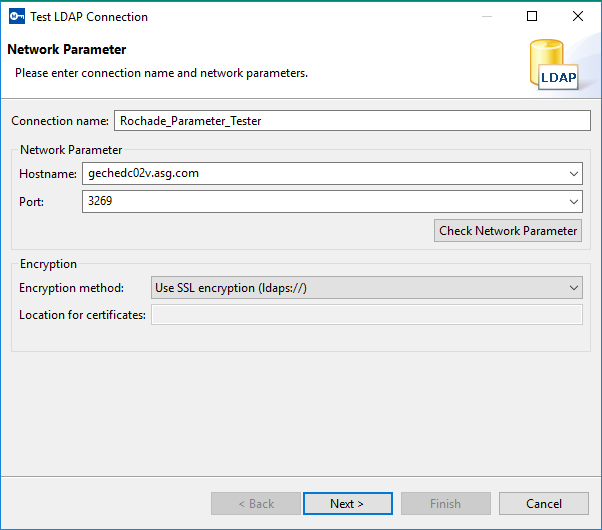
Under Windows, the access via default port 389 only allows to search in Active Directory in the local structure of a specific domain controller.
If the account for which attributes or groups are to be retrieved or which is to be authenticated is not maintained in the local structure, you must specify a port for the search in the global catalog (that is, 3268 for TCP or 3269 for LDAP via SSL). The port must be activated by the system administrator.
If the connection is tested successfully, the following message is displayed.

Otherwise, an error message is displayed.
Or
If the Server authentication check is successful, this message is displayed.

Otherwise, an error message is displayed.
The Browser Options page is displayed.
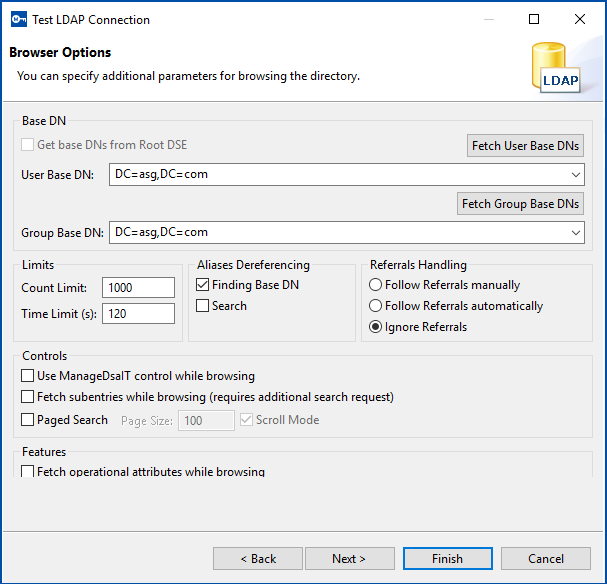
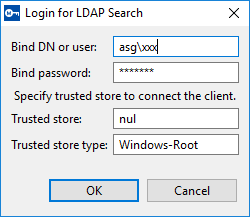

A message is displayed informing you that the LDAP settings have changed.

The LDAP perspective is displayed.
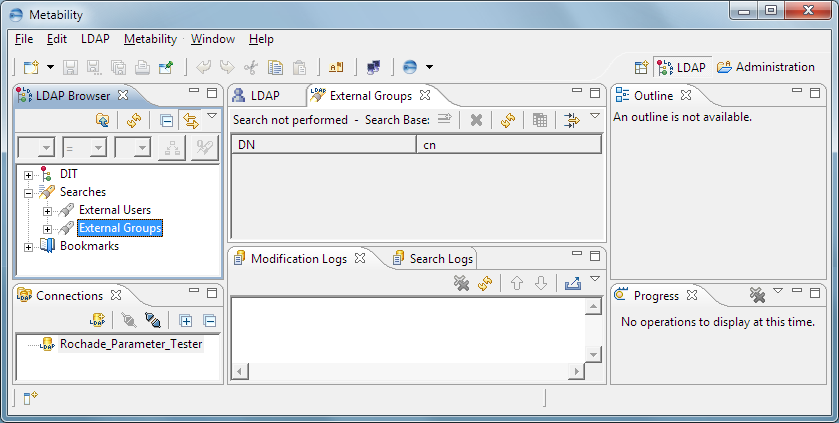
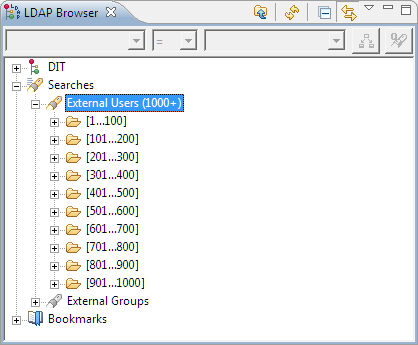
The value in parenthesis on the External Users node indicates the approximate number of user entries that have been found in the LDAP directory.
A value of 0 and the message No Results indicate an error in the LDAP configuration, as shown in the following example.

To resolve the error, use the LDAP Browser plug-in to modify and retest the configuration until the user search returns the correct results. For help with using the plug-in, see the LDAP Browser User’s Guide available under:
http://directory.apache.org/studio/static/users_guide/ldap_browser/
When you have identified the error, you must manually correct it in the server initialization file. For more information, see Editing the LDAP settings manually.
You are returned to the LDAP Configuration view and the resulting LDAP configuration in the server initialization file is displayed.
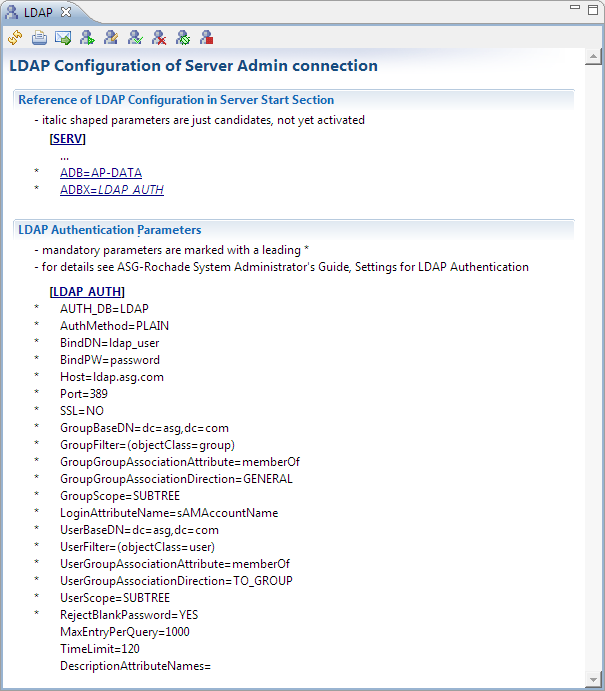
For information on how to activate the LDAP configuration, see Enabling and Disabling LDAP Authentication.
Editing the LDAP settings manually
- Open the LDAP Configuration view.
- Click the Edit LDAP connection parameter icon in the local toolbar.
- Edit the settings in the Parameters field as required. You also can add new settings.
- Click Save to save your changes.
The Edit Rochade Configuration Sections dialog box is displayed.
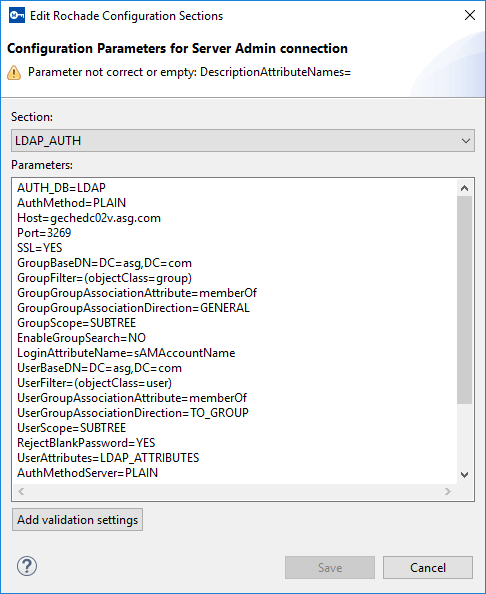
The Edit Rochade Configuration Sections dialog box displays the section of the server initialization file where the LDAP settings are defined.
AllowInternalAccounts=YES
For detailed information on the available settings, refer to LDAP authentication in the ASG-DI Administration Online Documentation.
If the Parameters field contains a UserAttributes entry, the referenced section (for example, LDAP_ATTRIBUTES) can also be selected in Sections drop-down list. If not, use the Add validation settings button to create this entry. The UserAttributes section specifies the LoginAttributeName parameter which refers to the LDAP attribute that contains the account name.


