Defining a Query Path
In addition to working with computed query paths, you can define customized query paths that can be stored in the database for later reuse. Using the Work on Query Paths option, you can create new path definitions, copy existing path definitions with new names, and modify existing path definitions. This option is available whenever a subject area is open.
Creating a new path definition
- Open the subject area for which you want to define the query path.
- Select New Query Path from the Query menu or from the context menus for subject areas and item types in the navigation tree.
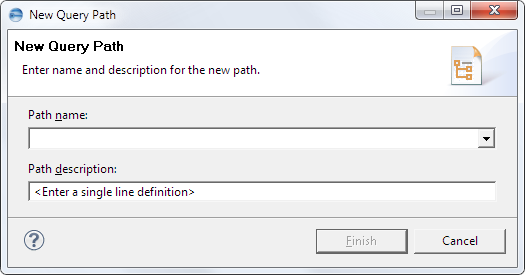
- Enter a path name and a short definition and then click Finish.
The New Query Path dialog is displayed.
Or
- Select the General tab and enter a short description for the new query path in the Description field. The description will be useful later when you save the Path query to the database.
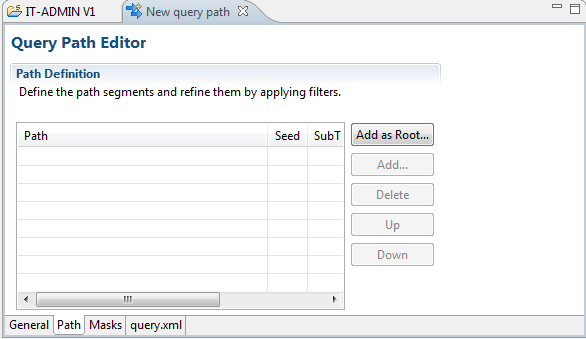
- Adding root item: Click the Add as Root button to start working on the path definition or to add further root item types to the path definition.
- Select a computed path and click OK to display the path definition in the item table on the Path Definition panel of the Query Path Editor.
- To define further root path segments, repeat step 3 and step 4.
- To define further path segments, click Add and proceed as described in step 3 and step 4.
- On the Path Definition panel, click one of the next level entries in the item table. The path details for the selected entry is displayed on the Refine Path Segment panel.
- Click the Masks tab at the bottom of the Query Path Editor. The Mask Definition panel is displayed on the Query Mask Editor subpage.
- Enter a name for the mask in the Mask name field and then click New. A column for the new mask is added to the table.
- To change the search depth, select the mask from the Mask name drop-down list and then a new search depth from the Search depth drop-down list.
- Clear the check boxes of the item types that you want to hide in the query result.
- To define further masks, repeat the procedure from step 9 to step 11.
- To delete a mask, select it from the Mask name drop-down list and then click Delete.
- To rename a mask, select it from the Mask name drop-down list and then click Rename to open the Rename Mask dialog where you can enter a new name for the mask.
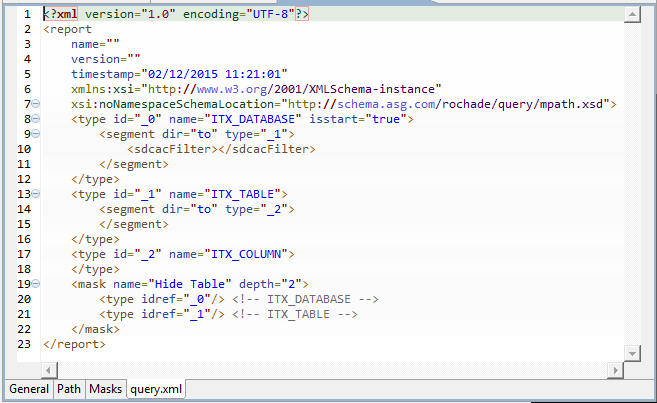
- To display the path definition in XML representation, click the query.xml tab at the bottom of the Query Path Editor.
- When you are finished adding path definitions, refining path segments, and defining masks, click the Save icon
 on Metability’s main toolbar to save your changes.
If you not have specified a path name, the Query Path Name dialog is displayed.
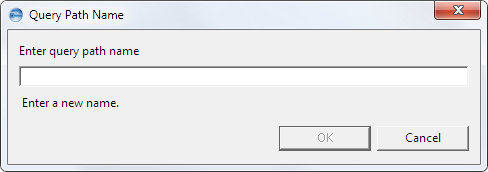
- Enter a name for the new query path.
- Click OK to save the query path.
The path now is available in the Path Query option. To know more, see Running a Path query and Running a Path query using the Path Query dialog.
The Query Path dialog is displayed in the Add Computed Query Path page.
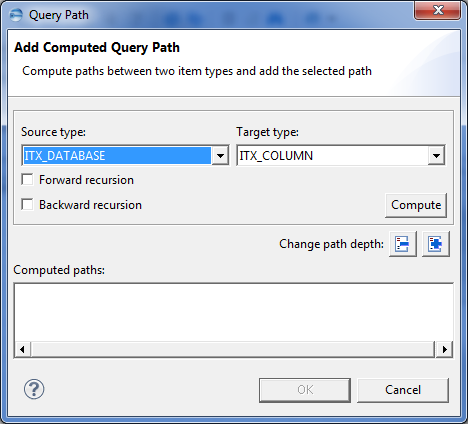
This Query Path dialog is identical to the Path Query dialog described in Path Queries. To know how to compute a path, see Running a computed Path query.
When you call the Query Path dialog for the first time, you can select the source type (which, in this case, is the seed item type for the query). In all further instances of the Query Path dialog, the item type that is currently selected in the Query Path Editor is set as the source type, and you cannot change it in the dialog.
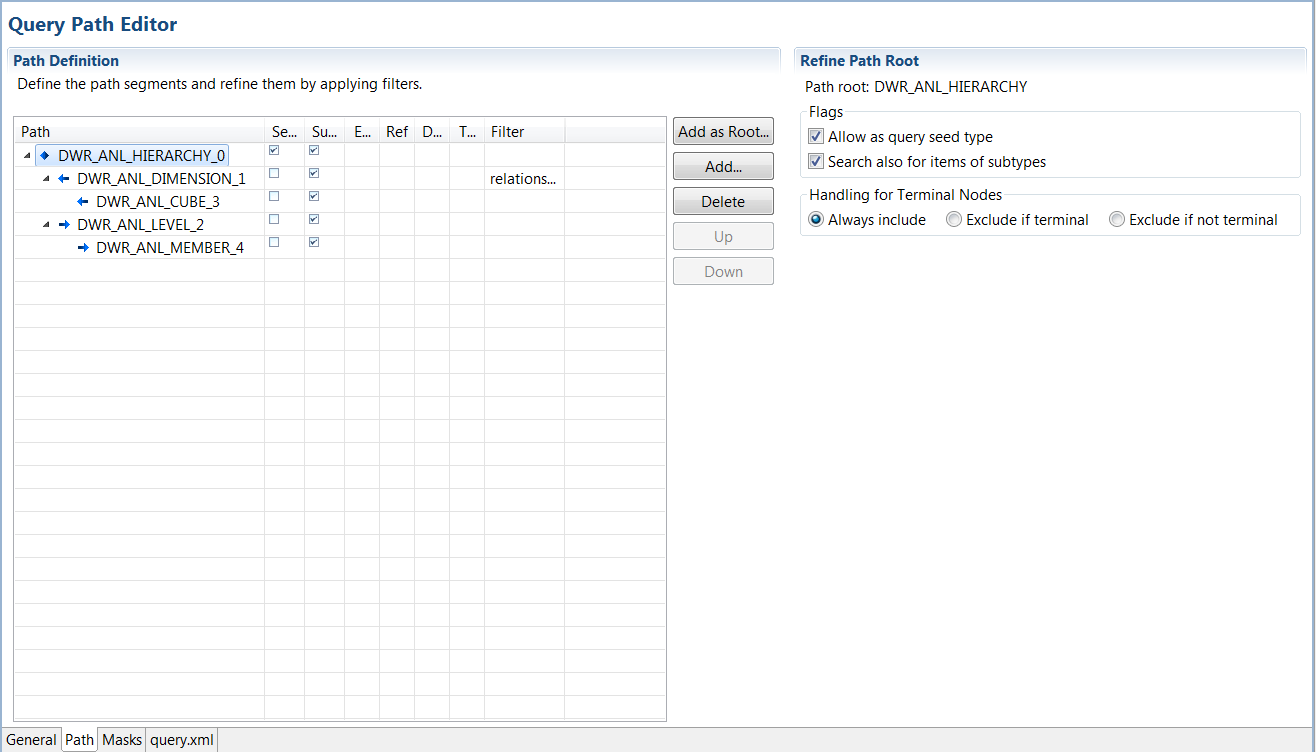
To remove a particular segment, select an item type and then click Delete. This removes the selected type and all subordinate item types from the Path definition.
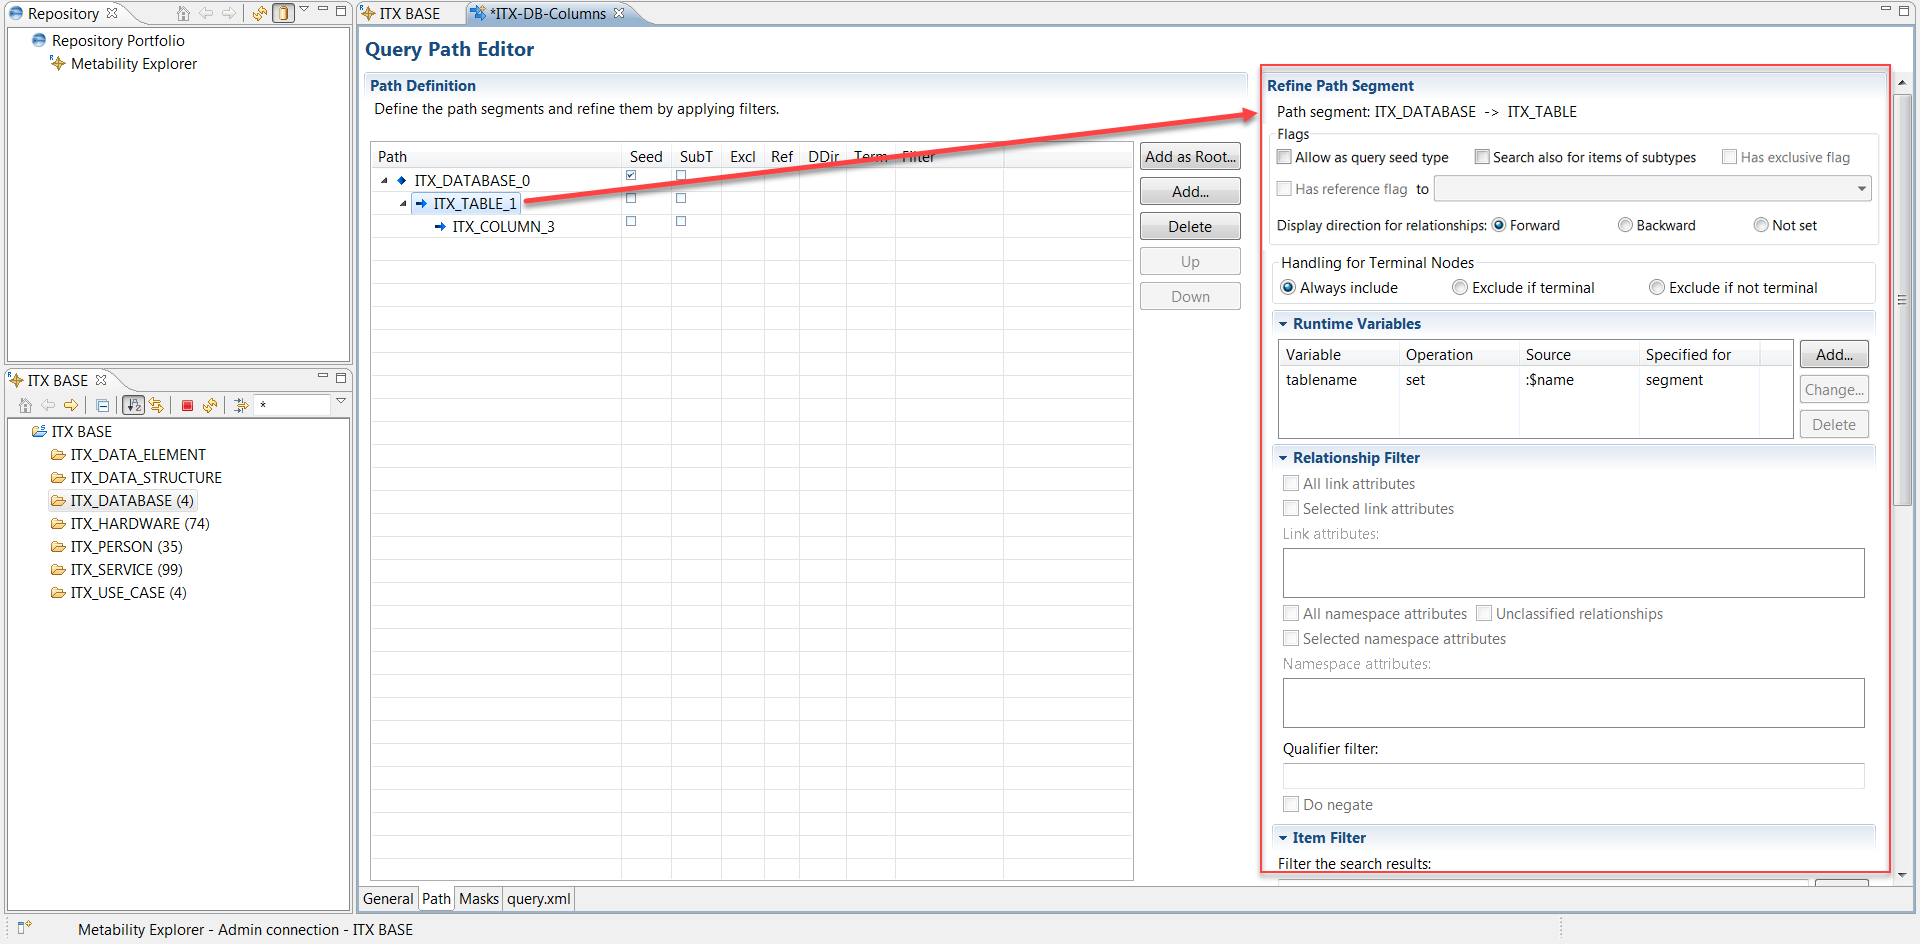
The path segment contains the path between the item type you clicked and its superordinate item type in the item table. In this example, ITX_TABLE was clicked and ITX_DATABASE is the superordinate item type. You can now refine this path segment. To know more, see Refining Path Segments.
You can hide the items of specific types in query results that are based on the path by defining a mask for it. For more information on this subject, see Path Queries. To define a mask, continue to step 8.
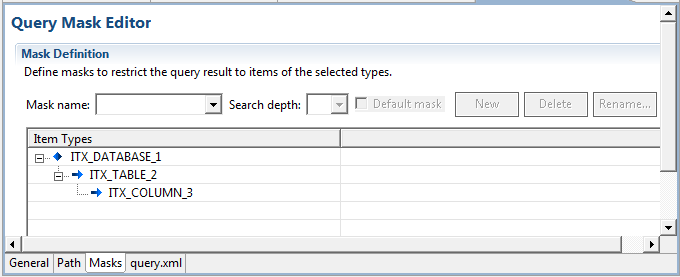
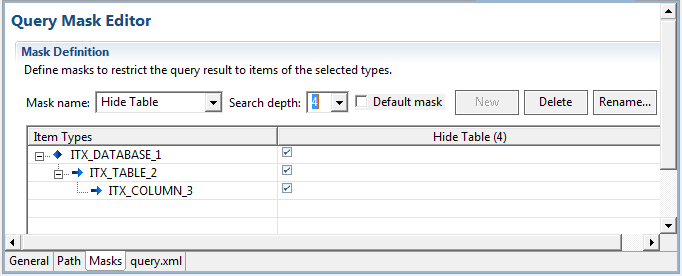
The number in parentheses in the column header indicates the search depth for the mask.
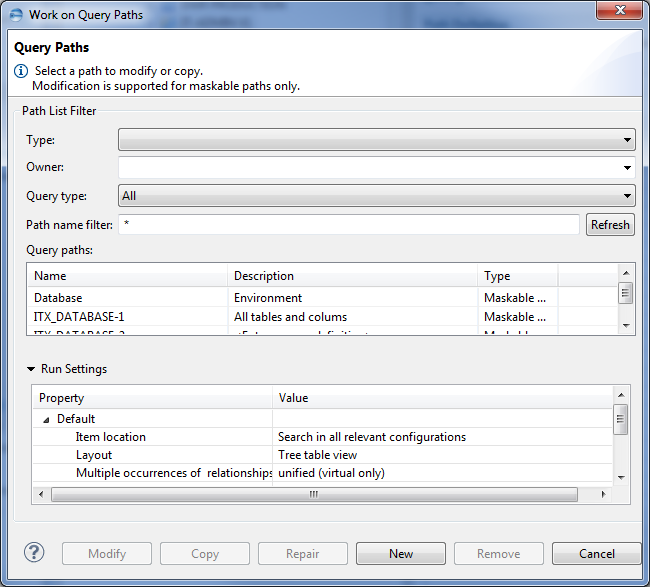
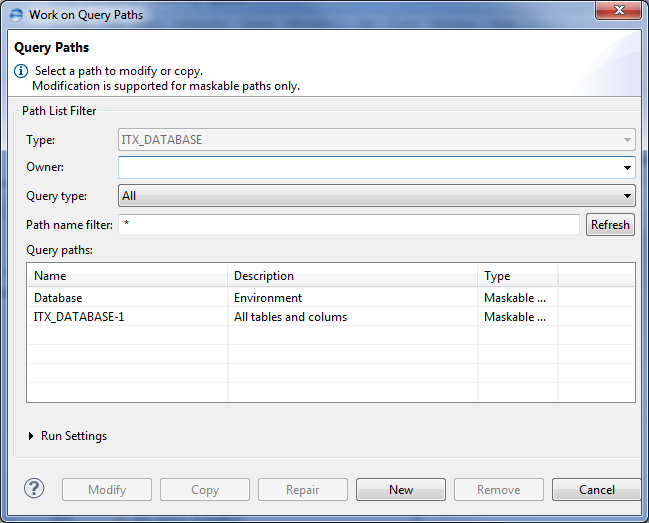
- With a subject area open, select the Work on Query Paths option from the Query menu. Alternatively, the option also is available in the context menus for subject areas and item types in the navigation tree.
- In the Path List Filter area, limit or widen the available path selection.
- Select the seed item type for which you want to list the query paths from the Type drop-down list. The behavior of the Type drop-down list depends on the situation in which you opened the Work on Query Paths dialog.
- If you selected an item type or item before opening the dialog, the Type drop-down list is set to the corresponding item type and you cannot modify it. The Query paths list then contains all paths defined for that type.
- If you selected multiple item types, items of multiple types, or a subject area before opening the dialog, no particular path is selected (indicated by the empty entry in the Type drop-down list) and the Query paths list contains the query paths defined for all item types.
- Select or enter the name of the owner of the paths you want to list from the Owner drop-down list. You can type in any user ID that is known to you.
- Select whether all available query paths, only maskable query paths, or only non-maskable paths should be listed from the Query type drop-down list.
- Enter a search string for the query paths that you want to list in the Path name filter field. You can enter wildcard characters.
- Click the Refresh button to update the Query paths list.
- Select the path that you want to modify and then click the Modify button.
The Work on Query Paths dialog is displayed in the Query Paths page.
The selected query path opens in the Query Path Editor.
You can proceed to modify and save the path as explained from step 2 to step 14 in Creating a new path definition.
- With a subject area open, select the Work on Query Paths option from the Query menu. Alternatively, the option also is available in the context menus for subject areas and item types in the navigation tree.
- Select the path you want to copy.
- Click the Copy button.
The Work on Query Paths dialog is displayed. For a description of the dialog, see Editing a query path.
If the path you want to copy was defined without a start type for the query, the Copy button remains inactive and the following message is displayed in the dialog’s top area.
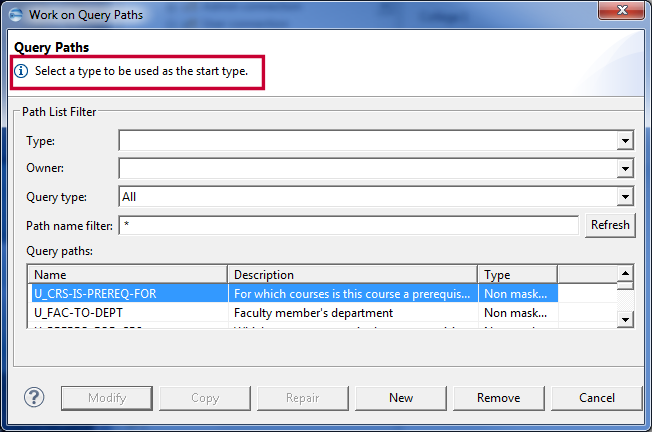
In this case, select an item type from the Type drop-down list, click Refresh, and then select again the path you want to copy.
A copy of the selected query path opens on the Query Path Editor.
Proceed to modify and save that path as explained from step 2 to step 14 in Creating a new path definition.
If the path conversion tool encounters problems with non-maskable paths that cannot be resolved, an error message is displayed, such as the one shown in the following example.

In a case like this, ASG advises you to create a new query path definition that corresponds to the non-maskable one.
Repairing a query path
- With a subject area open, select the Work on Query Paths option from the Query menu. Alternatively, the option also is available in the context menus for subject areas and item types in the navigation tree.
- Select the path you want to repair. If Metability detects an error in the path, a message is displayed in the dialog’s top area and the Modify and Copy buttons are disabled.
- The path’s XML representation is not well-formed.
- It cannot be validated successfully against the specified XML schema.
- The inner logic is not correct. For example, inconsistent assignment of IDs, segment elements without type definition, and so on.
- Click Repair. A detailed error message is displayed.
- Click OK to confirm the message.
- Correct the XML representation.
- Click the Save icon
 in the main toolbar to save your changes.
The Work on Query Paths dialog opens. For a description of the dialog, see Editing a query path.
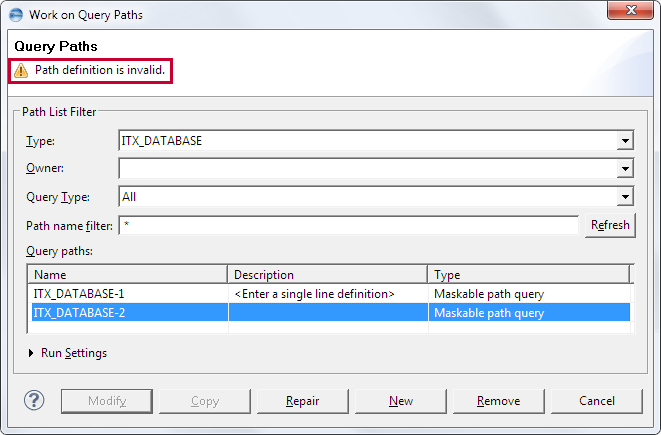
Metability detects these kinds of errors in query path definitions:

The Query Path Editor opens in repair mode.
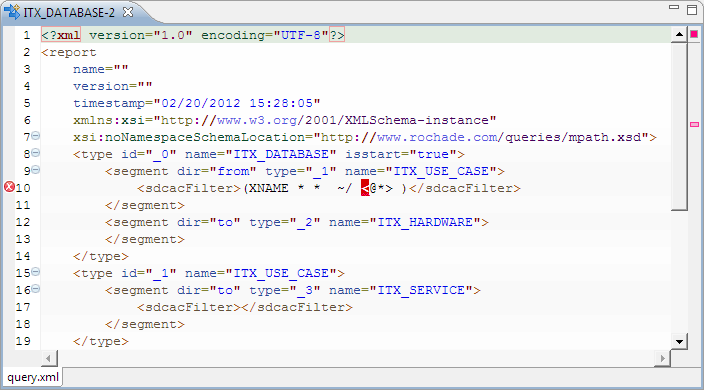
The editor highlights errors in the XML syntax and the lines in which they occur. Errors that pertain to the XML schema or to missing XML elements, however, are not highlighted .
In the example, the error is caused by the less than symbol (<) in the SDCAC filter condition. The symbol should be replaced with its predefined lt entity (<).
Deleting a query path
- With a subject area open, select the Work on Query Paths option from the Query menu. Alternatively, the option also is available in the context menus for subject areas and item types in the navigation tree.
- Select the path you want to delete and then click Remove. A confirmation dialog is displayed.
- Click OK to confirm the deletion.
The Work on Query Paths dialog opens. For a description of the dialog, see Editing a query path.


