
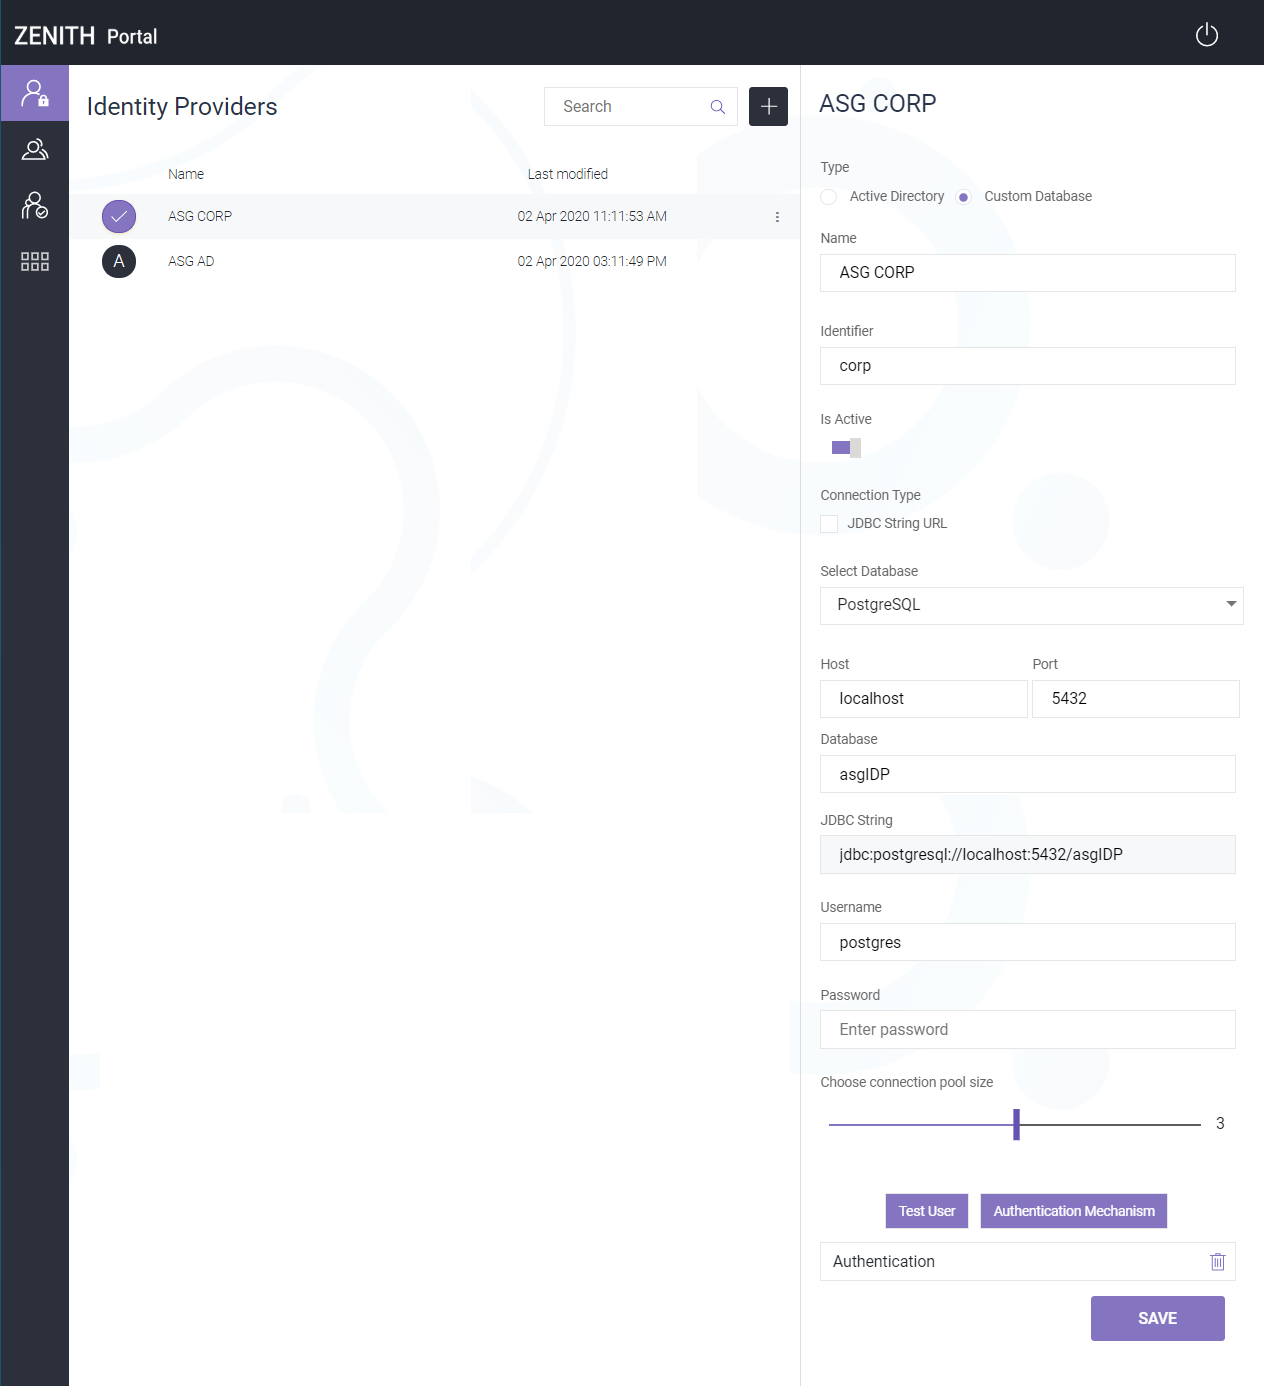
Create Identity Provider with Custom Database
The custom database helps to use your user database instead of copying the user data to LDAP.
Perform the following steps:
- Login to ASG-Zenith Portal (On-Premises) as Organization Administrator.
- Navigate to Identity Providers and click Add. If you are creating your first Identity Provider, click Create Now.
- Select Custom Database as Type.
- Enter Name for the identify provider. The name is used to distinguish the identity provider's connections in ASG-Zenith Portal (On-Premises).
- Enter a unique Identifier for the identity provider connection. This helps to authorize the users with appropriate role when same user name is found in more than one database.
- Choose either JDBC String (Java Database Connection String) to manually enter the connection string, or Database Type to fill in the database details and let the system form the JDBC string for you.
- If you select JDBC String, enter the string in the corresponding format.
- If you select Database Type, enter the required connection parameters.
- PostgreSQL 10 or higher
- Oracle 12c or higher
- Microsoft SQL 2015 or higher
- MySQL 8 or higherMySQL database requires JDBC driver to enable ASG-Zenith Portal (On-Premises) to connect with your database. If you are using MySQL as your user database or apps database, you must add MySQL Connector/J to the ASG-Zenith Portal (On-Premises) installation under the path ..\<ASG-Zenith Portal (On-Premises) installation folder>\bin\lib\. The required MySQL Connection/J driver (mysql-connector-java-8.0.19.jar) is currently available for download from this link.
ASG-Zenith Portal (On-Premises) supports the following database types to use as datasource for your apps:
- Enter the Username and Password that give access to the database, and set Is Active to Yes, to specify that the database is currently active and running.
- Use the Choose connection pool size slider to choose the number of connection pools to create for the JDBC string. You can use a maximum of 5 connection pools for each JDBC string.
- Click Save.
- Click Authentication Mechanism and specify the tables and columns that represent the users data in the database.
- Optionally, click Test and enter Username and Password of any user that exists in the database to verify the connection.
You can update the Identity Provider details as per your future requirements. You must enter the password every time you save the Identity Provider details.
The Identity Provider with custom database connection is successfully created.