Managing Subreport Retention
This topic provides information on updating the retention and security schedules for reports or subreports.
Introduction
When a subreport is sent to print, the Cypress Capture Driver converts the document into a Cypress format and sends it to the DocuVault. Inside the DocuVault, each page is stored individually. You can define the length of time that a DocuVault retains a document. Some users require that all documents be archived indefinitely. Other users, however, need documents to be archived only for a specific period of time. Once this time has been reached, Cypress automatically deletes the document from the DocuVault.
The original retention and security settings for a subreport are defined in its subreport definition (see Using the Document Tab). This topic discusses updating and verifying the settings specified in the definition.
Updating the Retention Settings of Archived Reports and/or Subreports
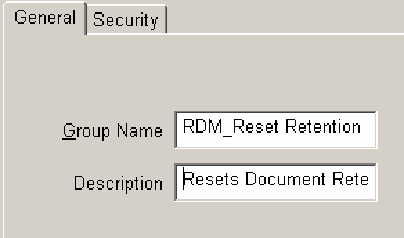
To simplify managing document retention, you can use RDM to reset the retention time for existing documents. You might find this useful when the retention policy changes for a class of documents that have already been archived in the DocuVault.
Do not use the RDM processor you create for any purpose other than resetting the retention of archived documents.
The updating changes the retention time of existing documents. It does not create a new document, but retains the existing document title, security, indexes, and creation dates.
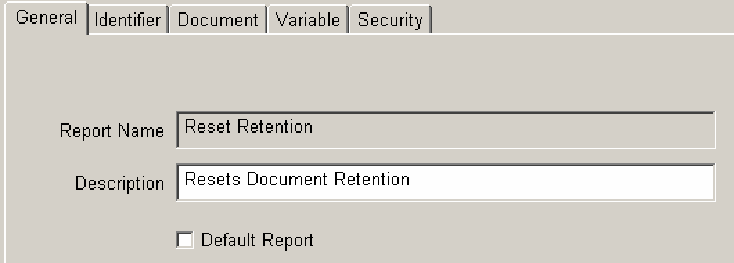
To update document retention for archived reports and/or subreports
ASG strongly recommends that you grant permissions to this RDM processor only to the Cypress Administrator. Allowing end users to reset document retention times can lead to documents with erroneous retention times.
|
1.
|
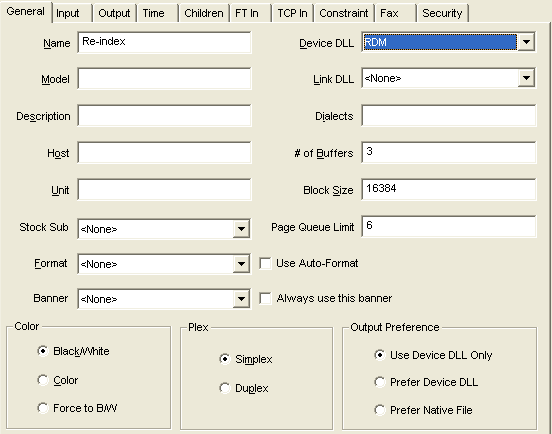
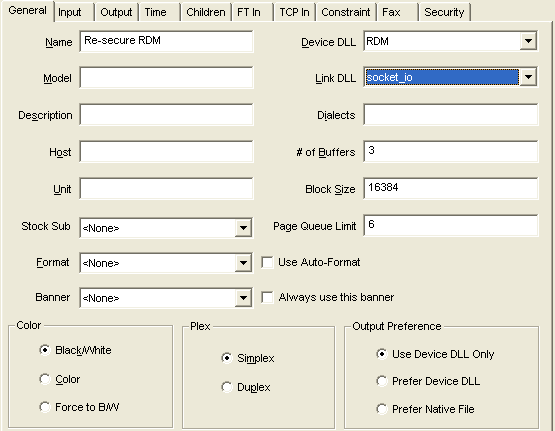
Open the Administration Tools module, and select the General tab if it is not already selected. |
Do not use this RDM processor for any purpose other than resetting retention times.
|
3.
|
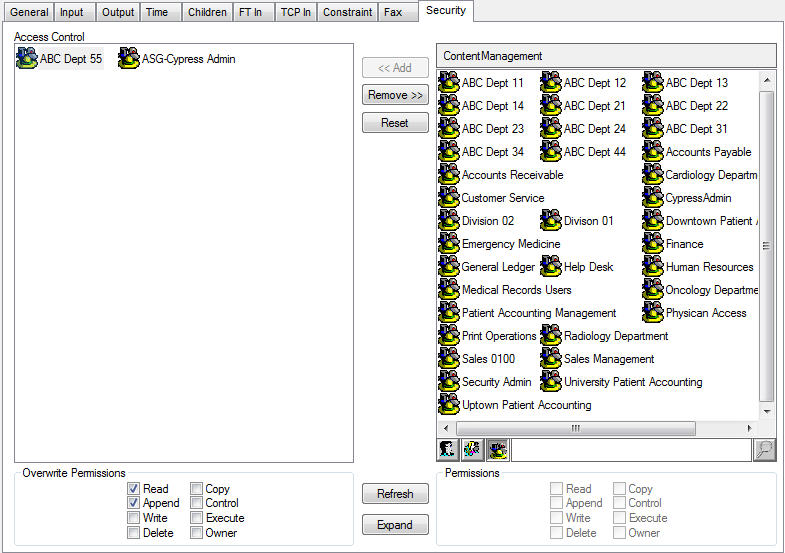
Select the Security tab and specify desired security settings. |
|
6.
|
Select the Identifier tab, and enter true to instruct the RDM processor to re-index all documents that are queued to the RDM processor. |
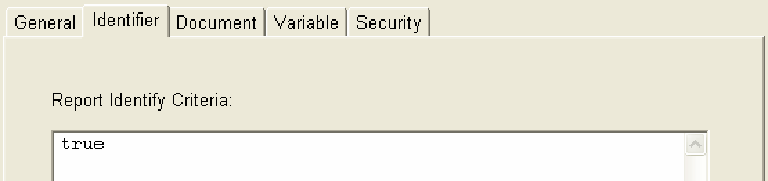
After changing the retention time, immediately set this value to false. This will prevent accidental changes to document retention settings.
|
7.
|
Select the Document tab. |
|
•
|
To retain documents indefinitely, select the Keep Forever option. |

|
•
|
To change the retention to a specific number of days, clear Keep Original and type the desired number of days in the Retain For (Days) field. |
|
–
|
Select the Document Creation Time option to count the retention days from the time of document creation; select the Processing Time option to count the retention days from the time of report processing. |
|
8.
|
Click the Apply button to save your report definition. |
|
9.
|
From the Knowledge Builder module (or from Cypress.Web), perform a query. The Folder Query tab allows you to preview and select the documents whose retention settings you want to change. |

|
10.
|
Open the desired documents to a DocuSpace. |
If any unwanted documents appear, remove them:
|
a.
|
Select the document’s node in the DocuSpace’s tree view. The document’s property pages will appear to the right of the tree view. |
|
b.
|
Click the Delete button at the right side of the screen. (Delete is the third button down, below Apply and Reset.) |
|
c.
|
A message box appears, asking you to confirm that you want to delete this document from the DocuVault. Click OK to continue with the deletion. If you click Cancel when the confirmation message box appears, the document will be retained. |
|
11.
|
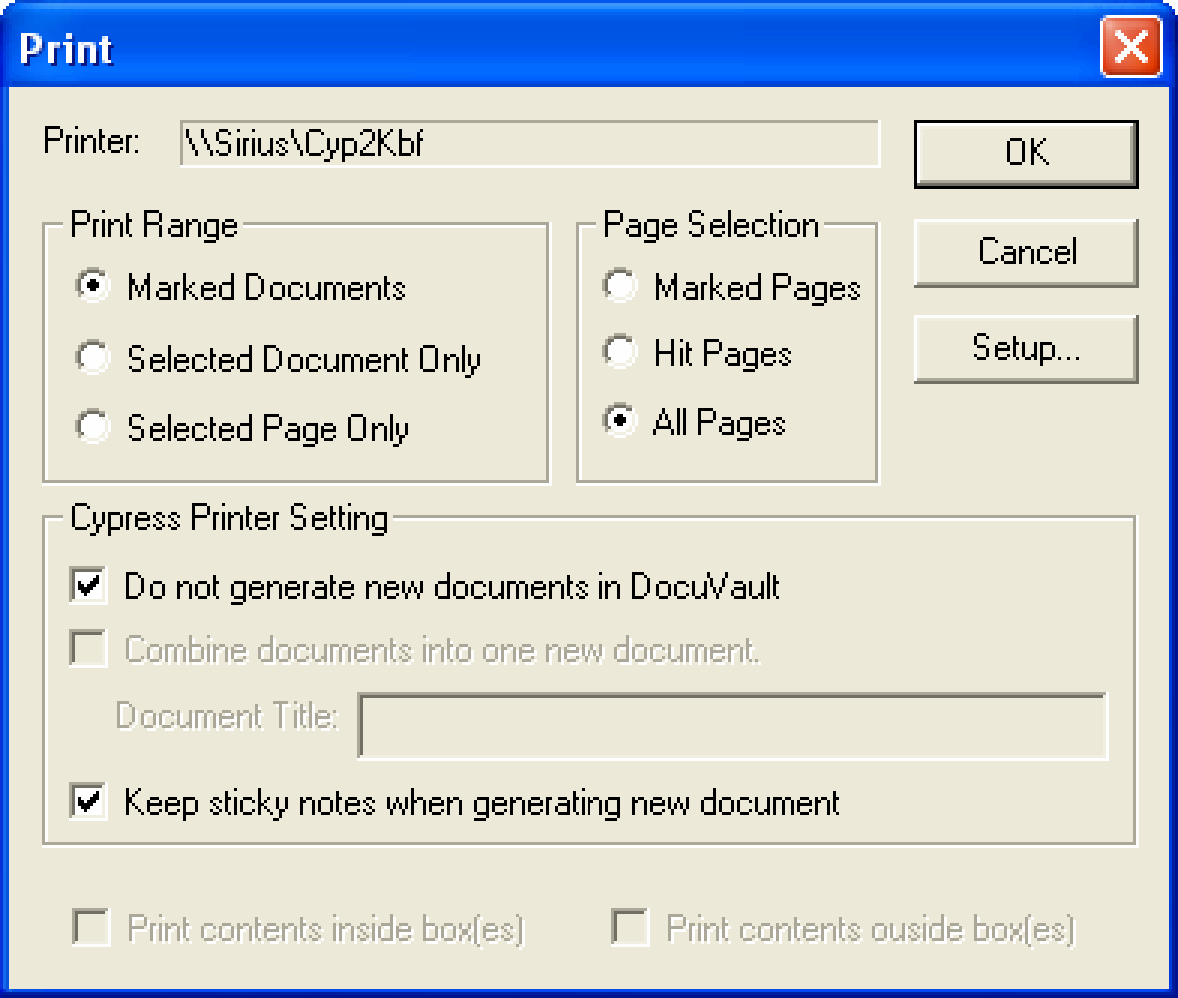
Select File Print to print the selected documents to the document Re-secure RDM processor. Ensure that you click the All Pages option button in the Page Selection area of the Print dialog; otherwise, document retention configuration will not occur. |
|
12.
|
Open Knowledge Builder (or Cypress.Web), and requery the documents. |
|
13.
|
Select several document, and open them in a DocuSpace. |
|
14.
|
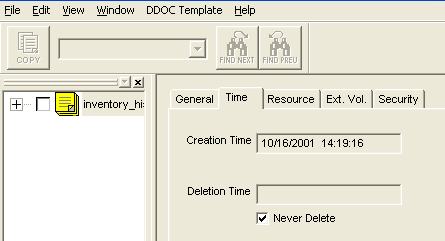
In the DocuSpace, click a document icon to display the document’s properties dialog. Select the Time tab. |
|
15.
|
Examine the Deletion Time field and the Never Delete option to verify that it has been reset as expected. |
Defining Security Requirements for Individual Subreports
This topic explains how to define unique security requirements for individual subreports that are generated by a subreport definition. You can configure the Auto Role feature to dynamically associate a Cypress role definition with the current subreport, allowing subreports generated by the same subreport definition to have unique security settings.
Security, as discussed in this topic, refers to assigning permissions for retrieving and viewing subreports after they have been archived (retained) in the DocuVault.
Default Security for Archived Subreports
Security for archived subreports is defined on the Document tab of a subreport definition. Configuring these settings enables you to control who can retrieve and view an archived subreport, who can modify it’s attributes, who can delete it, etc.
By default, the permissions you set on the Document tab pertain to all subreports generated by the subreport definition. Thus, any user (or member of a group) added to the Access Control list can retrieve any archived subreport generated by the subreport definition. In some cases, however, you might not want all users to be able to see all subreports. For example, you might not want the Department 1110 Manager to be able to retrieve the archived subreport generated for the Department 1111 Manager, and vice versa.
While you can create a separate subreport definition designed to generate only one subreport and set its security permissions so that only the recipient and the appropriate manager(s) can retrieve it from a DocuVault, that is clearly not an efficient approach.
The most efficient and automated approach to defining security requirements for individual subreports is by using the Auto Role feature. Auto Role allows Cypress to dynamically assign a unique security role (or definition) to each subreport generated by a subreport definition.
Implementing Auto Role
To implement Auto Role, you need to perform specific tasks using the Administration Tools module, the Enterprise Output Manager, and RDM. This is a brief overview of the process.
|
•
|
Within Administration Tools, you first need to create a role definition (and the appropriate permissions) for each user or group to which you want to grant access to a specific archived subreport. For example, if your report application generated 10 reports and you want only each recipient to be able to retrieve their own subreport, you would create 10 role definitions, one for each recipient. |
The names you define for your role definitions must exactly match the value of the variable you created in your subreport definition. You also need to define all desired permissions as they relate to the archived subreport.
|
•
|
Within Enterprise Output Manager, you need to create a region whose contents uniquely identify the person or group that is allowed to retrieve the archived subreport, (e.g., Department Number or Employee Number). |
|
•
|
Within the RDM subreport definition’s Variable tab, you can now create a variable that uses the value of the region you just created, and define when it is to be set or reset. This variable will now be available for selection within the Document tab and should be added to the Access Control list. |
You must configure the Variable tab so that the value of the variable exactly matches the name of a role definition. For example, if the contents of the Department Number region is 1111, and the desired role definition is named Manager 1111, you must prepend the region text with the string Manager so that an exact match is created:
"Manager "+region_text[Department Number]
When the report file is processed, Cypress will now automatically look within the DocuVault to locate a role definition that matches the value of the associated variable (e.g., 1110). If a match is found, the security for that role (user and permissions) will be applied to the current subreport.
Configuring Auto Role
To configure your subreport definition to use Auto Role
|
1.
|
Create all necessary role definitions within the Administration Tools module. |
Or
Define the users or groups in Windows.
|
2.
|
Create the region that uniquely identifies the user or group that you want to be able to retrieve the archived subreport (see Creating and Using Regions. |
|
3.
|
Select the subreport definition’s Variable tab and click the New button. |
|
4.
|
Enter the name of the variable in the Variable Name detail (e.g., Dept_Security). |
|
5.
|
Enter the appropriate RDM criteria in the Condition field. The criteria will determine how (or when) the value of the variable is set and reset. |
|
6.
|
In the Data field, enter the region that uniquely identifies the user or group that will have access to the subreport (e.g., Department Number). Keep in mind that you must use the region_text function to access the region text. For example, to set the variable to the value of the Department Number region, enter region_text("Department Number"). |
If Cypress detects a forward slash in the Data field, it will assume that the user or group is defined in Windows. If no forward slash is detected, Cypress will look for the user or group among its own role definitions.
|
7.
|
Click the Add button on the Variable tab. The Variable Name, Condition, and Data fields you specified will display in the list box at the top of the Variable tab. |
|
8.
|
Select the Document tab, then |
|
9.
|
the variable you created in step 4. from the Domain list (e.g., Dept_Security). |
|
10.
|
Click the <<Add button to add the selected variable to the Access Control list. |
|
11.
|
Click the Apply button to update the subreport definition. |
Updating Security for Archived DocuVault Documents
To better respond to changes in your organization, you can resecure existing documents in the Cypress DocuVault using RDM subreports. This feature is helpful when new users need to access existing documents, or when you need to change permissions for existing users as their job roles change.
The resecuring process modifies the security settings of existing documents. It does not create a new document, but retains the existing document title, indexes, retention settings, and creation dates.
To update security for archived reports and/or subreports
ASG strongly recommends that you give permissions to this RDM processor only to the Cypress administrator. Allowing end users to resecure documents can lead to security breaches.
|
1.
|
Open the Administration Tools module, and select the General tab if it is not already selected. |
Do not use this RDM processor for any purpose other than resecuring documents.
|
3.
|
Select the Security tab and specify desired security settings. |

|
6.
|
Select the Identifier tab, and enter true in the Report Identify Criteria box to instruct the RDM processor to re-index all documents that are queued to the RDM device. |

After re-securing your documents, immediately set this value to false to prevent accidental re-securing of documents.
|
7.
|
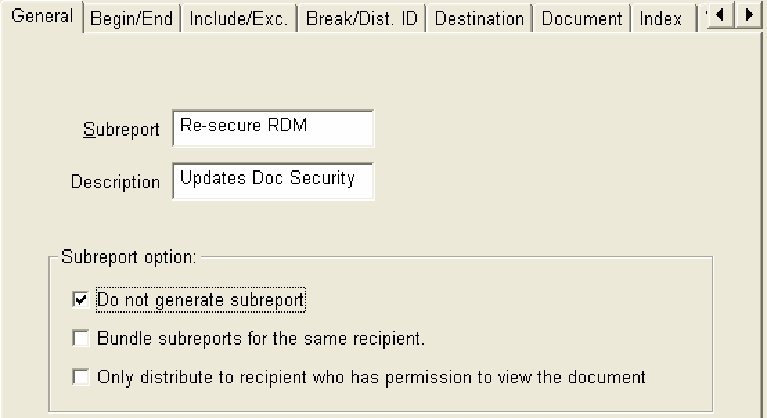
Create a subreport definition. Be certain to select the Do not generate subreport option to instruct the RDM processor not to create an additional copies of the documents being resecured. |
|
8.
|
Click the Apply button when you are finished. |
|
9.
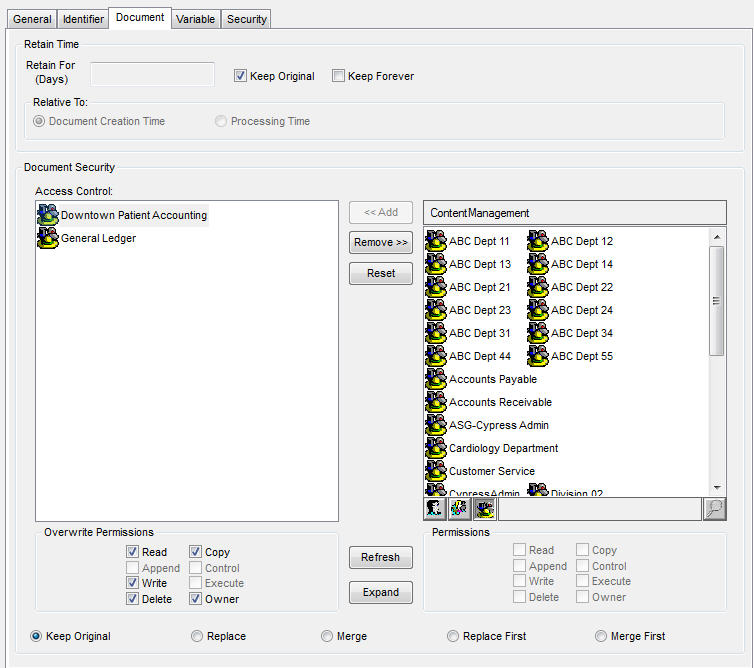
|
Return to the Report level, and select the Document tab. |
|
10.
|
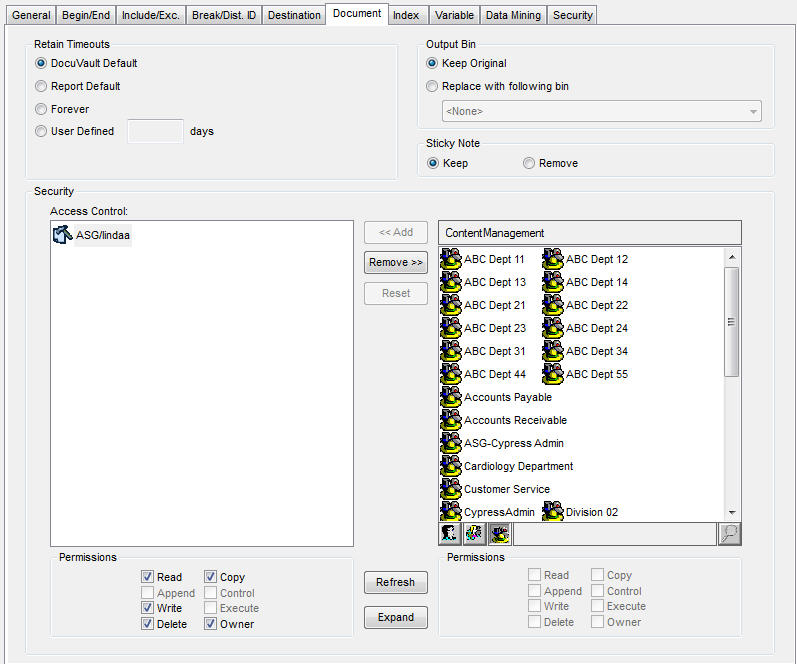
To provide new users, Roles, Windows groups, or Windows accounts with access to the documents, add them to the Access Control list and click the Merge option. |
|
11.
|
To prevent existing users, Roles, Windows groups, or Windows accounts from accessing the documents, remove them from the Access Control list and click the Replace option. Only users listed in the Access Control list will have access to the documents after being processed by this subreport definition. |
|
12.
|
Click the Apply button to save the security updates to your subreport definition. |
|
13.
|
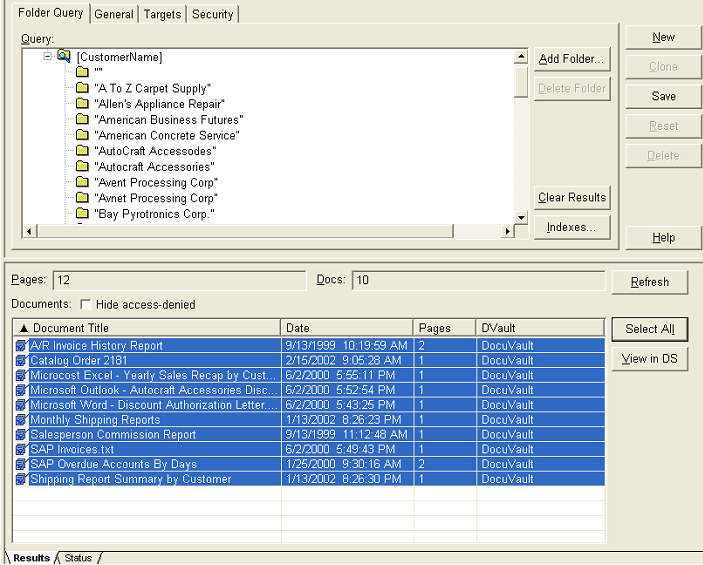
From the Knowledge Builder module (or Cypress.Web), perform a query, The Folder Query tab allows you to preview and select the documents whose security settings you want to change. |
|
14.
|
Open the desired documents to a DocuSpace. |
If any unwanted documents appear, remove them:
|
a.
|
Select the document’s node in the DocuSpace’s tree view. The document’s property pages will appear to the right of the tree view. |
|
b.
|
Click the Delete button at the right side of the screen. (Delete is the third button down, below Apply and Reset.) |
A message box appears, asking you to confirm that you want to delete this document from the DocuVault.
|
c.
|
Click OK to continue with the deletion. |
Or
Click Cancel to retain the document.
|
15.
|
Select File Print to print the selected documents to the Re-secure RDM processor. Ensure that you select the All Pages option. Resecuring will not occur if you do not select this option, for example: |

|
16.
|
Open Knowledge Builder or Cypress.Web and requery the documents. |
|
17.
|
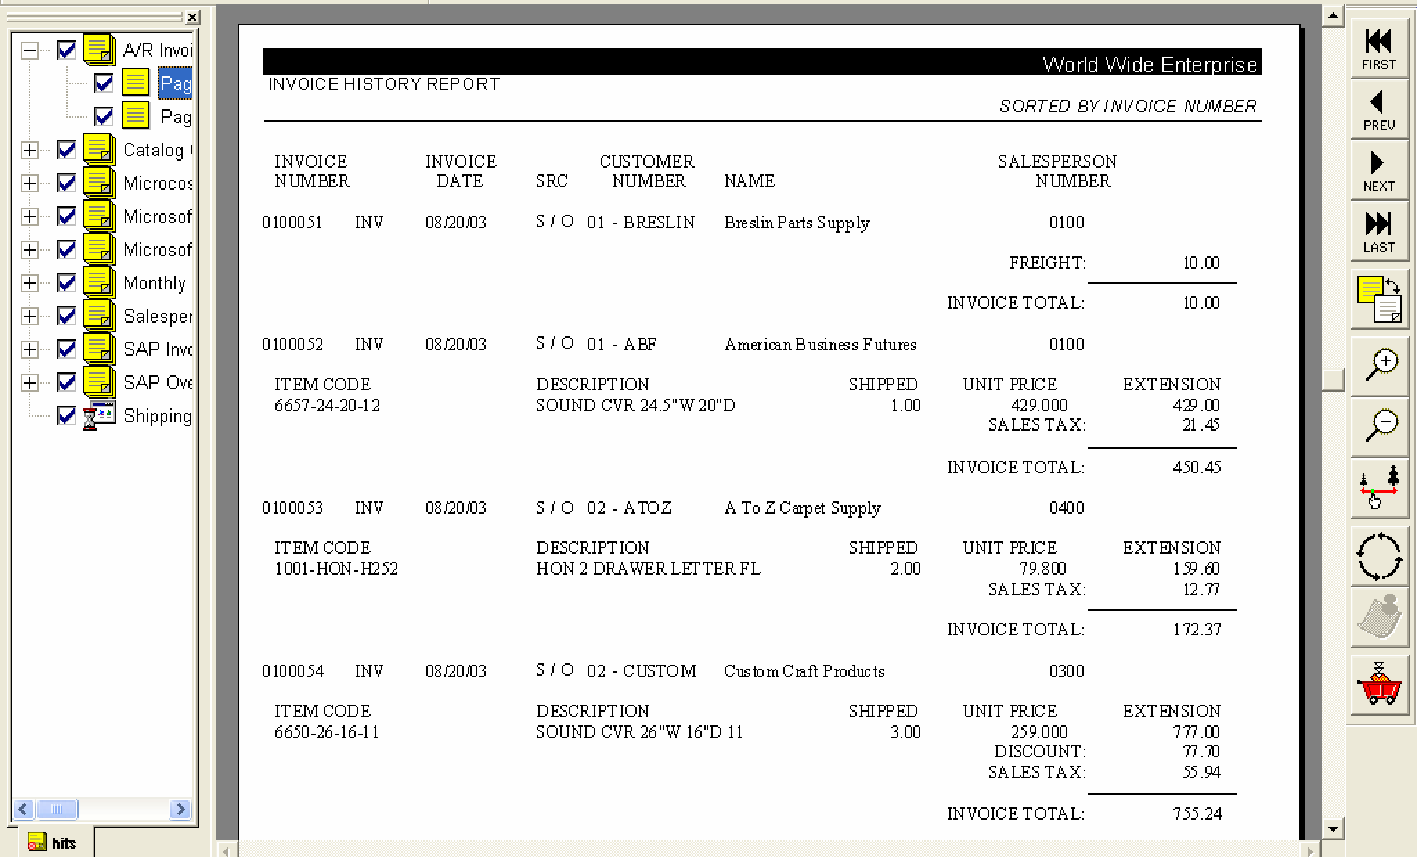
In the DocuSpace, click a document icon (not a page icon) and select the Security tab. |
|
18.
|
Examine the Access Control list to verify that it has been updated as appropriate. |
Verifying Security and Retention Settings
Verifying Job Ticket Security
When you are testing an RDM report, you use Enterprise Output Manager to verify that your document’s job ticket security is set correctly.
To verify that the job ticket security was set correctly when a report was sent to an RDM processor
|
1.
|
Select the newly created job ticket from the list in Enterprise Output Manager. |
|
2.
|
View the properties for the job ticket. |
|
3.
|
Click the Security tab. |
|
4.
|
View the Roles, groups, and/or individual user IDs included in the Access Control list and verify that they are configured as appropriate. |
Verifying Document Security
When you are testing an RDM report, you can use Knowledge Builder to verify that your document security is set correctly.
To verify document security using Knowledge Builder
|
1.
|
Perform a query to retrieve the document. |
|
2.
|
Open the document in a DocuSpace. |
|
3.
|
Right-click the document, and choose Properties from the context menu. |
|
4.
|
Click the Security tab. |
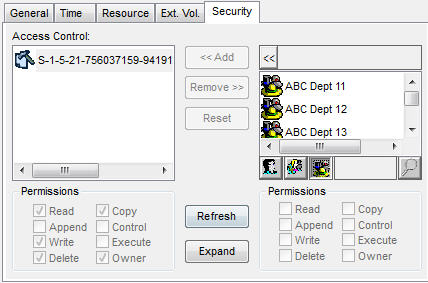
|
5.
|
Verify that the correct roles, groups, and individual members display in the Access Control list, and that their permission settings are correct. |
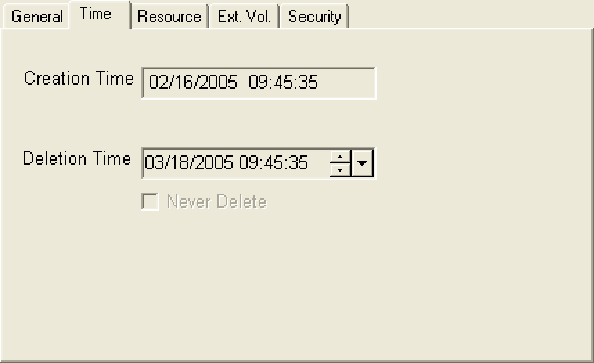
Verifying Document Retention Using Knowledge Builder
When you are testing an RDM report, you can use Knowledge Builder to verify that your document retention times are set correctly.
To verify document retention in the Knowledge Builder
|
1.
|
Perform a query to retrieve the document. |
|
2.
|
Open the document in a DocuSpace. |
|
3.
|
Right-click the document and choose Properties from the context menu. |
|
5.
|
Verify that the value in the Deletion Time field is the expected value. |
