Linking Subject Areas
By default, items are visible in a subject area if they fulfill the following conditions.
- They must be of item types that are defined in the information model on which the subject area is based.
- They must be assigned to the subject area’s configuration or—in the case of a subject area hierarchy—to the subject area’s configuration path.
If you want the items of other subject areas to be visible in the current subject area, you must define a custom configuration path for the subject area and add the configurations of the other subject areas to that path. This process is called linking subject areas.
Before you link subject areas, take the following facts into consideration.
- The position of the subject areas in the configuration path affects the visibility of the items. If an item exists in more than one subject area, only the one that comes first in the path will be visible. For more information on configurations and item visibility, see the ASG-Rochade Concepts and Facilities.
- Members of the current subject area will have only read access to the items of the linked subject areas (that is, they can open the items, browse their attributes, and even create links that point to the items but they cannot update them).
- The contents of the linked subject areas will remain unaffected by operations that are performed in the current subject area.
You also can use subject area linking to define an aggregate view on data from multiple subject areas. To know more, see Creating a Viewing Subject Area.
Linking subject areas
- In the navigation tree, select the subject area to which you want to link other subject areas and then Subject Area
 Link Subject Areas from the main menu.
 - On the left side of the dialog, select the subject areas that you want to link to the current subject area.
- Click the Add selected configurations to the configuration path icon
 .
. - To make item types of the linked subject area visible in the current subject area, select the check box in the Extended View column.
- If the current subject area has the feature NSA (that is, namespace attributes), it also must have the XNSA feature.
- The linked subject area must have the feature XNSA (that is, namespace attributes with extended capabilities).
- To move the subject areas to another position in the configuration path, select them and then click the Move Up icon
 and Move Down icon
  , respectively.
 - To unlink a subject area, select it and then click the Detach selected configurations from configuration path icon
 .
. - To restore the original configuration path, click the Restore Original Path icon
 .
. - Click OK to link the subject areas.
Or
Right-click the subject area and then select Link Subject Areas from the context menu.
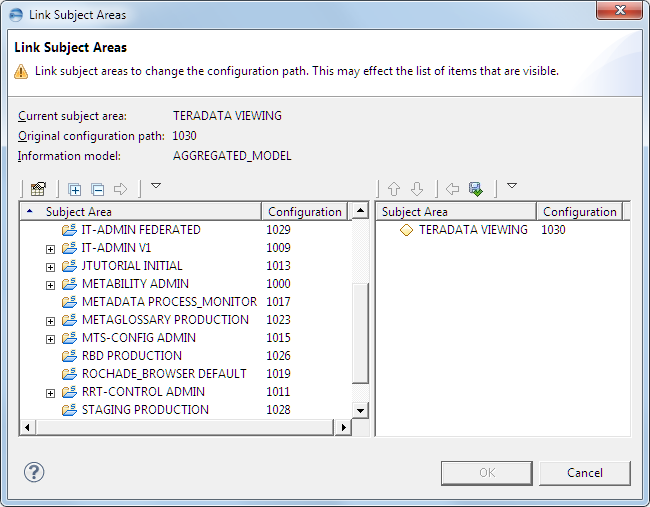
The Link Subject Areas dialog box is displayed.
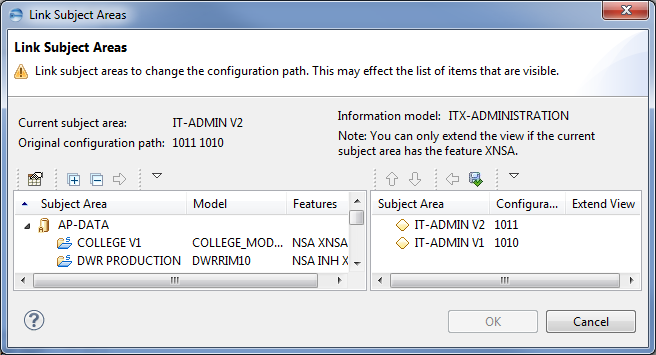
On the right side, the dialog lists the subject areas that belong to the configuration path of the current subject area. The subject area IT-ADMIN V1 precedes IT-ADMIN V2 in the hierarchy and, therefore, belongs to its configuration path.
The selected subject areas are added at the end of the configuration path.
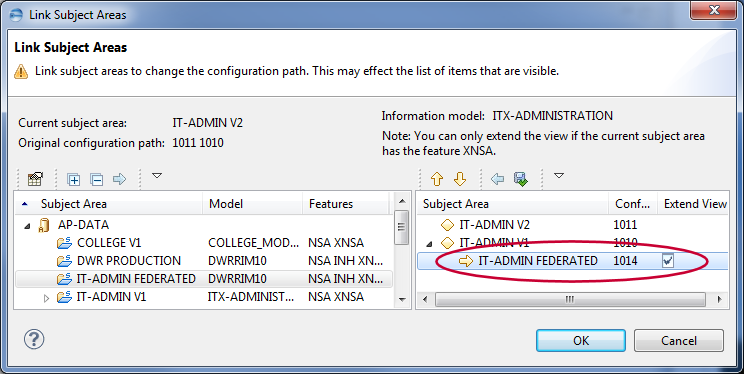
Selecting the Extended View check box is possibly only if the following prerequisites are fulfilled:
If you cannot select the Extended View check box for any linked subject area, you must perform the steps as described under Extending the subject area view manually.
The subject area feature XLSA (that is, linked subject area with view extension) is assigned to any linking subject area whose view has been extended.
Extending the subject area view manually
- Add the item types of the linked subject areas to the current subject area’s information model. To know more, see Adding Item Types.
- If the other models support multiple languages, assign the languages also to the current subject area’s model. To know more, see Defining Multi-Language Support for Information Models.
- Reorganize the current subject area and activate the new types. To know more, see Reorganizing subject areas.
Creating a Viewing Subject Area
In complex enterprise environments, users might be required to analyze data from multiple different sources on a regular basis. For structuring and organizational purposes, these data might be stored in various different subject areas in Rochade leading to a fragmented view for users who need to work with the data.
Subject area linking can provide users with a single point of access to required data and, in addition, enable you to separate data analysis from data manipulation. You simply need to create a separate viewing subject area to which you link the subject areas that contain the required data. By defining a new information model for the viewing subject area, you can precisely determine the view users will have on the linked data.
Defining a model for the viewing subject area
- Open Model Administration.
- Select Model
 New
New Model from the main menu.
 - Specify a name and a short description for the model.
- Perform the following steps for each subject area that contains data that you want to make available in the viewing subject area.
- Search the list of information models for the subject area’s model.
- Expand the node of the pertinent model, and select any item type that you want to make available in the viewing subject area.
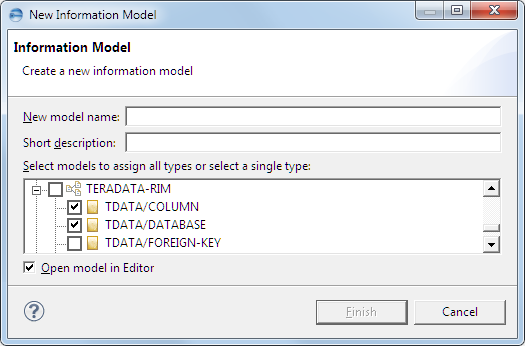
- Click Finish to create the model.
- Assign the required languages to the new model. To know more, see Defining Multi-Language Support for Information Models.
- Generate the new model.
The Information Model dialog box is displayed.
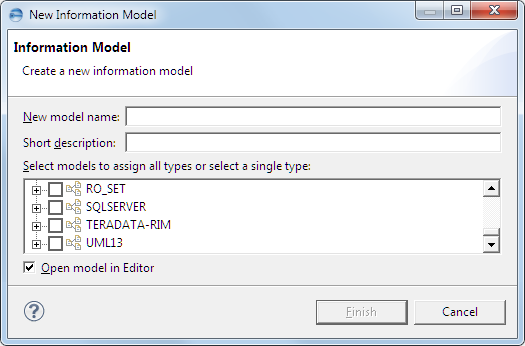

Creating the viewing subject area
- Open Subject Area Administration.
- Select Subject Area
 New Subject Area from the main menu.
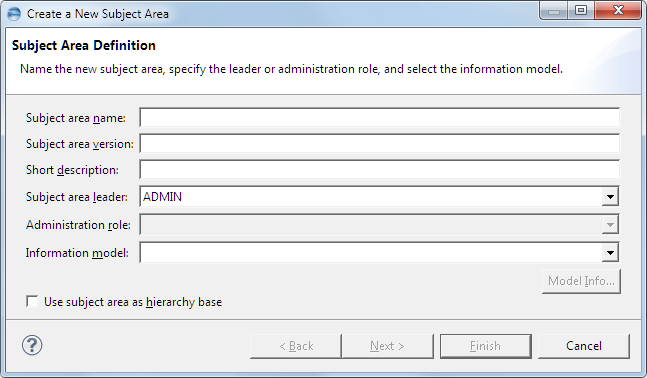
 - Specify a name, a version, and a short description for the viewing subject area.
- Specify a user who will be the leader of the viewing subject area.
- From the Information model drop-down list, select the model created in Defining a model for the viewing subject area.
- Click Finish to create the new subject area.
- In the navigation tree, right-click the newly created subject area and then select Link Subject Areas from the context menu.
- Link the required subject areas to the viewing subject area and then click OK.
- Change the status of the viewing subject area to In Work.
- Assign the users to the viewing subject area who should have access to the linked data. To know more, see User Administration for details.
The Subject Area Definition dialog box is displayed.
The Link Subject Areas dialog box is displayed.
Each user who is assigned to the subject area will have read access to the linked data and will be able to run queries on them.
